Learn How to Easily Add Plugins to Your WordPress Site
Estimated reading time: 3 minutes
Last updated on May 24th, 2024 at 07:53 am
To add more functionalities to your website, plugins play an important role.
But before starting, I wanted to clarify that you cannot install a plugin in WordPress.com until you upgrade to their business plan.
WordPress.com is limited that’s why I always recommend WordPress.org.
Did you know there are over 58,000 plugins available for WordPress?
They help you do everything from improving site security to adding contact forms.
Plugins are the secret sauce of WordPress.
They make up 85% of the reasons people choose WordPress for their websites.
Easy Steps to Adding Plugins on WordPress
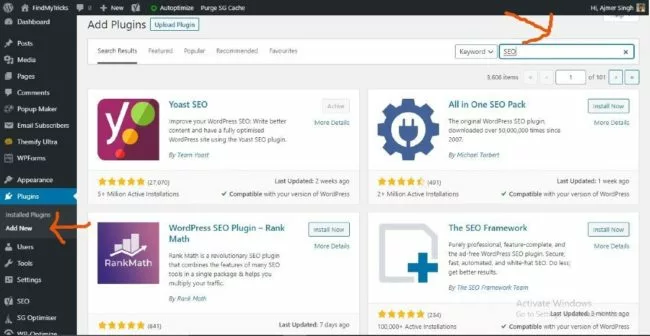
1. Plugin Search from the Dashboard
It is one of the easiest ways to install a plugin in WordPress.
You will find a lot of plugins by searching here and yes most of these plugins are free.
As I said it’s simple, just click on add plugin, and in the search bar look for the plugin you want.
You will get a lot of options for every search.
Compare every plugin with reviews, ratings, etc., and then select the best one according to your needs.
After that click on install now, wait for a few seconds then activate it.
For example, I am looking for an SEO plugin, you will see a lot of plugins are available like Yoast SEO, All in One SEO Pack, RankMath, SEO Framework, etc.
I am already using Yoast SEO that’s why you can see the active option there.
Yoast SEO is one of the best plugins for SEO but as I said compare before using any plugin.
Currently, I am using SEO Framework for SEO.
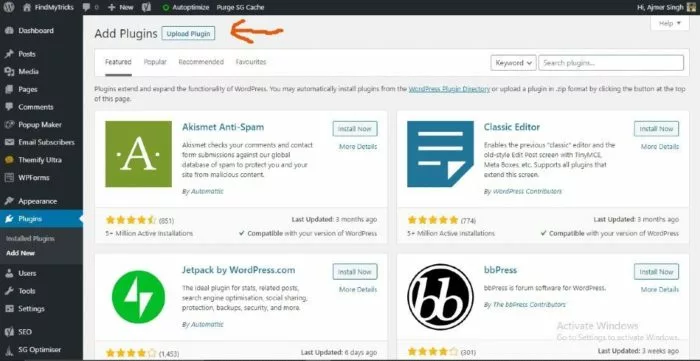
2. Upload a Plugin
There are a lot of paid plugins that are not available in the plugin directory like the WP Rocket cache plugin.
To install these plugins WordPress gives you the option to upload.
Download the plugin from their website. The file will be in the .zip format.
Next, click on the upload plugin, then choose a file (select your plugin file in .zip format).
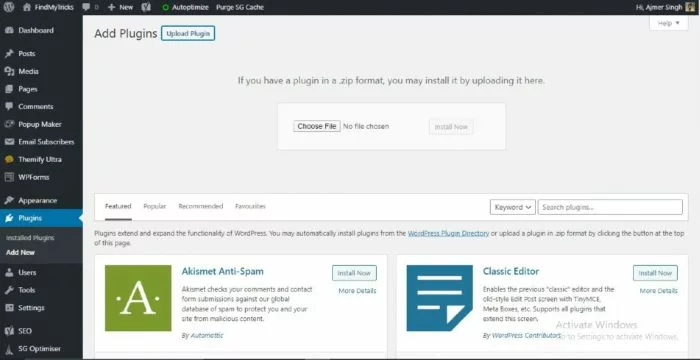
Click on Install Now. After the plugin is installed, activate it.
Done, now you can use this plugin.
3. Manually install a Plugin via FTP
This process is not for beginners, so if you are new to WordPress then avoid using this and go for the above two steps.
In the second method, you download a plugin file and upload it, but in this process, you need to download a plugin file and extract this .zip file into a folder.
Here you have to access your host FTP manager, if you don’t know the username and password then ask your hosting provider.
Some are using third-party software like FileZilla to access their FTP, while some are using managed hosting accounts to access the file manager.
Connect your site using the ID password and go to /wp-content/plugins/.
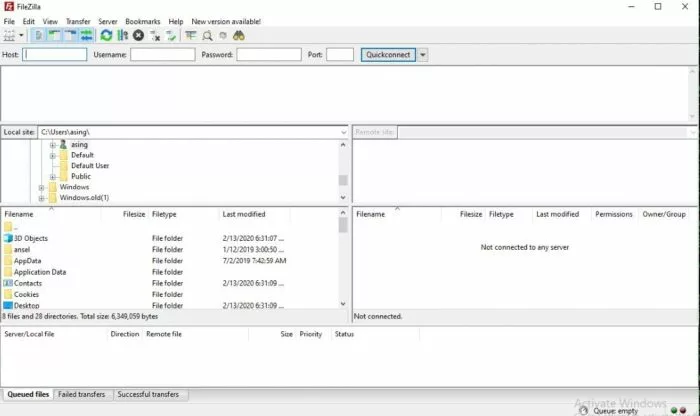
Next, you need to upload the folder you extracted to this /wp-content/plugins/.
Done, now visit your WordPress admin dashboard and check the installed plugins.
You will see the plugin is installed, next, you need to activate the plugin.
Wrapping Up
Adding plugins to WordPress is like giving your website superpowers.
It’s as easy as going to your WordPress dashboard, searching for the plugin you need, clicking ‘Install,’ and then ‘Activate.’
Just like adding apps to your smartphone, plugins are there to make your website better, and with a little curiosity and a few clicks, you can transform your site into something amazing.
So, don’t be afraid to explore and experiment with plugins to make your WordPress site truly yours.