How to Create a Table of Contents in WordPress – Plugin + Manual
Estimated reading time: 4 minutes
Last updated on March 26th, 2024 at 07:01 am
Do you want to know “How to create a Table of Contents in WordPress”?
Imagine your website is like a book, and you want readers to easily find specific chapters.
Well, that’s where a Table of Contents (TOC) comes in handy. It’s like a roadmap for your content.
Ever felt lost in a big book with no chapters listed?
Similarly, without a TOC, your readers might struggle to navigate through your content.
Research shows that websites with a clear TOC can increase user engagement by up to 47%.
2 Methods to Create a Table of Contents in WordPress
1. Plugin
To create and implement a table of contents easily, I use the Lucky WP Table of Contents plugin.
First of all, you need to login to your dashboard – click on plugins – add new – search table of contents – Lucky WP Table of Contents – Install – Activate.
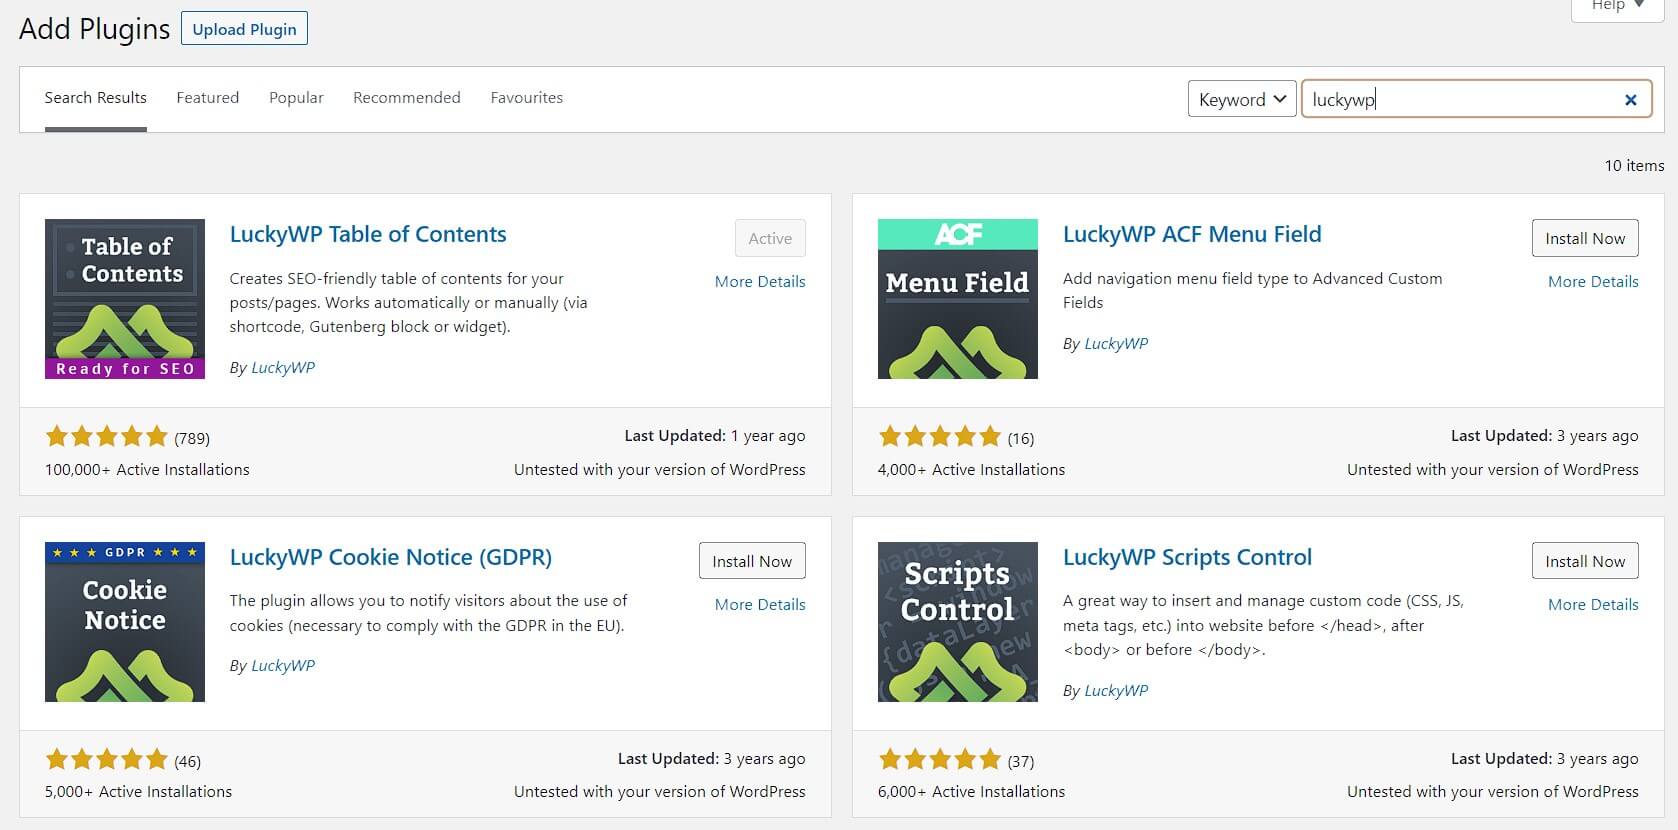
Now on the left side, hover over to settings – you will find a new icon – table of contents – click on it.

Now we will explain to you every single setting step by step,
- General
- Appearance
- Auto insert
- Processing headings’
- Misc.
General Settings
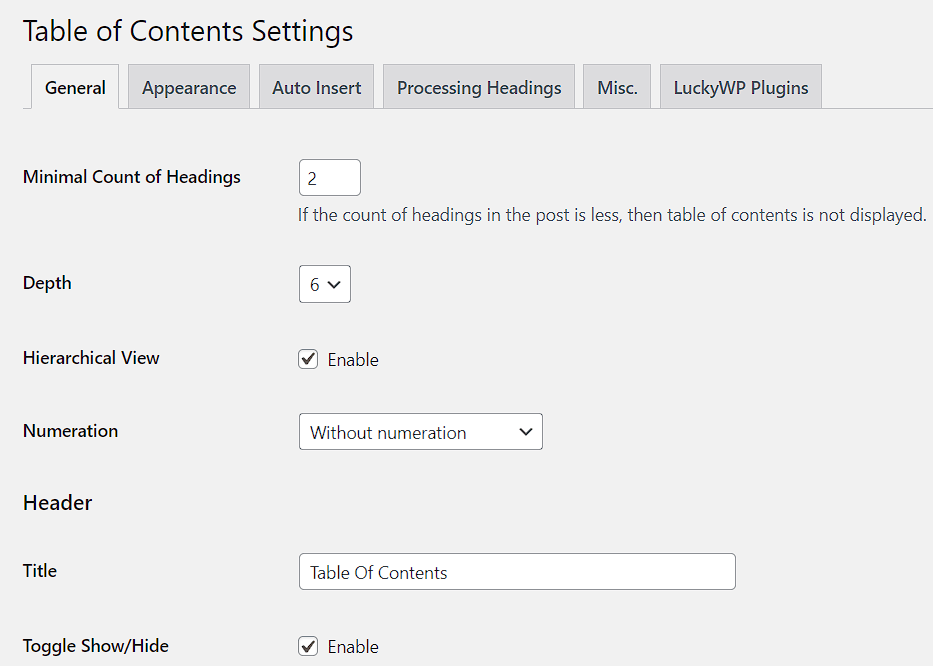
Minimal count of headings: “2”
If the count of headings in the post is less, then the table of contents is not displayed.
Means – If your article contains less than 2 headings then a Table of content is not created.
Depth: 6
Hierarchical view: Enable
Numeration: Decimal numbers (nested)
Numeration suffix: None
Title: Table of contents

Toggle show/hide: Enable
Label show: Show
Label hide: Hide
Smooth scroll: Enable
Scroll offset top: 24
Appearance Settings
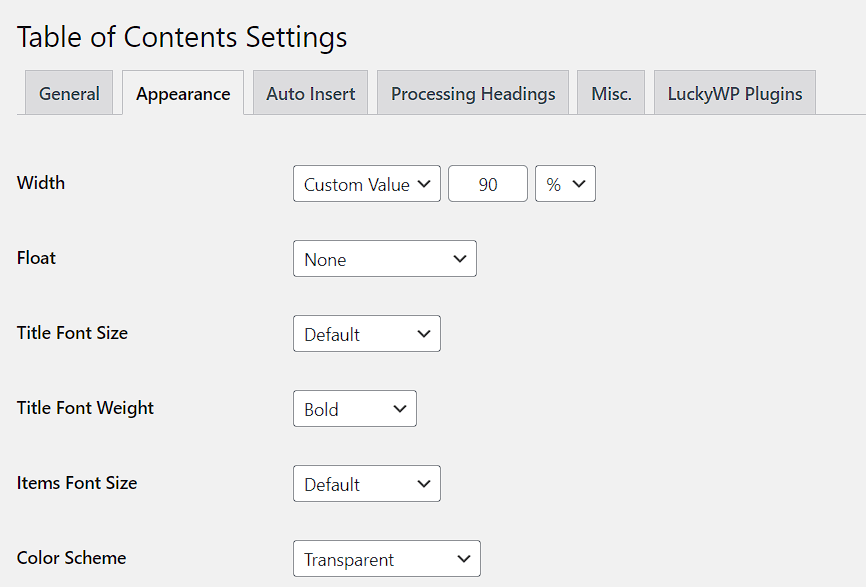
Width: Auto
Float: None
Title font size: Default
Title font weight: Bold
Items font-size: Default
Colour scheme: Light colours
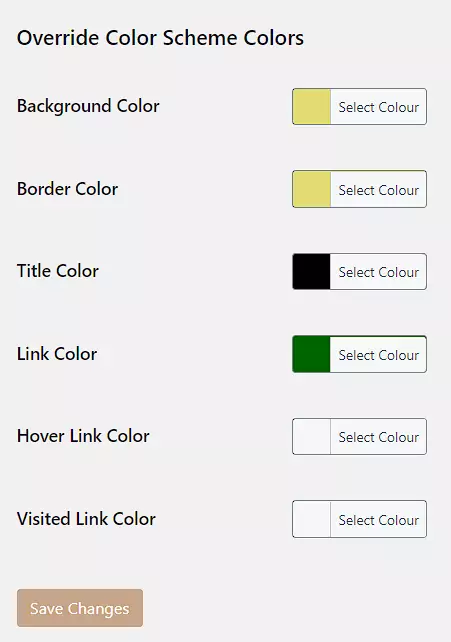
Background colour: Your choice
Border colour: Your choice
Title colour: Your choice
Link colour: Your choice
Hover link colour: Your choice
Visited link colour: Your choice
Auto-insert Settings
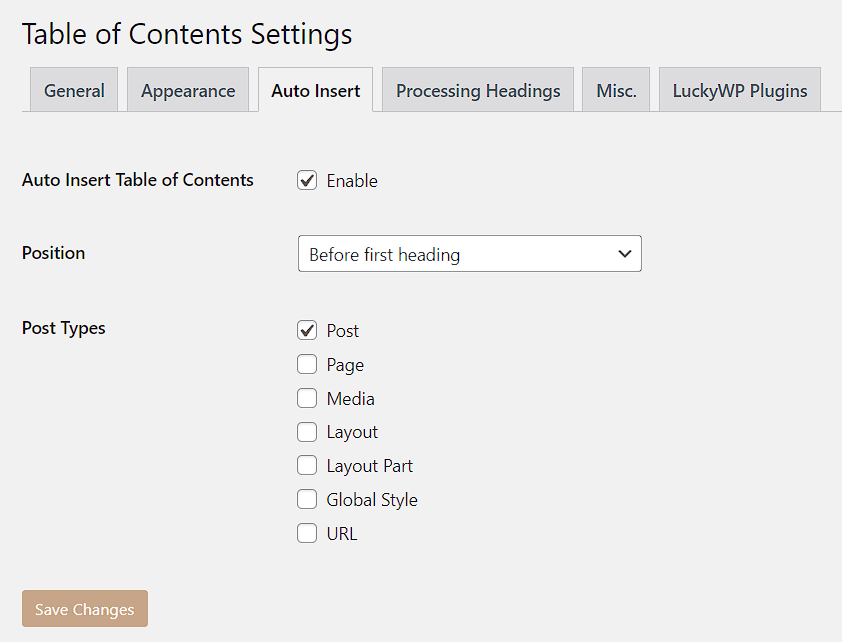
Auto insert Table of contents: Enable
Position: Before first heading
Post types: Post
Processing Headings
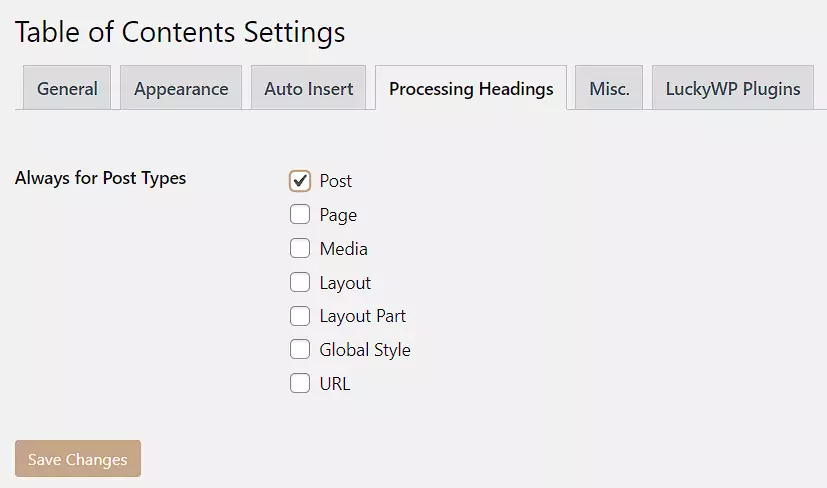
Always for post types: Post
Misc Settings

By level: Leave blank for proper heading hierarchy
By text: leave
Hash format: As heading(#Example_Heading_Text)
Convert to lowercase: uncheck
Replace underscores_ with dashes- : uncheck
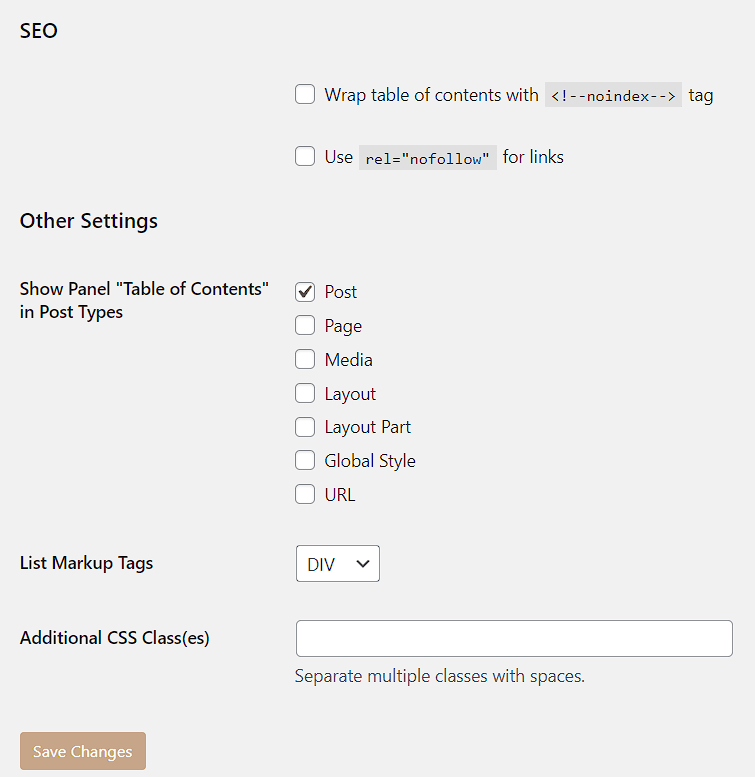
SEO: Default
Show panel “Table of contents” in post types: Post
List markup tags: DIV
Additional classes: Leave blank if you are not a developer
After done with all the above settings, now visit one of your posts.
You can get your Table of Contents ready!
2. Manual (Not Recommended to Beginners)
If you know how to code then you can freely use this code. Or you can also use this code after creating a backup.
Here’s an example code snippet that you can add to your theme’s functions.php file:
// Custom shortcode for Table of Contents
function custom_table_of_contents($atts) {
// Set default attributes
$atts = shortcode_atts(
array(
‘title’ => ‘Table of Contents’,
‘depth’ => 3,
),
$atts,
‘table_of_contents’
);
// Get the content
$content = get_the_content();
// Extract headings from the content
preg_match_all(‘/<h([1-‘ . $atts[‘depth’] . ‘])>(.*?)<\/h\1>/’, $content, $matches);
if (empty($matches[0])) {
return ”; // No headings found
}
// Build the table of contents
$output = ‘<div class=”table-of-contents”>’;
$output .= ‘<h2>’ . esc_html($atts[‘title’]) . ‘</h2>’;
$output .= ‘<ul>’;
foreach ($matches[2] as $index => $heading) {
$id = sanitize_title($heading);
$output .= ‘<li><a href=”#’ . esc_attr($id) . ‘”>’ . esc_html($heading) . ‘</a></li>’;
}
$output .= ‘</ul>’;
$output .= ‘</div>’;
return $output;
}
// Register the shortcode
add_shortcode(‘table_of_contents’, ‘custom_table_of_contents’);
To use this shortcode in your posts or pages, you can simply add the following shortcode wherever you want the table of contents to appear:
[table_of_contents title=”Table of Contents” depth=3]
You can customize the title and depth attributes as needed.
The depth attribute determines the maximum heading level to include in the table of contents.
The code will automatically generate links to each heading in your post.
Wrapping Up – How to Create a Table of Contents in WordPress
Adding a table of contents to your WordPress articles is like creating a roadmap for your readers.
It helps them find what they’re looking for quickly and makes your content easier to understand.
Whether you use the built-in options or plugins made for this job, it’s a simple way to organize your information and make your website more user-friendly.
Think of it as a helpful guide that makes it easy for your visitors to navigate through your content, making their experience better and keeping them engaged.