How to Add and Create a Contact Form in WordPress – Easy And Simple Setup
Estimated reading time: 6 minutes
Last updated on March 26th, 2024 at 07:00 am
Are you looking to “Create a Contact Form in WordPress”?
Imagine a contact form as a digital suggestion box or a way for your website visitors to leave you a message.
In WordPress, it’s like adding a simple form where people can type in their name, email, and their message to get in touch with you.
Did you know that websites with contact forms tend to get 51% more conversions than those without?
Having an easy way for people to reach out can make a big difference!
Over 30% of website visitors prefer using a contact form over other communication methods.
So, having one can make your site more user-friendly and accessible.
Create a Contact Form in WordPress with Formidable Forms
To create a contact form without any technical knowledge, I am going to use the Formidable Forms plugin.
You can use other plugins also, all have come with almost the same features.
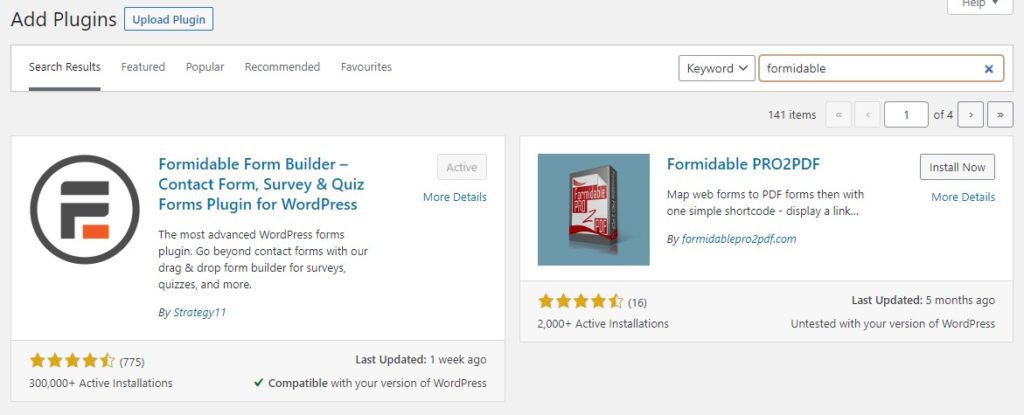
First of all, you need to log into your admin dashboard, then click on plugins – add new – search for Formidable Forms.
Install the plugin and then activate it.
After installation, hover over to formidable forms and click.
On the left tab, you see some options,
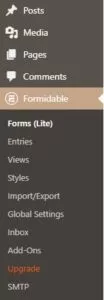
- Forms (lite)
- Entries
- Views
- Styles
- Import/Export
- Global settings
- Inbox
- Addons
- Upgrade
- SMTP
To not confuse you, we will start one by one
1. Forms(Lite)
Here, you can create/add a new contact form or import saved files in CSV or XML format only.
But you are here to create a new contact form so click on add new,
I already created a form, so for better understanding, I will create another one by clicking add new.
(By the way, you can create multiple forms using this plugin)
After clicking add new, you will see a new tab where you are being asked to select a format for your form.
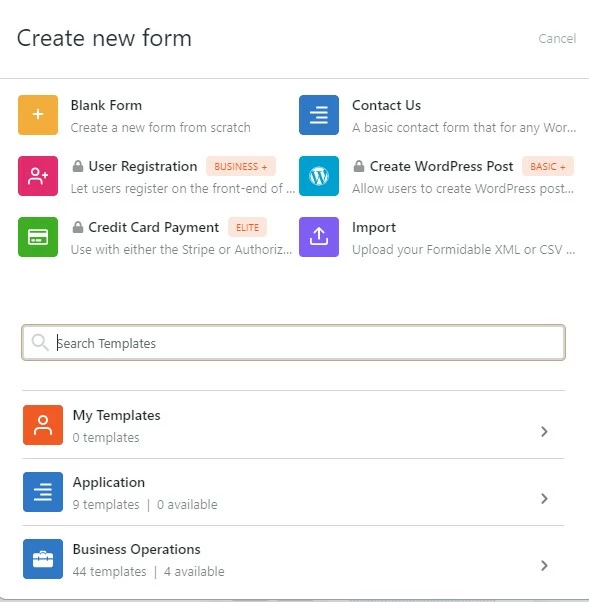
- Blank form
- Contact Us
- User Registration (Premium)
- Create a WordPress post(Premium)
- Credit card payment(Premium)
- Import
Below you will see some prebuilt templates, you can select one if you want. Just check if they are available for the free version or not.
Leave this for now, and hover over to contact us after the blank form.
You can check its preview. After checking either you can select to use this form or click on create this form.
When clicked, you are asked to enter your form name (for your understanding like my new contact form, you can change later) and form description (like contact form for my users/visitors).
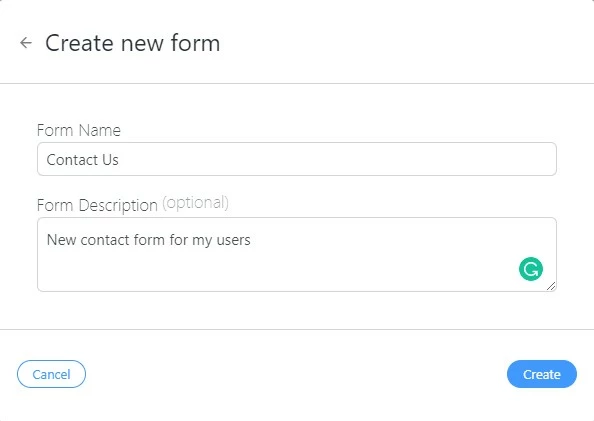
Click on Create when done.
Now you are redirected to the form builder, where you can edit, add, and remove fields.
What are fields? Fields are used to create a form.
Some examples of fields are First name, Last name, Email, Website URL etc.
It’s the basic contact form that you saw in the preview.
If you don’t want to change anything then just click on the cross/close button and done.
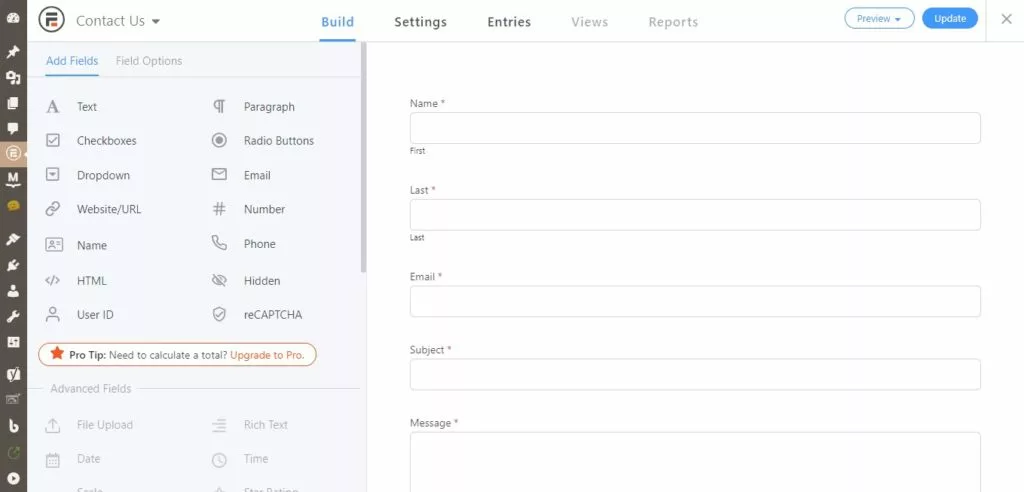
If you want to add a new field then just drag a field and drop it on the form.
Move up and down to adjust the position. It’s a simple drag and drop builder form.
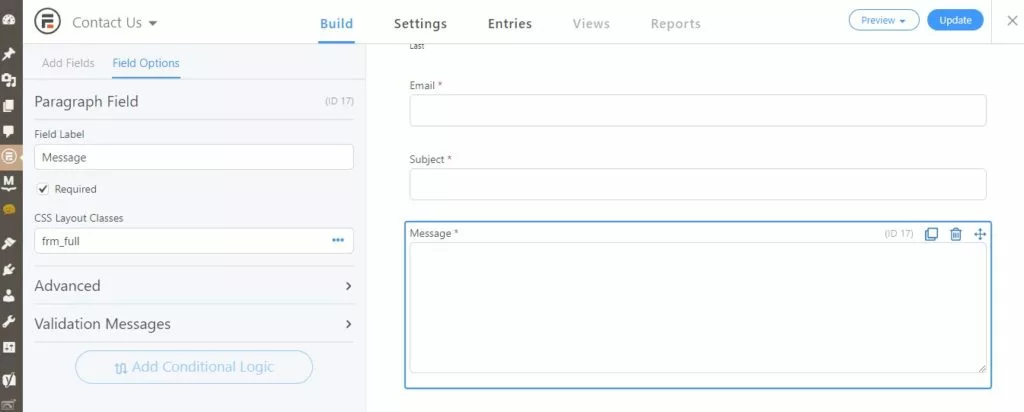
If you want to remove a field or add/remove a mandatory option then just click on the field and you will see the field options.
Click on settings after build.
These are your form settings. Here you can modify the basic settings.
You can change your form title, description, get your shortcode, add Akismet and honeypot for spam protection and a lot more options.
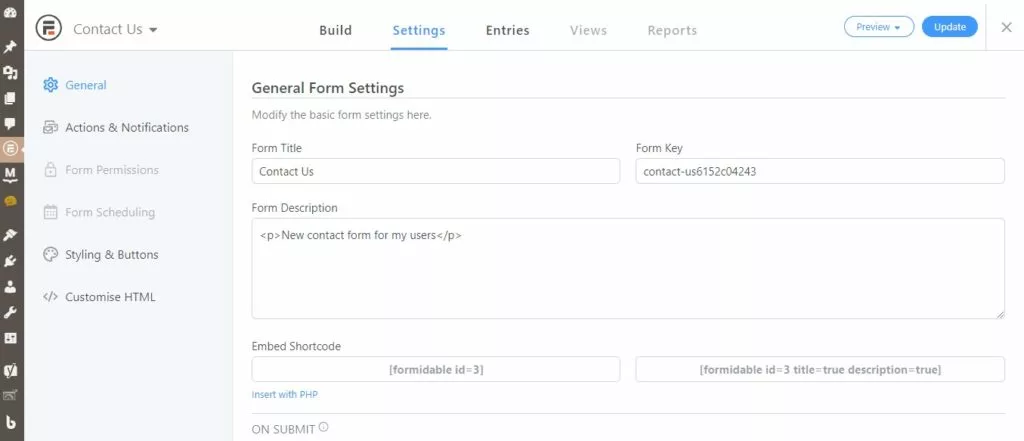
If you can find difficulty with any option then comment below, I will explain it to you as soon as possible.
All others are premium options, so close the tab and congrats your contact form is done and created successfully.
But how to implement the form on your website?
Simple, just copy your shortcode, create a new page (Contact us) and paste the code. Done.

Not only on a new page, but you can also place it anywhere on your website using this shortcode.
2. Entries
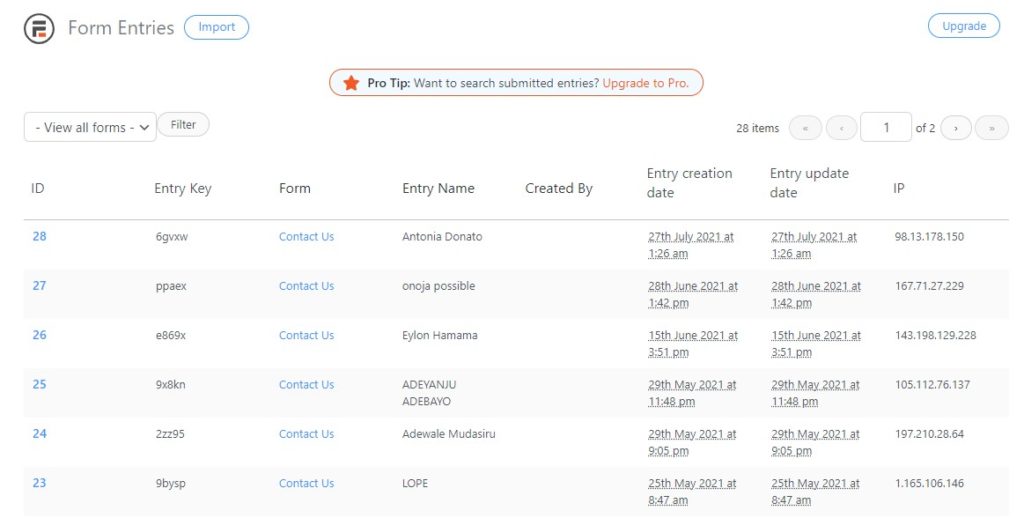
At this tab, you can check all your contact form entries by others. View them, delete them, check date time etc.
3. Views
It’s a premium option, here you can check your contact form analytics.
4. Styles
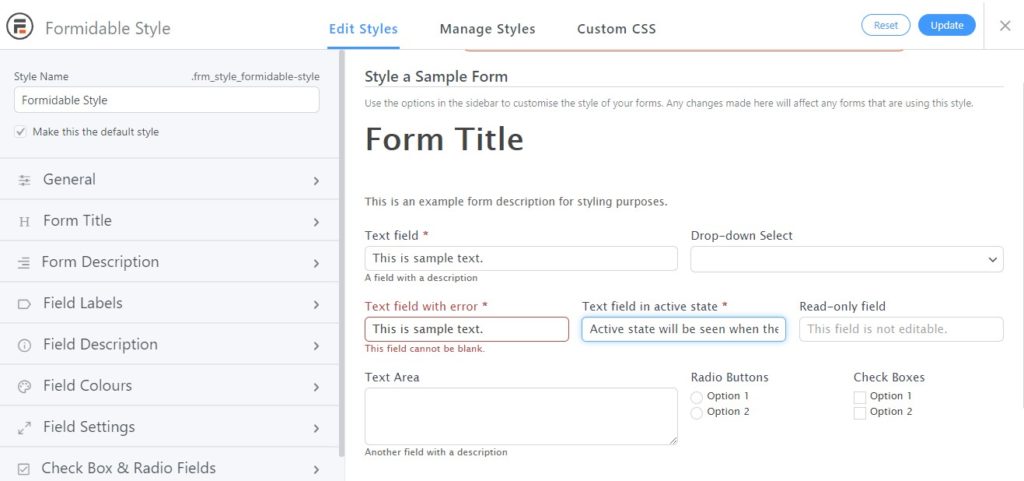
In the styles tab, you can edit and manage your contact form styles like field texts, error messages, colour, positions, field labels, alignment, text size, buttons, etc.
This option is for advanced users but you can check it if you want.
5. Import/Export
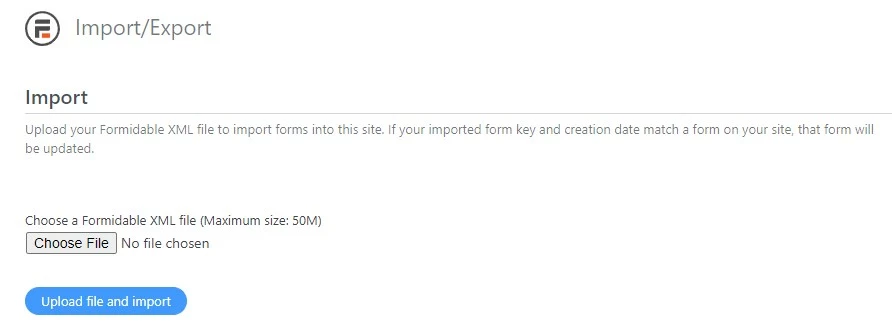
If you want to import another contact form then you can simply import it here.
And to export your form or entries you can export them here. (In CSV or XML format)
6. Global settings
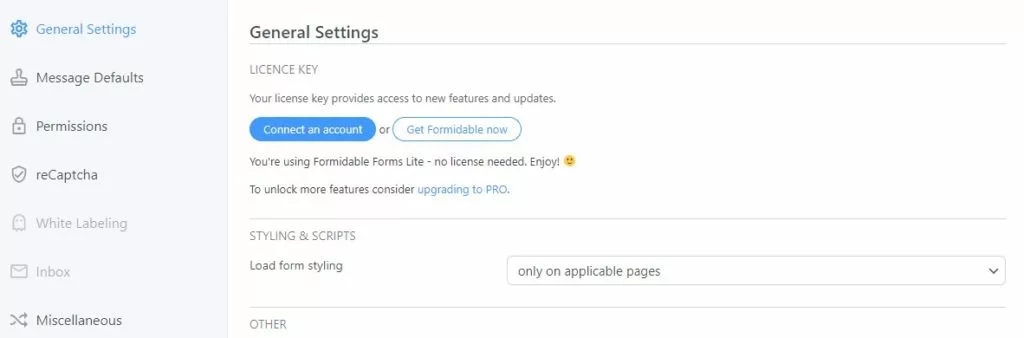
General Settings:
You can connect your pro version here by entering your license key. Change your load form styling(Important).
It’s important and not every other plugin has this option.
When you check your page performance in GTmetrix or Google page speed insights, you see that the contact form script is loading on every page of your website.
That will affect your page speed. So select the option only on applicable pages.
Leave other options to default if you don’t know what you are doing.
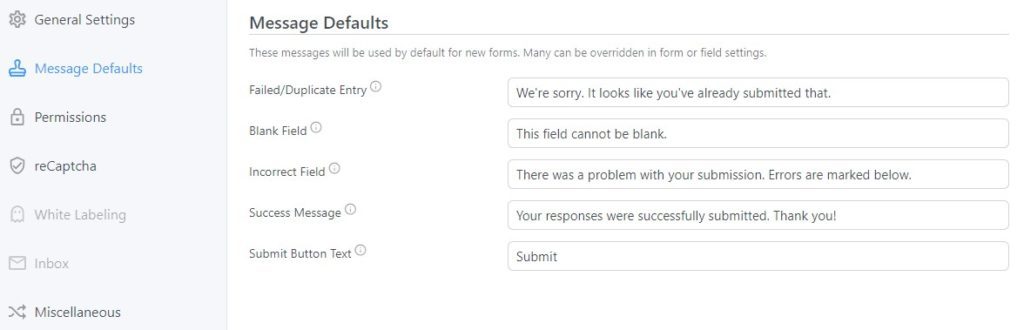
Message defaults:
You can change your default messages in your contact form. Like error messages, duplicate entry messages, etc.
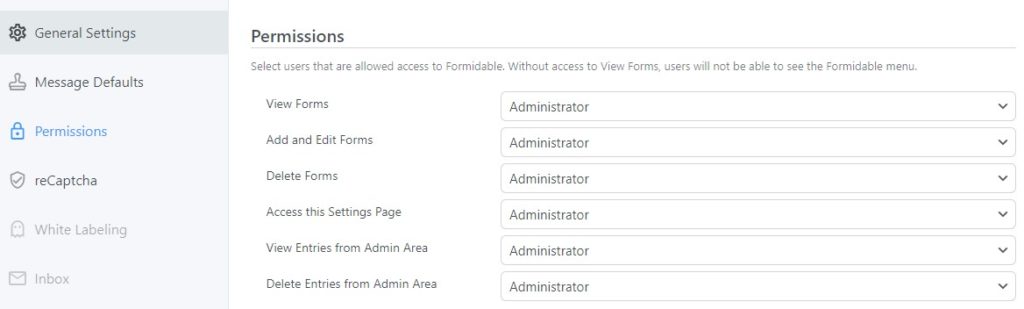
Permissions:
If you want to give permissions to other users of your website, then you can change them here.
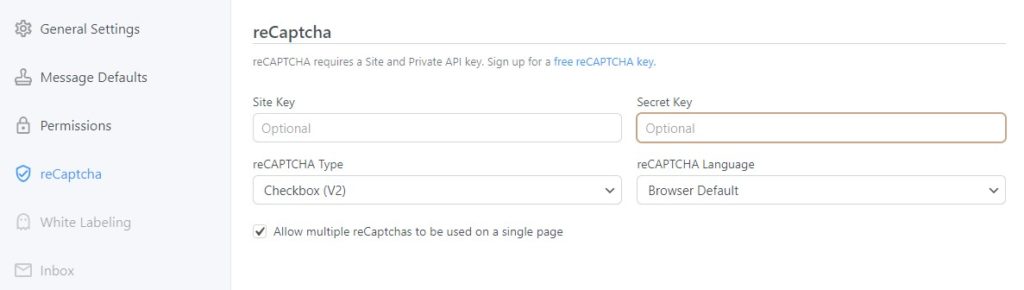
Recaptcha:
You can connect your site with Google Recaptcha for spam protection.
Just enter your site key, secret key, and Recaptcha type (V2 or invisible). Get your ReCaptcha by visiting here, it’s free.
White labelling and inbox:
Premium options, leave them.
Miscellaneous:
You can permanently delete formidable forms and all your data.
7. Inbox

Premium Option, so leave.
8. Addons
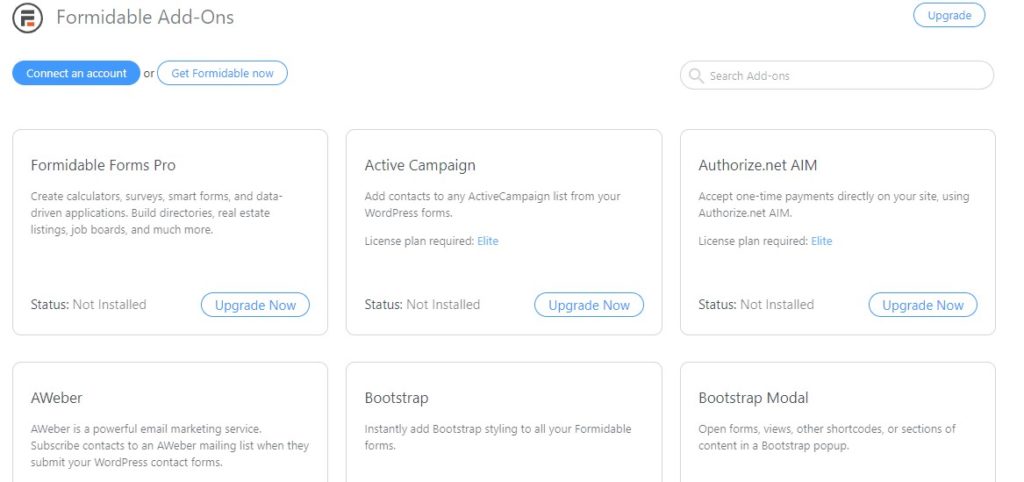
You can connect all the listed addons with the premium version.
So, leave and consider using them when you are ready to purchase their pro version.
9. Upgrade

If you want to check the features and differences between the free and pro versions, then you can check here before considering purchasing.
10. SMTP
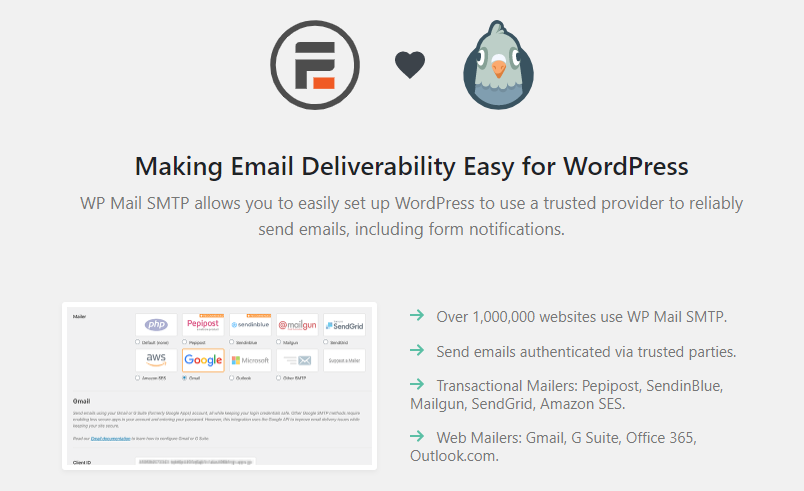
Here you are being asked to connect wp mail SMTP for better delivery of your emails.
It’s a good option and you can connect easily by installing the WP mail SMTP plugin.
WP Mail SMTP allows you to easily set up WordPress to use a trusted provider to reliably send emails, including form notifications.
Wrapping Up – Formidable Forms Settings
In conclusion, creating a contact form in WordPress is a user-friendly process that allows you to connect with your website visitors easily.
By following the step-by-step guide mentioned earlier, you can customize and add a contact form to your site without the need for coding skills.
With a functional contact form in place, you’re not only making it convenient for your audience to get in touch but also enhancing the overall user experience on your WordPress site.