Top Wordfence Security Settings for a Bulletproof WordPress Site
Estimated reading time: 5 minutes
Last updated on May 28th, 2024 at 06:47 am
Wordfence security is one of the most popular and best security plugin in WordPress.
- Did you know that there is an average of 30,000 new websites hacked every day?
- Did you know that 90% of hacked websites had vulnerabilities the owner wasn’t aware of?
Using Wordfence makes your site 58% less likely to be hacked.
Wordfence can block up to 4 billion attacks in a day! Wordfence helps you find and fix those weak points.
In this post, I will tell you about the Wordfence security plugin and how you can install and set this plugin on your WordPress website.
So, let’s get started!
What is Wordfence Security plugin and How does it work?
Wordfence is a security plugin for websites, especially those running on WordPress. In simple terms, it’s like having a guard dog for your website.
Here’s how it works:
Firewall: Wordfence has a firewall that acts like a protective barrier for your website.
It monitors incoming traffic and blocks any suspicious or harmful requests.
Think of it as a filter that only lets in the good visitors and keeps the bad ones out.
Malware Scanner: It regularly checks your website for any signs of malware (malicious software).
Malware can harm your site and your visitors, so Wordfence scans for it and helps you remove it if it’s found.
Login Security: Wordfence helps to protect your site from unauthorized logins.
It can limit the number of login attempts, and it can also notify you if someone tries to break into your site.
This is like having extra locks and alarms on your website’s doors.
Security Alerts: If Wordfence detects any suspicious activity on your website, it sends you alerts.
These are like warnings that tell you, “Hey, something’s not right; you should check it out.”
IP Blocking: You can use Wordfence to block specific IP addresses or entire countries from accessing your website.
It’s like saying, “I don’t want people from this place coming to my website.”
Security Monitoring: It keeps an eye on what’s happening on your website 24/7.
If it sees something fishy, it lets you know so you can take action.
Two-Factor Authentication: Wordfence can make your login process more secure by adding an extra step.
It’s like needing both a key and a password to enter a secret room.
This makes it harder for hackers to get in.
Setting up Wordfence Security Plugin
Once you have successfully installed and activated the plugin, it’s time for you to use its features.
On the successful activation of the plugin, you will find a new menu being created.
However, this menu will be displayed in your admin area in the name of WordFence.
The menu will have various options for the settings, which are discussed briefly below.
Let’s start the Wordfence security plugin settings,
1. Dashboard
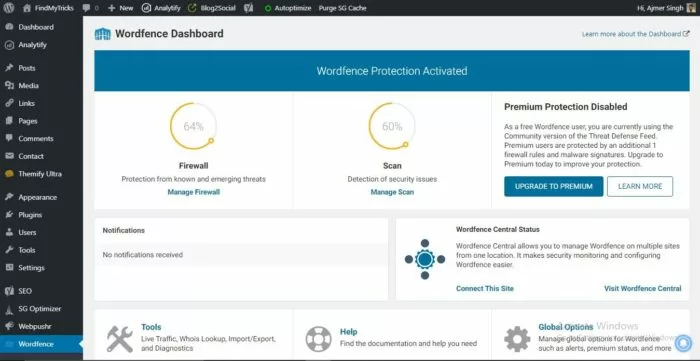
You can check your dashboard anytime after the setup. But first, you need to set other things before exploring your dashboard.
2. Firewall
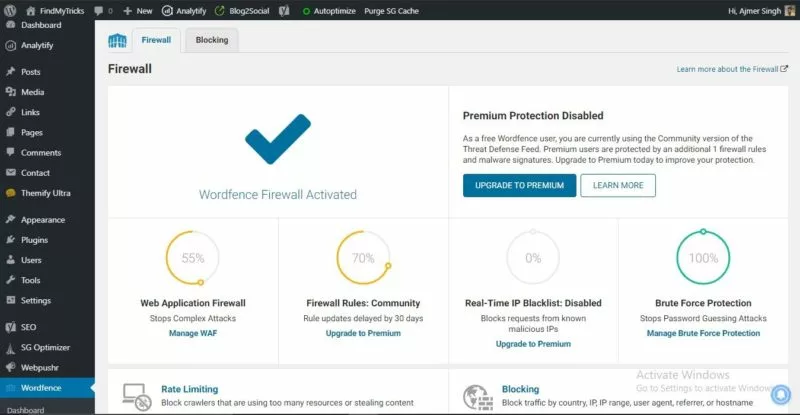
Under this, the plugin creates a firewall between your website and the other intrusive pages.
Moreover, this again helps in preventing hackers from accessing your data.
3. Scan
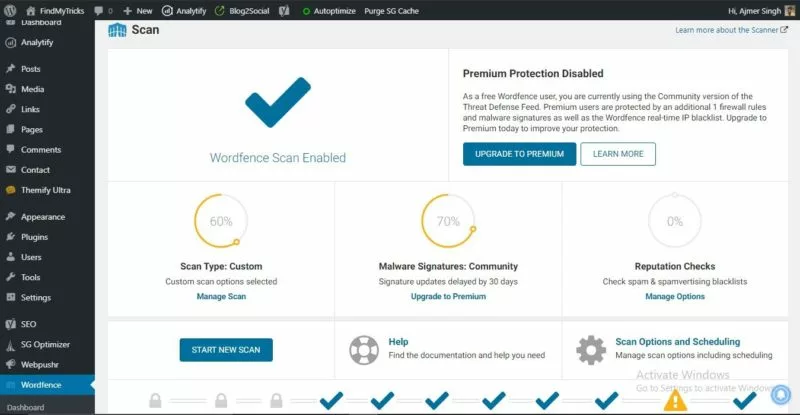
Under this, the plugin scans all the files of the website for malware.
Later it shows the result of the affected files and how it has been scanned and made error-free.
If there is an error then you can check the issue and fix it from there.
4. Tools
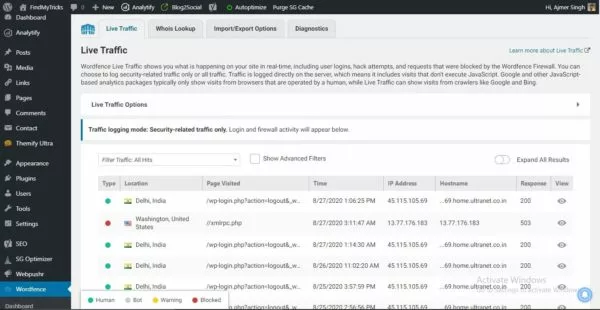
Under this, you will find various advanced settings that you can change as per your requirements.
Make all the settings default if you don’t know what it is.
5. Login Security
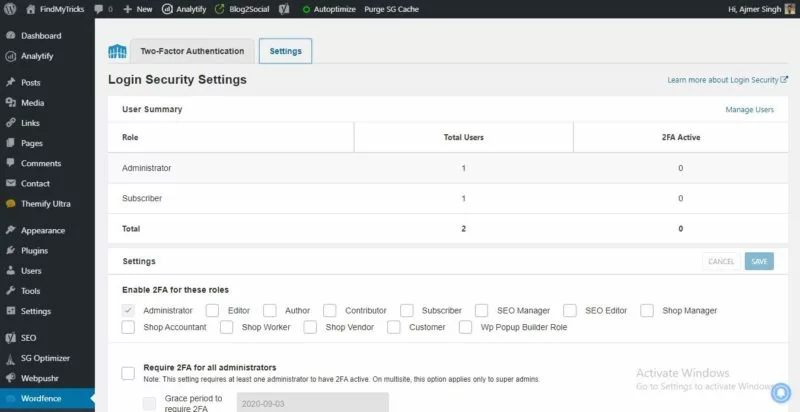
Under this, you can activate Two-Factor Authentication to prevent your login page. (It’s very important)
Activate this so that you can protect your wp-login page from hackers.
6. All Options
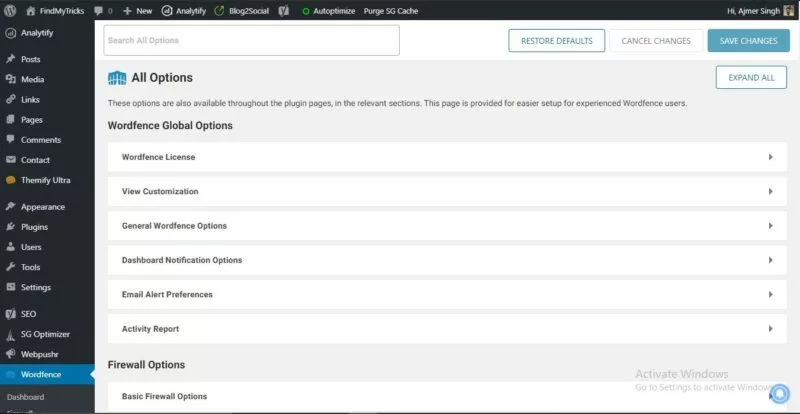
Under this, you will get all the options in one place.
Firewall, Scan, Tools, Login security, and some premium ones if you have any.
Here you can also restore your settings to default.
How to Setup Firewall?
The plugin offers two types of protection.
One is the basic protection, which provides security by default and runs along with the programs and files.
The second one is extended protection, which runs before all the programs giving it complete protection.
To use an extended feature, one has to opt for the premium plan of the plugin.
For this click on “Firewall,” press the “Optimize Firewall” option, and tap on Continue.
Now your data will be updated, and the plugin will function before WordPress.
The option “Optimize Firewall” will be changed to “Extended Protection,” and the firewall status will be “Learning Mode.
This is because the plugin will have to first learn about your website to perform accordingly.
This will change to “Protecting” after some days.
However, if you use Cloudways as your host, then you can get a premium protection plugin for free with any of the hosting packages.
I am using Cloudways host and totally satisfied with the performance and speed of my website.
Wrapping Up
Wordfence is like having a superhero guardian for your website.
It watches over your site, stops the bad guys from getting in, and alerts you if something goes wrong.
Just like you lock your doors and windows to keep your home safe, Wordfence does the same for your website.
It’s an important tool to make sure your online space is secure and working well.
So, if you have a website, consider using Wordfence to keep it safe from online threats!
Devid T
January 1, 2022 @ 5:59 pm
Thanks for sharing informative content!