Next-Level Speed: Pro Strategies for Cloudflare CDN Optimization
Estimated reading time: 22 minutes
Last updated on May 23rd, 2024 at 07:37 am
We all use websites every day, whether it’s to shop, learn, or have fun.
But did you know that some websites are faster and more secure than others?
Cloudflare is like a superhero for websites. It helps them load quickly and keeps them safe from bad guys on the internet.
Did you know that Cloudflare blocks an average of 72 billion cyber threats every day?
By using features like caching and optimizing images, Cloudflare can make your site load up to 30% faster.
In this guide, I will share Cloudflare’s best settings and configuration for WordPress.
I will also share screenshots of my website page speed at the end. (Plus my Personal Setup of Tools I use and a Bonus Tip)
Installing and setting up Cloudflare on WordPress is easy, just follow the guide I have provided below:
Create a Cloudflare account

Visit the Cloudflare website on cloudflare.com, and click on the Signup button to create an account.
On the next page, provide your email address and password, after which you click on the ‘Create account button’.
Check your mailbox from Cloudflare and verify your email.
Add your domain name to Cloudflare
The second step on how to set up Cloudflare in WordPress is to Click on +Add Site and write down your site name (like findmytricks.com).
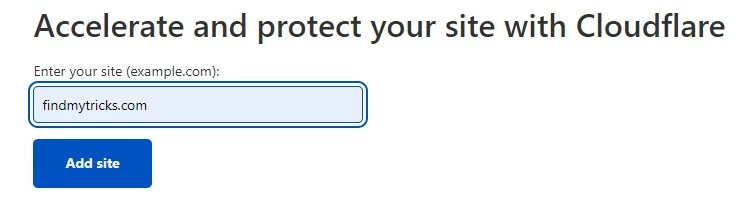
Do not use other things like https or www.

Select a plan
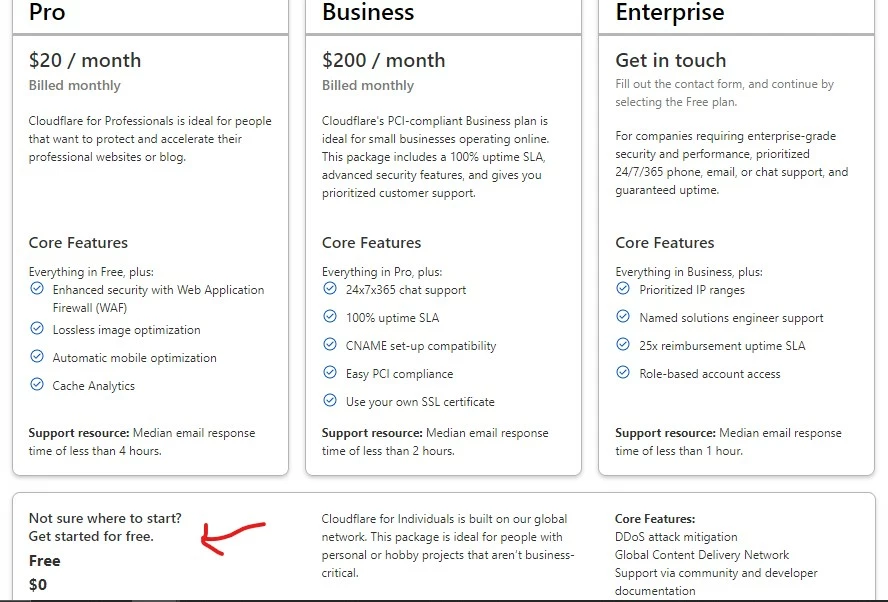
If it is a small business or personal blog I recommend that you continue with the free plan.
However, you can choose whatever plan suits your needs.
But in this guide, I choose the free plan.
Review your DNS records
After selecting the plan, Cloudflare starts scanning your DNS records.
Then they will display the list of DNS records.
Make sure the proxy status is set to orange.
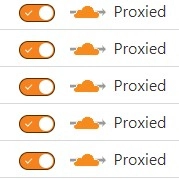
Orange means – Proxied – Accelerates and protects traffic – managed by Cloudflare.
Grey means – DNS resolution only – Bypasses Cloudflare.
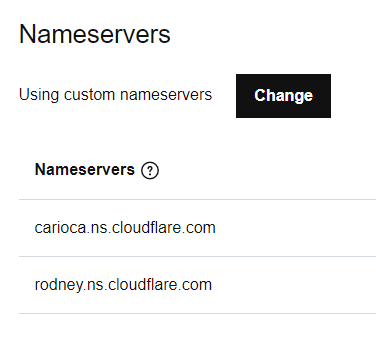
Point your domain name to Cloudflare nameservers
The fourth step is to replace your previous nameservers with Cloudflare.
Cloudflare provides 2 nameservers, copy them and replace them from your domain registrar website or hosting provider.
To do this, simply open a new tab and navigate to your hosting panel/ domain registrar, replace your previous name server with Cloudflare and click on ‘update’.
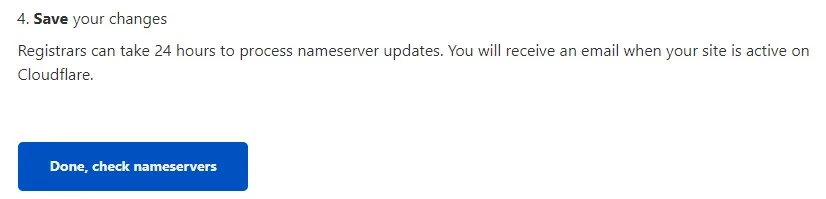
Return to the Cloudflare page and click on the ‘done, check nameservers’ button.
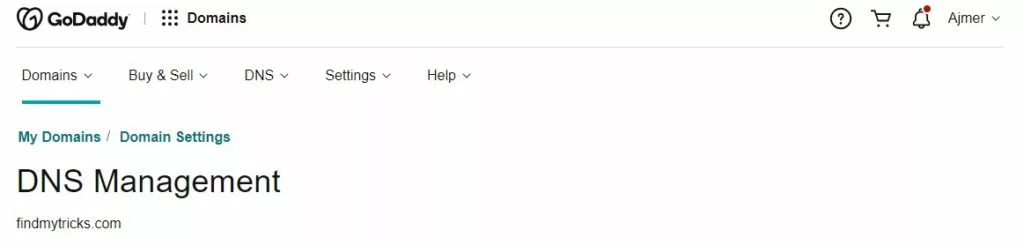
For example, if you are using Godaddy then:
- Login
- My products
- DNS
- Name servers (change). It will take around 24 hours as they say, but it generally takes only a few minutes.
- Continue.
After changing nameservers, click on done, and check nameservers.
If you see the status: Website not active (DNS modification pending), then click on recheck nameservers.
After 5-10 mins, check again – you will see the status active.
Now let’s configure these settings,
Cloudflare Dashboard Settings
1. Overview
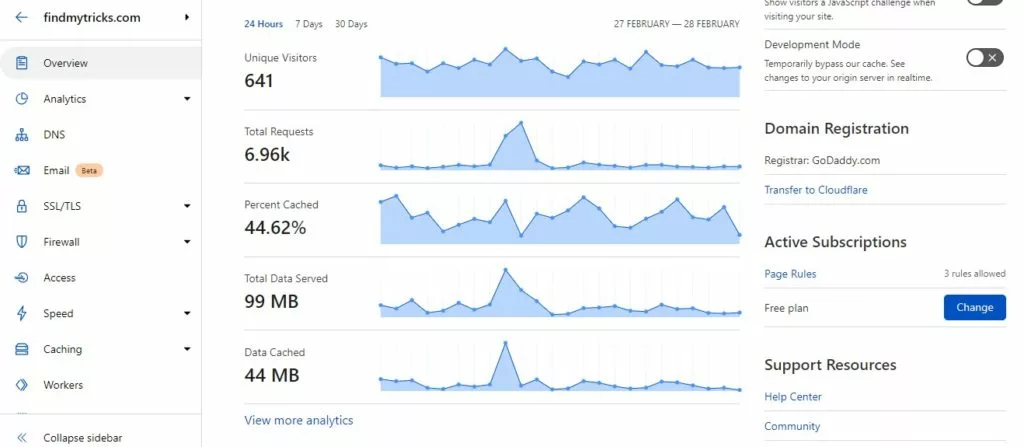
Here you can check your website analytics. However, they provide overall stats including bot visits.
So, if you want to check real visitors’ stats, then make sure to add Google Analytics.
As you are just signed up… so wait, you will see your results after some time.
2. Analytics & Logs
Traffic
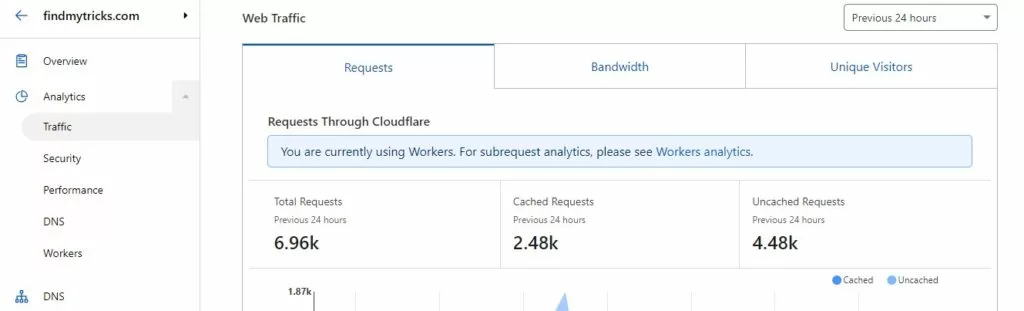
Same here, you will check your stats after some time.
Security
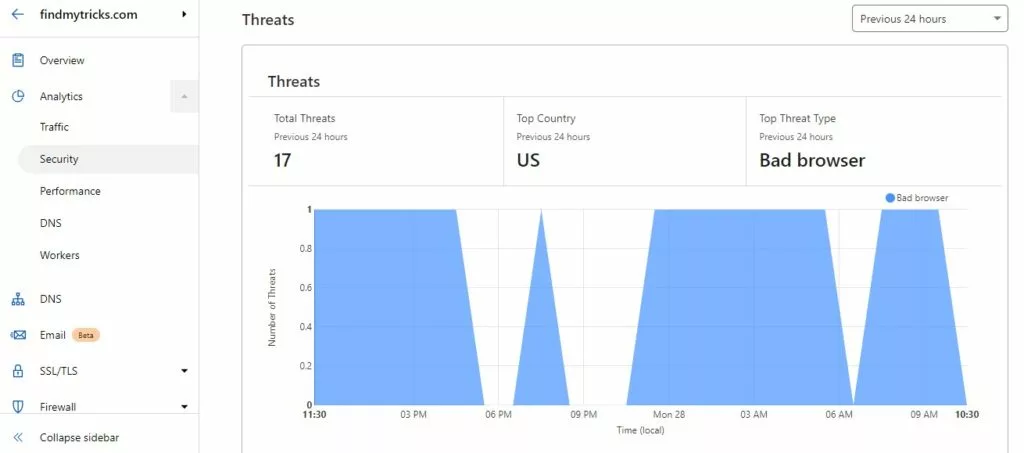
Here you can check the threats blocked by Cloudflare security.
Performance
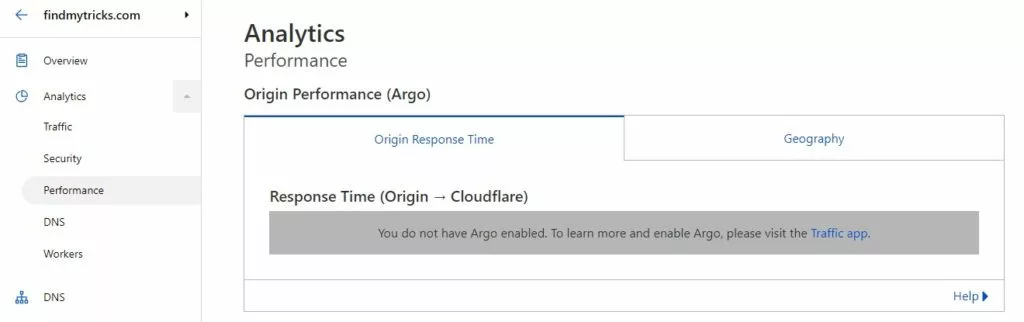
To check the performance, you need to enable Argo (which is paid). So, leave this and move to the next step.
DNS
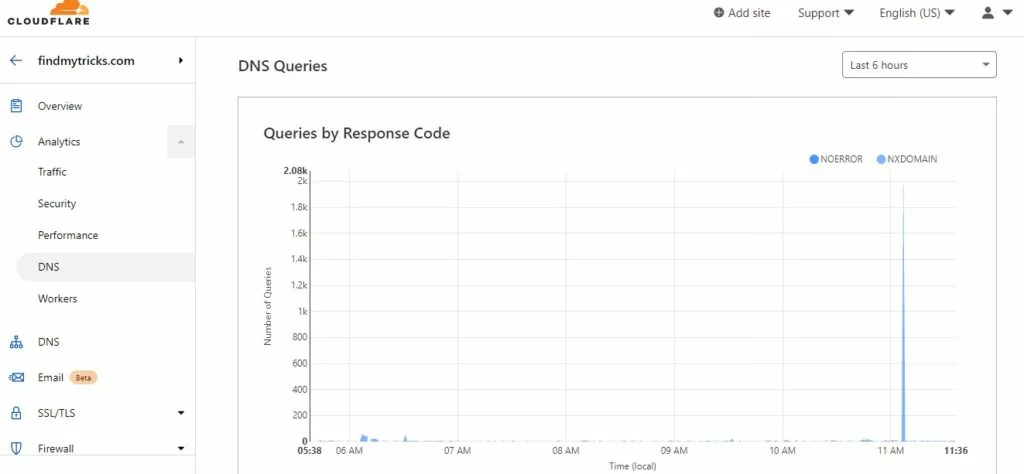
This tab is for those who are interested in checking their DNS queries.
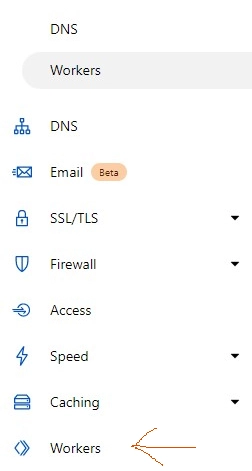
Workers
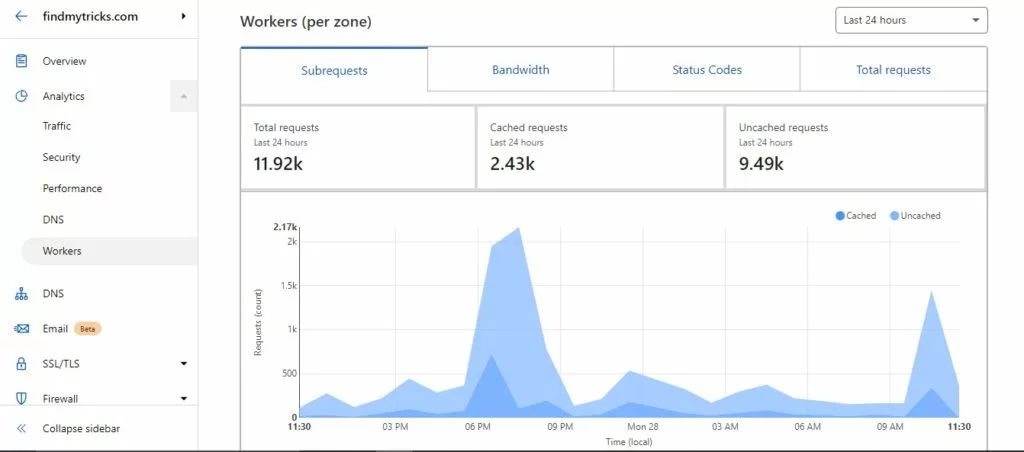
You can check these stats after enabling worker mode.
You can get Workers mode settings almost in the end.
Check the below screenshot.
3. DNS
Records
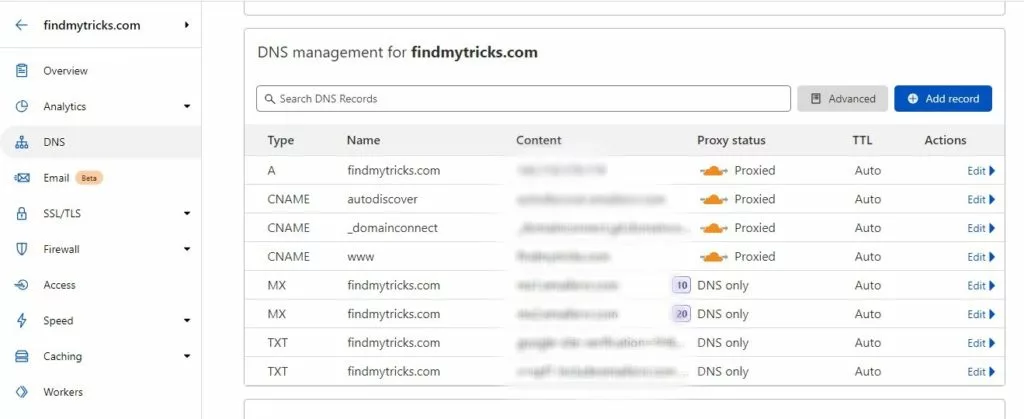
Review, and edit your DNS settings here if you don’t change them at the start.
Leave the other settings below that as default.
Settings
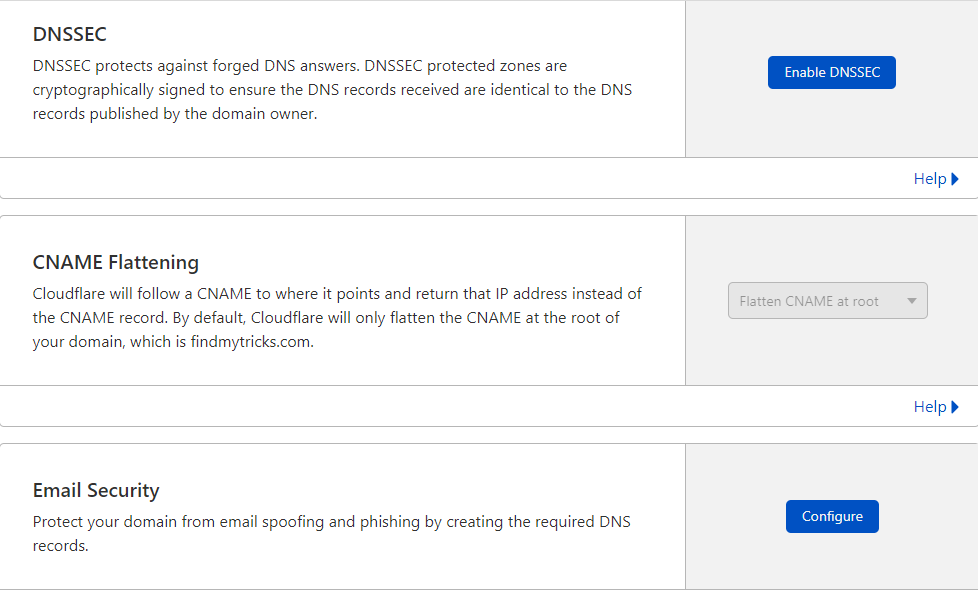
DNSSEC, or Domain Name System Security Extensions, is a set of extensions to the Domain Name System (DNS) that adds an extra layer of security to the DNS infrastructure.
DNS is the system that translates human-readable domain names (like www.example.com) into IP addresses (such as 192.168.1.1) that computers use to identify each other on the internet.
DNSSEC was developed to address certain vulnerabilities in the DNS, such as cache poisoning and man-in-the-middle attacks.
These attacks can lead to unauthorized modification of DNS data, which can redirect users to malicious websites or intercept their communications.
I am not using this feature right now.
4. Email
Email Routing
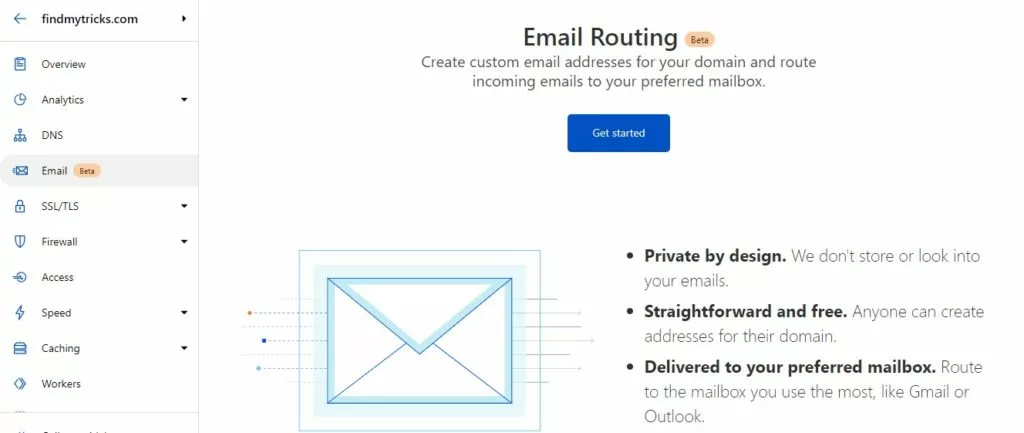
This is the new beta version of Cloudflare for people who wanted to create a custom email like [email protected], [email protected], [email protected] etc..
I am already using custom email from the Cloudways Rackspace server.
But for you let’s check how to configure this.
Click on Get Started.
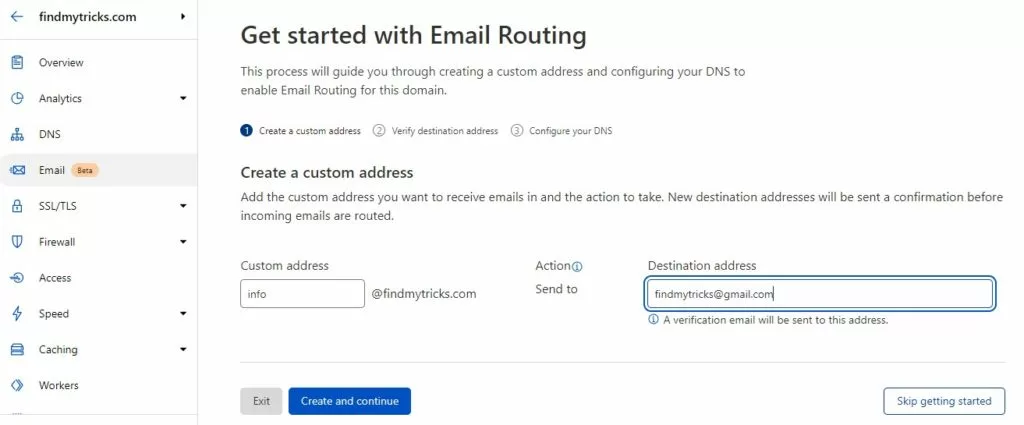
Okay so here I am going to create info@findmytricks and the destination email address is [email protected]
“In short, when you mail to [email protected], I will receive the mail at [email protected]”
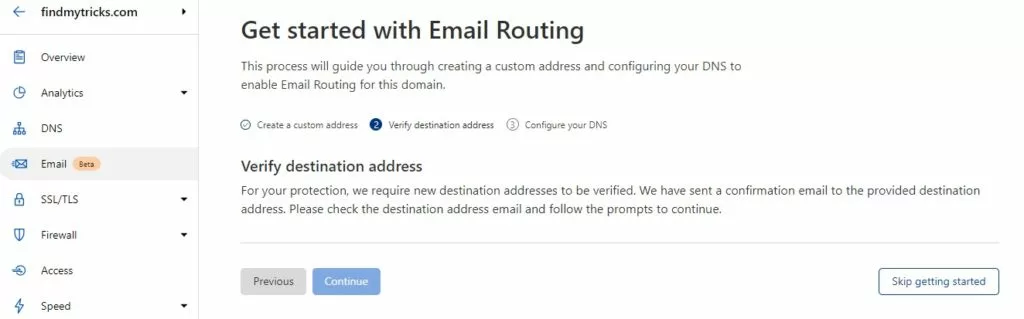
Next is to verify your destination address.
As I already have an email setup, so on the next page they want me to delete previous records and add the new ones.
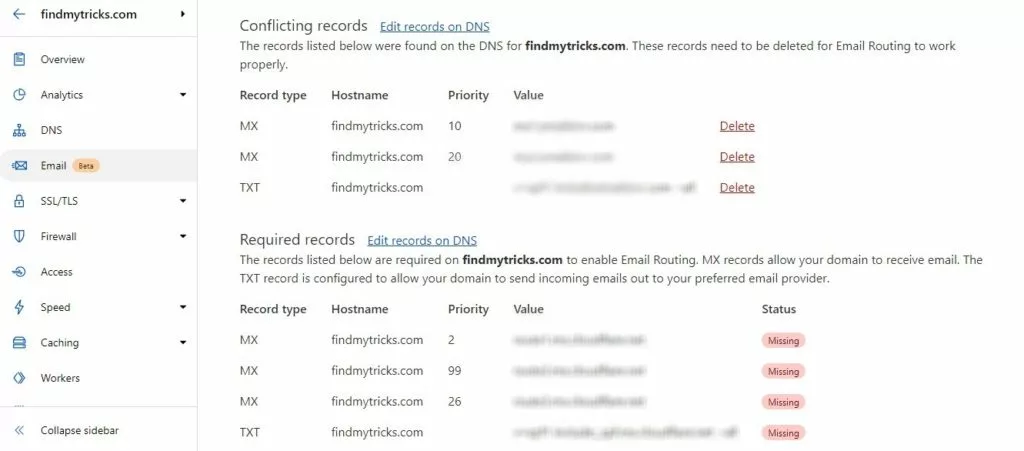
Here, what you can do is.
Open DNS settings, and add records one by one to set this custom email.
After adding records, click on next or skip.
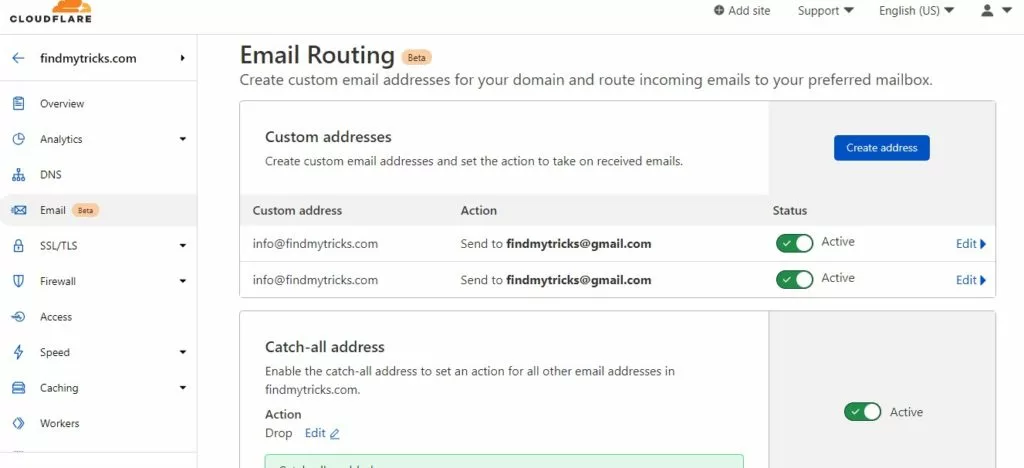
Then Enable the catch-all address and you are done.
You can check by sending an email to your new custom email address.
DMARC Management
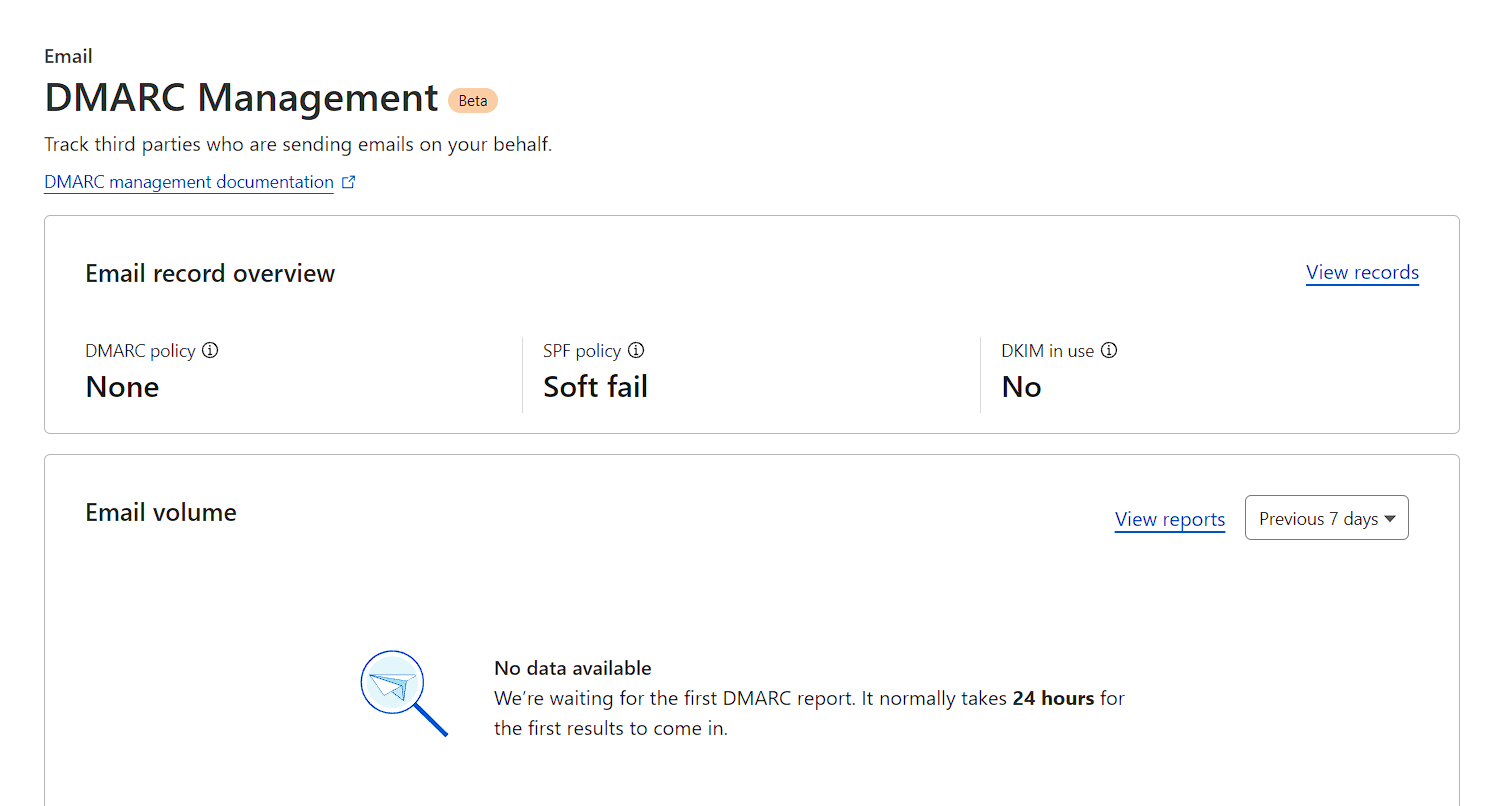
Track third parties who are sending emails on your behalf. I am not using this feature.
Email Security
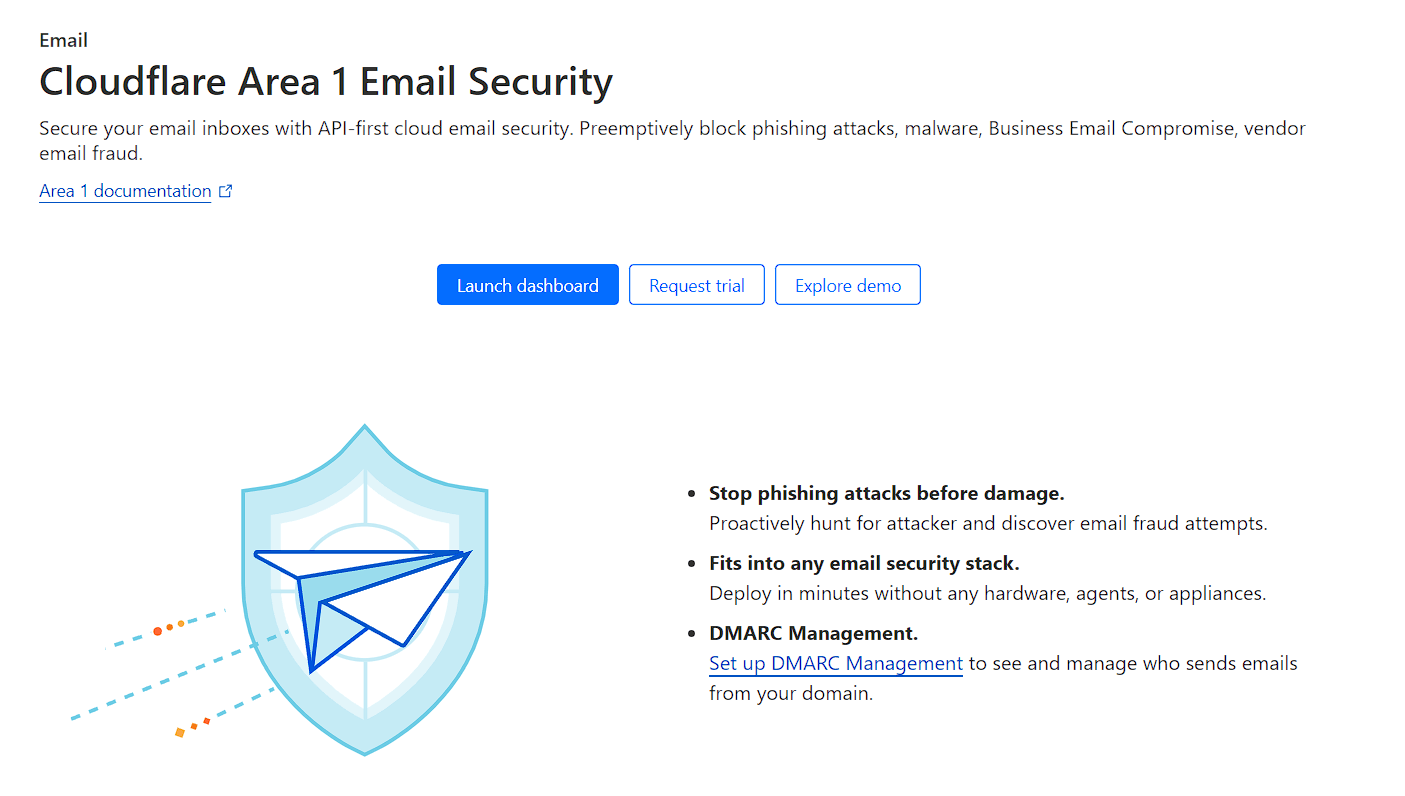
Secure your email inboxes with API-first cloud email security. Preemptively block phishing attacks, malware, Business Email Compromise, and vendor email fraud.
I am not using this feature.
5. SSL/TLS
Overview
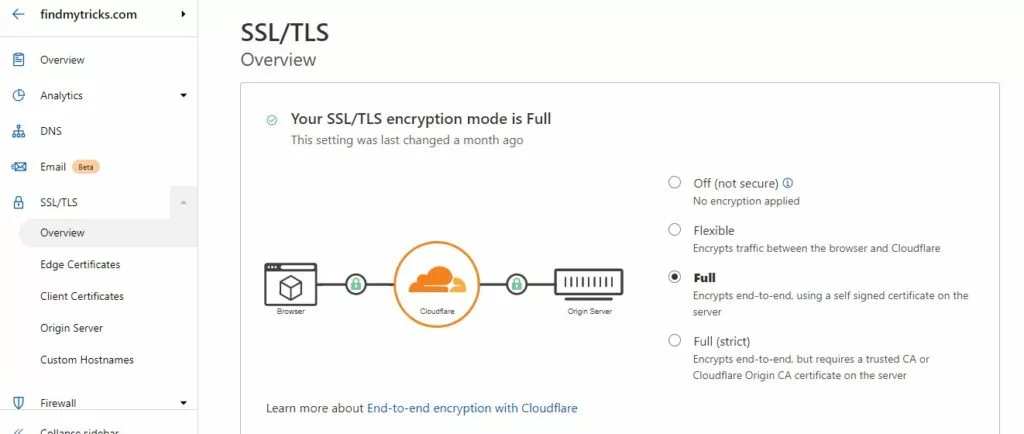
Check the full option, if you have an SSL certificate installed whether from your hosting provider or from any third party.
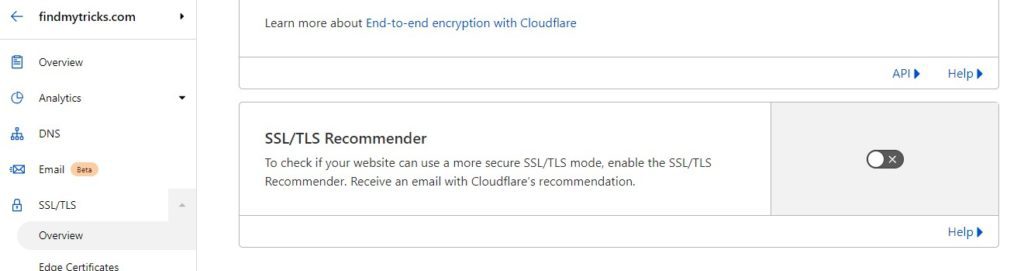
Disable SSL/TLS recommender, as this is not important.
Edge Certificates
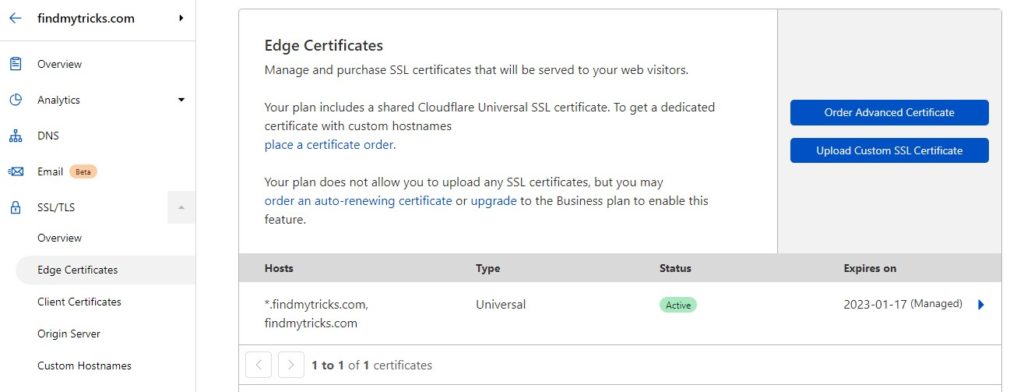
You can check your SSL certificate status, expiry date, managed by etc. (If you have an SSL certificate installed)
You can also upload your SSL certificate and order to create a new SSL certificate from this tab.
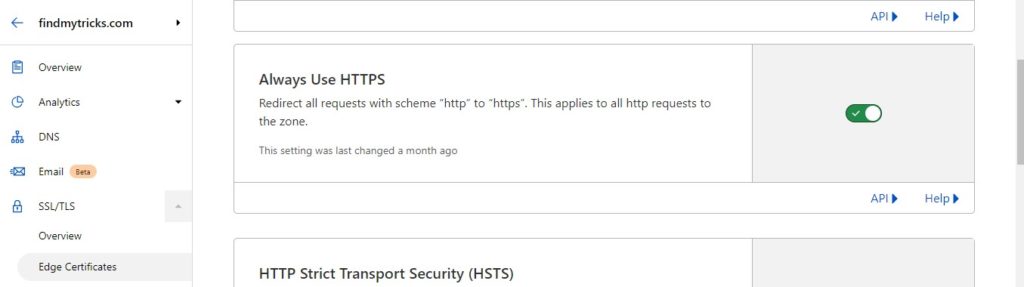
Make sure to enable “Always use HTTPS”. This will make sure that all the traffic will redirect from http to https automatically by Cloudflare.
Now, let’s configure HTTP Strict Transport Security (HSTS) settings,
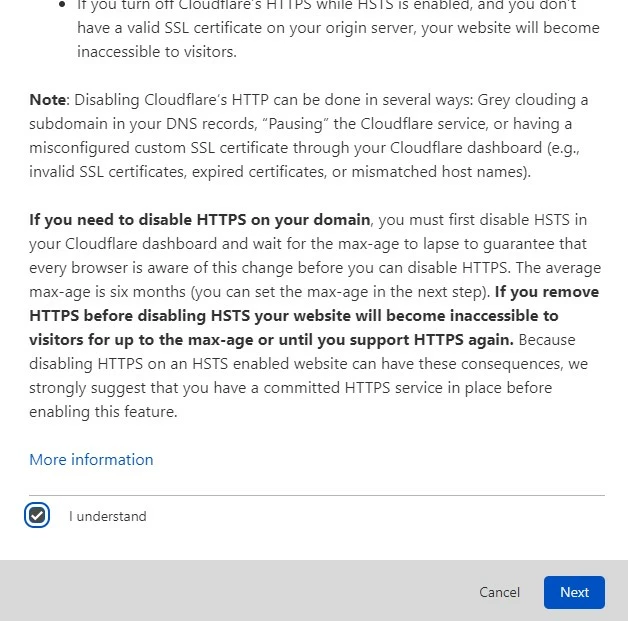
Click I understand and next.
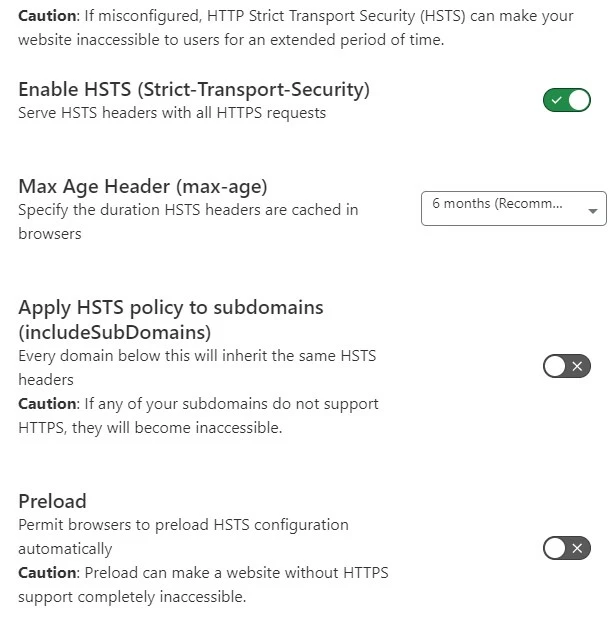
Apply these settings,
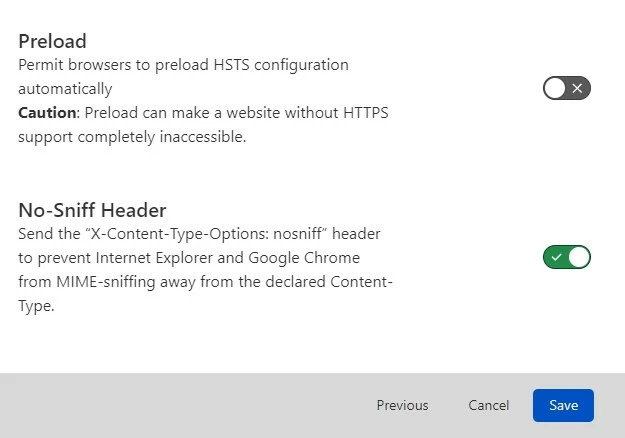
Enable HSTS.
Max age header – 6 months.
Apply HSTS policy to subdomains – disable
Preload – disable.
No sniff header – Enable.
More settings,
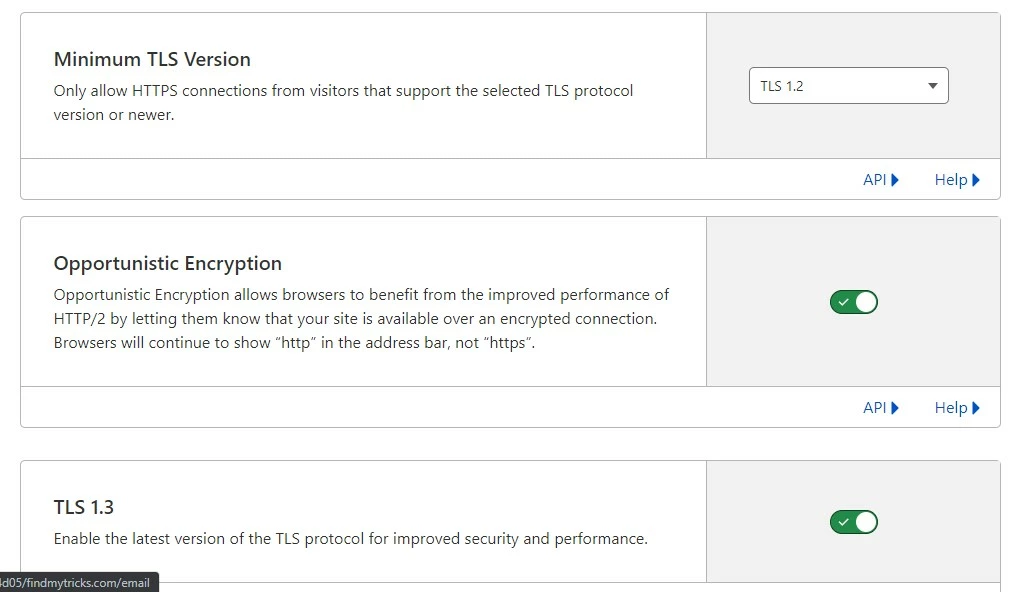
Minimum TLS version – TLS 1.2
Opportunistic Encryption – enable
TLS 1.3 – enable
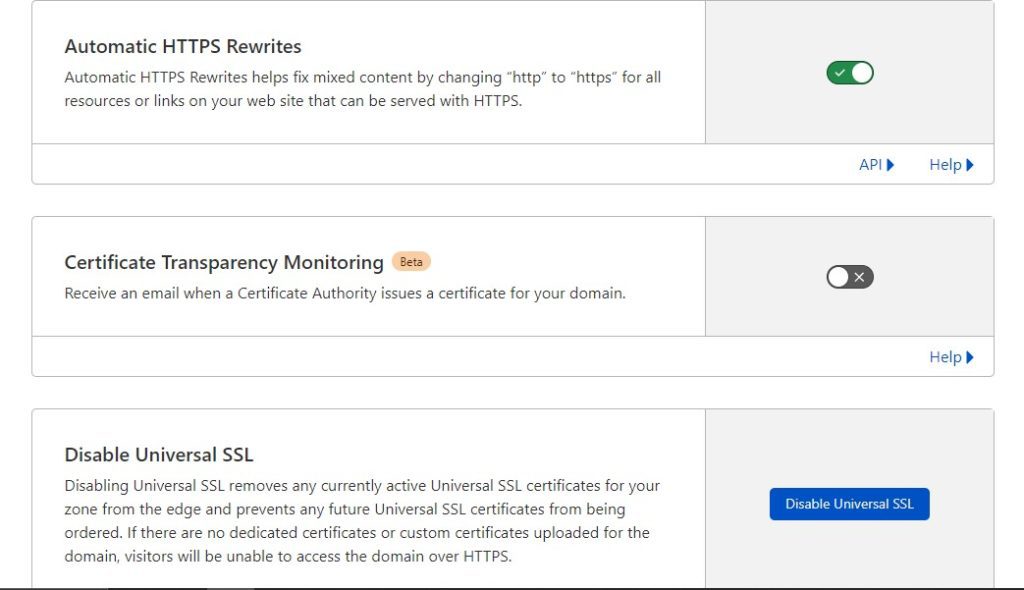
Automatic HTTPS Rewrites – enable
Certificate Transparency Monitoring (Beta) – disable – No need to receive emails when a new certificate issued.
You can enable this option if you want to get email notifications every time your hosting provider issues a new certificate.
Disable Universal SSL – Do not disable universal SSL.
Because disabling Universal SSL removes any currently active Universal SSL certificates for your zone from the edge, and prevents any future Universal SSL certificates from being ordered.
Client certificate
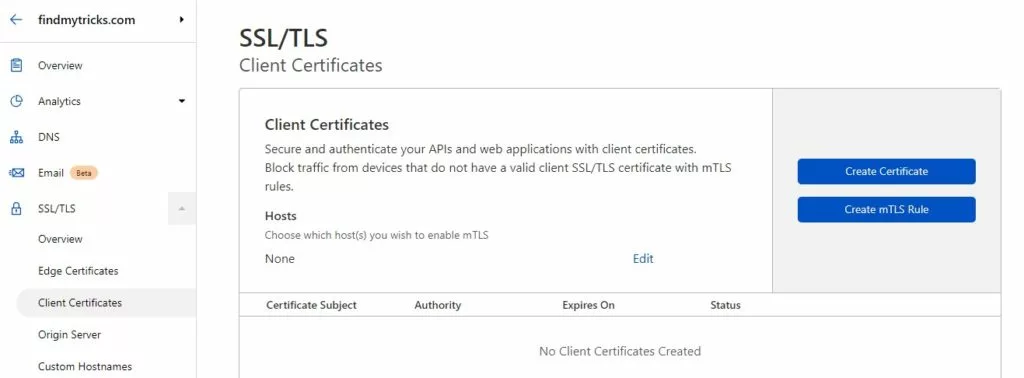
This is used for web applications. You don’t need to create one.
Origin Certificate
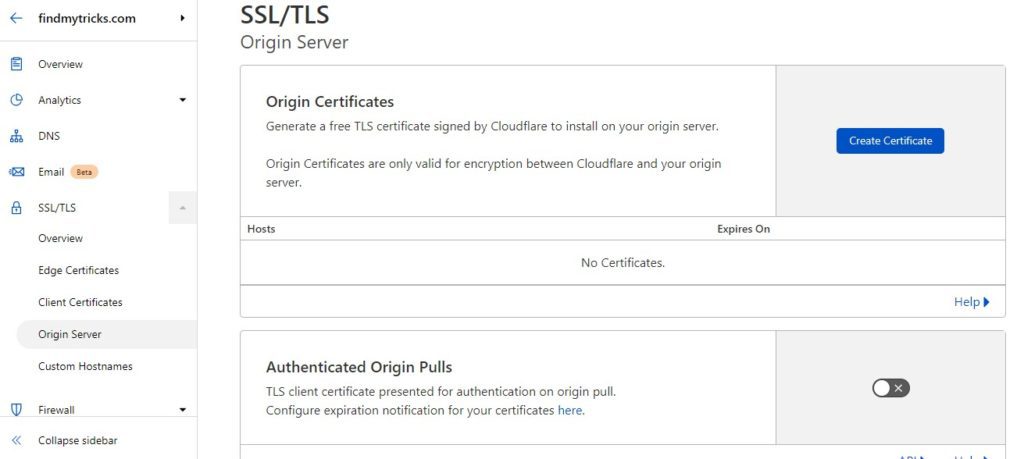
This one is also not necessary. Leave this disabled.
Origin Server
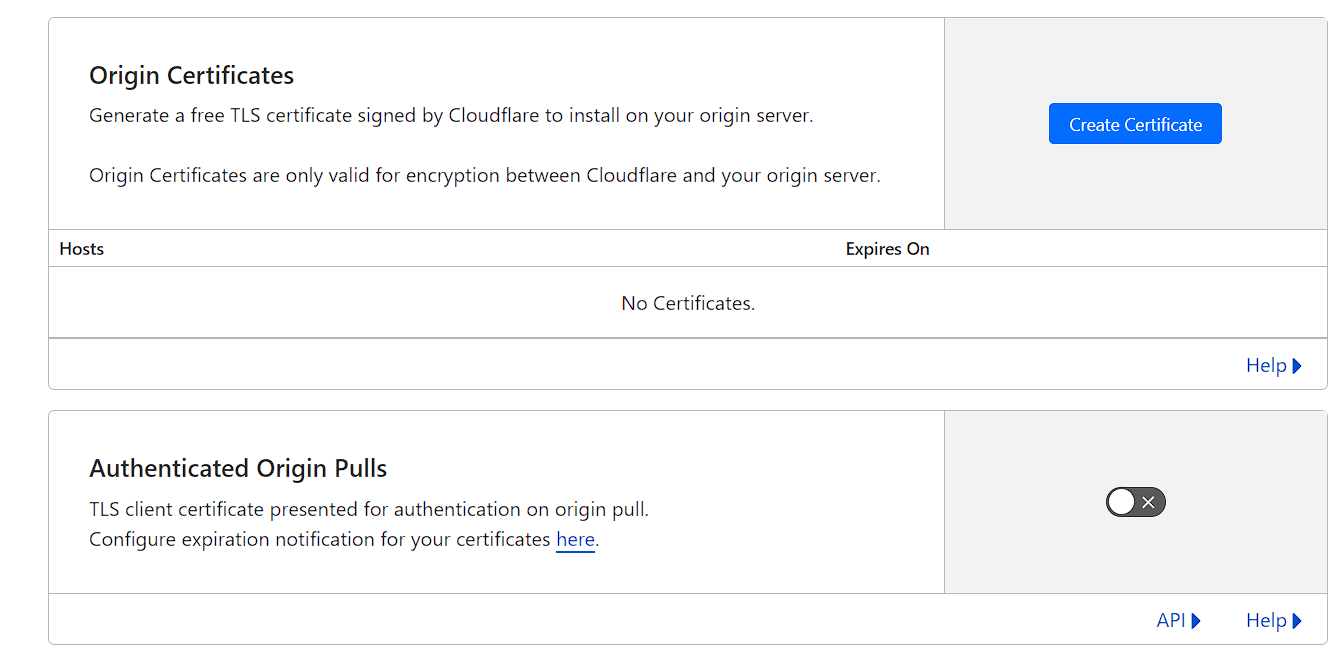
Customize encryption of traffic between your origin server and Cloudflare. I am not using this feature.
Custom Hostnames
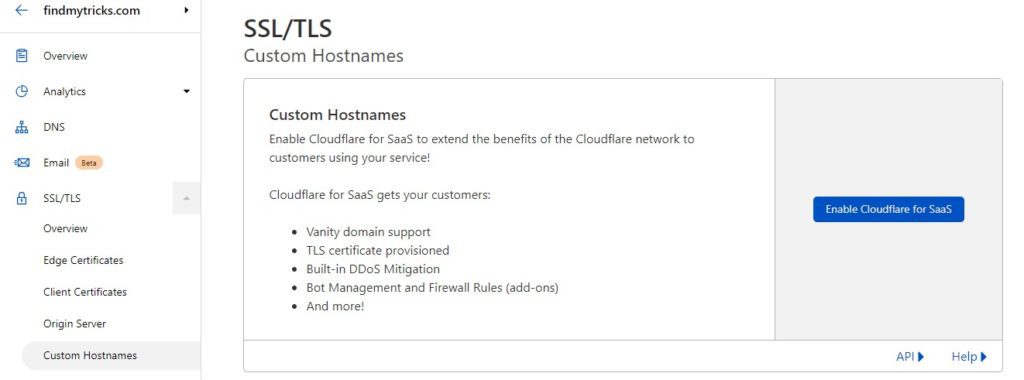
There is no requirement for this. Leave this disabled.
6. Security
Overview
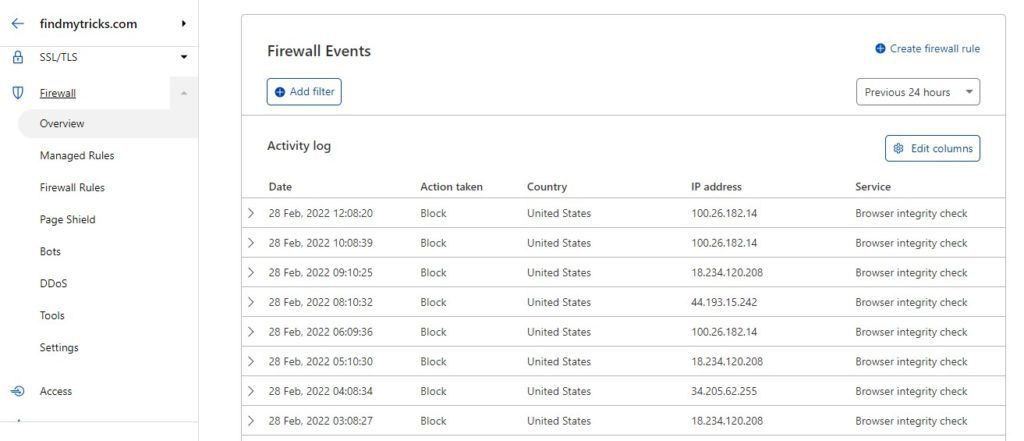
After configuring firewall settings, you can check the analytics of Cloudflare firewall events here.
Like the date, country, IP, action taken by which firewall rule etc…
Managed Rules
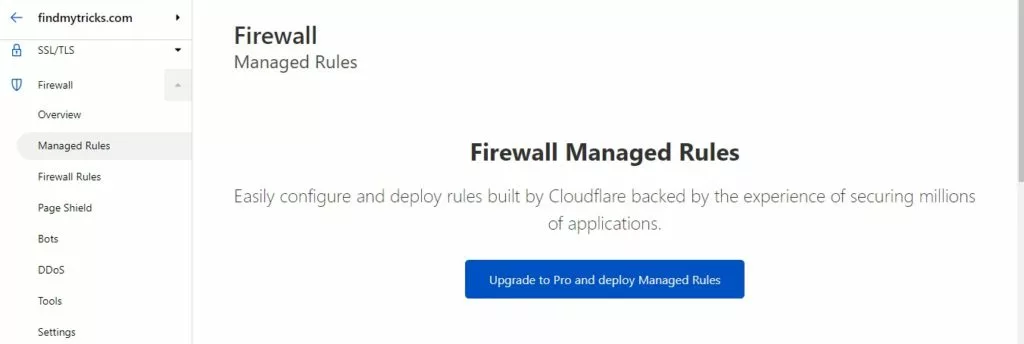
You need the pro version for managed rules, so for now, leave this tab.
Firewall Rules
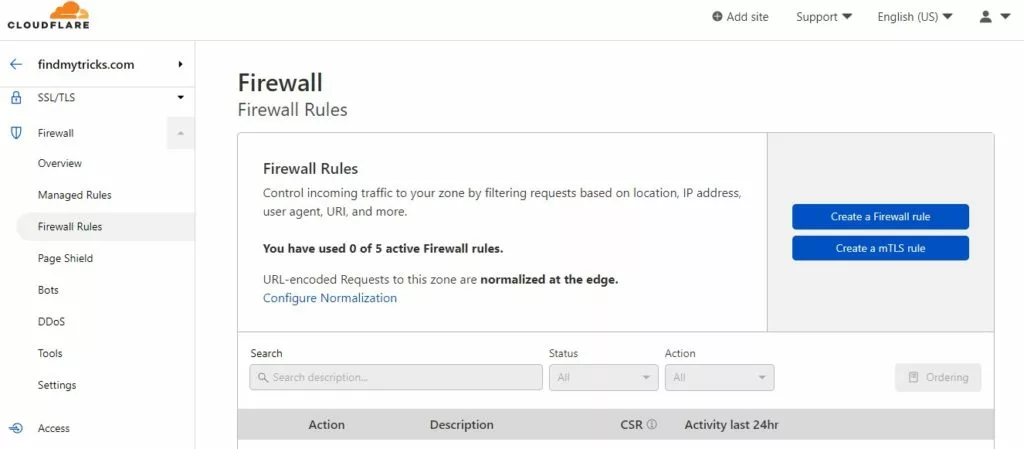
Here you can add rules like https redirect, bypass admin cache, block an IP address or website etc.
For now, it’s not necessary until you have a specific demand.
Page Shield
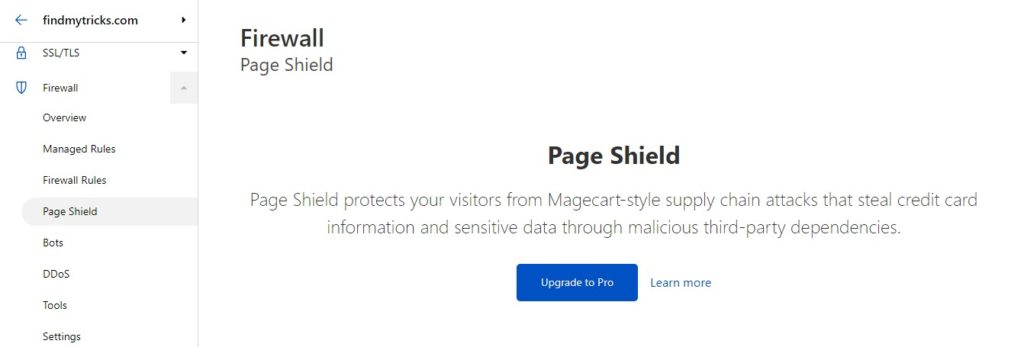
You have to upgrade to the premium version to enable the page shield.
Page Shield protects your visitors from Magecart-style supply chain attacks,
that steal credit card information and sensitive data through malicious third-party dependencies.
Bots
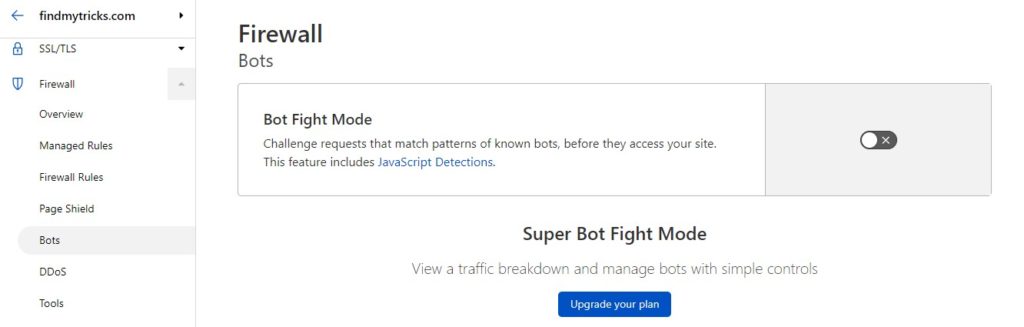
This is a new feature by Cloudflare.
Bot fight mode adds a challenge request that matches patterns of known bots before they access your site.
I personally disable this because this adds an extra request and increases website load time.
My host Cloudways already provides bot protection without adding any extra requests.
DDoS
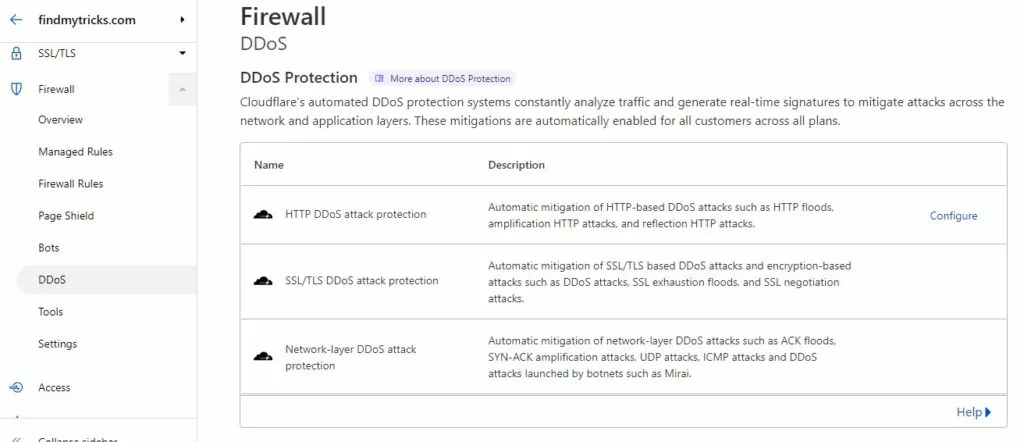
You don’t need to change anything here. These are the default DDoS settings configured by Cloudflare itself.
Tools
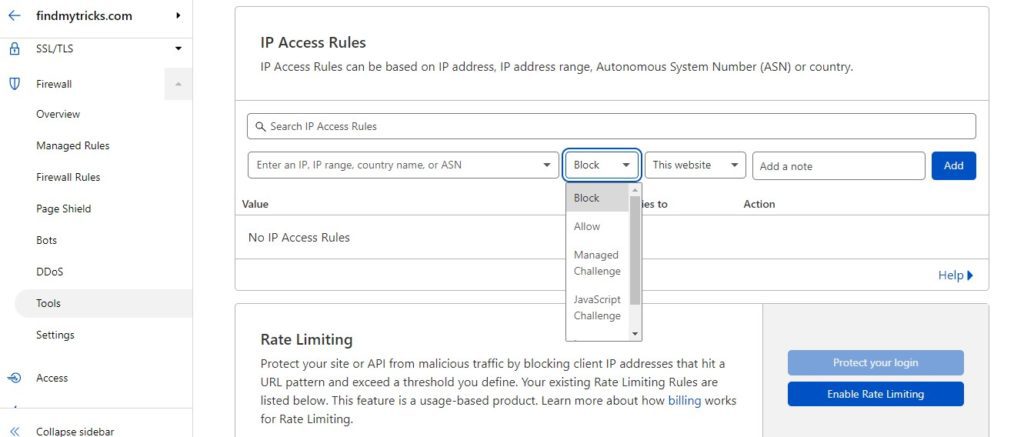
This tab is useful if you want to add a specific action to the IP addresses, country or ASN (autonomous system number).
Actions you can take,
- block
- allow
- managed challenge
- javascript challenge
- legacy captcha
Settings
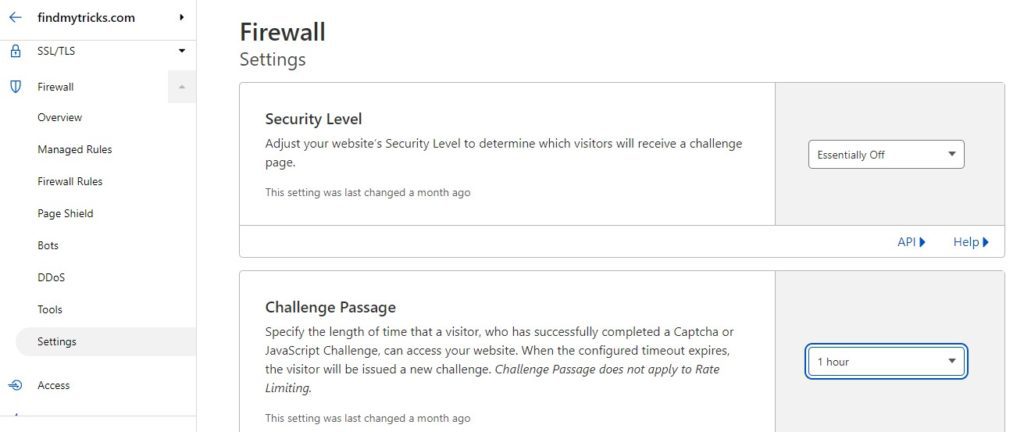
Security level – keep this essentially off, low or medium.
If you set this to high or under attack then Cloudflare set a challenge to visitors, which is very annoying (from the visitor’s perspective).
You need the pro version to select the “off” option.
Challenge pass – 1 hour is enough.
After 1 hour, the visitor will be issued a new challenge.
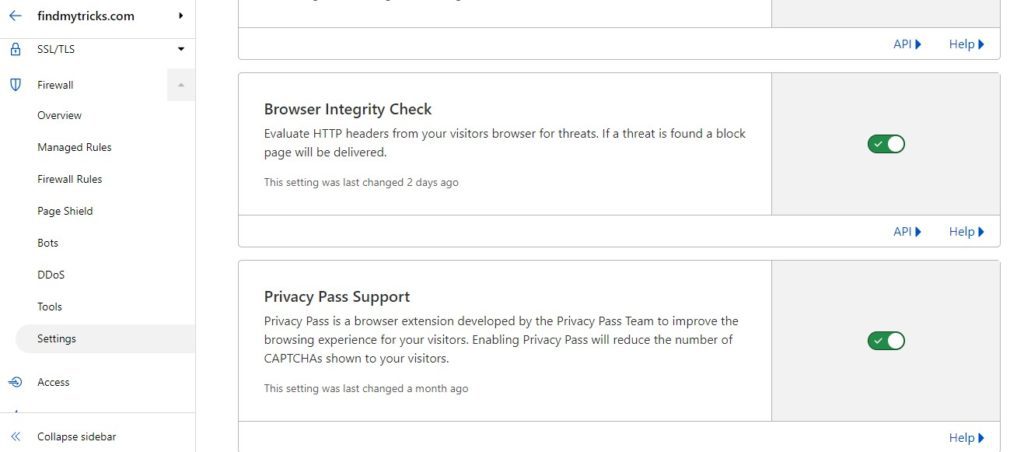
Browser integrity check – enable
If a threat is found a block page will be delivered.
Privacy pass support – enable
This is good because some users are using a privacy pass browser extension.
Privacy Pass is a browser extension developed by the Privacy Pass Team to improve the browsing experience for your visitors.
Enabling Privacy Pass will reduce the number of CAPTCHAs shown to your visitors.
7. Access
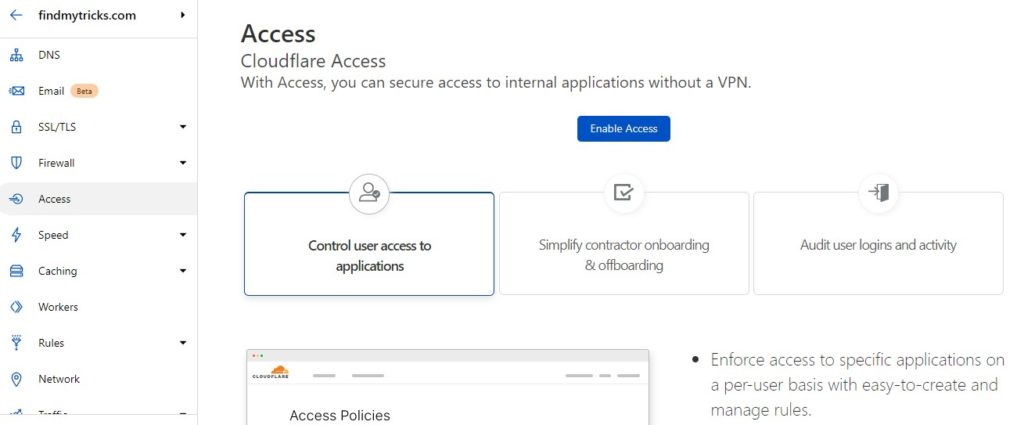
If you have users under this account then you can enable this option to secure access to internal applications without a VPN.
You can check user logins and activity.
As I am the only user of my account, so this is disabled from my side.
8. Speed
Overview
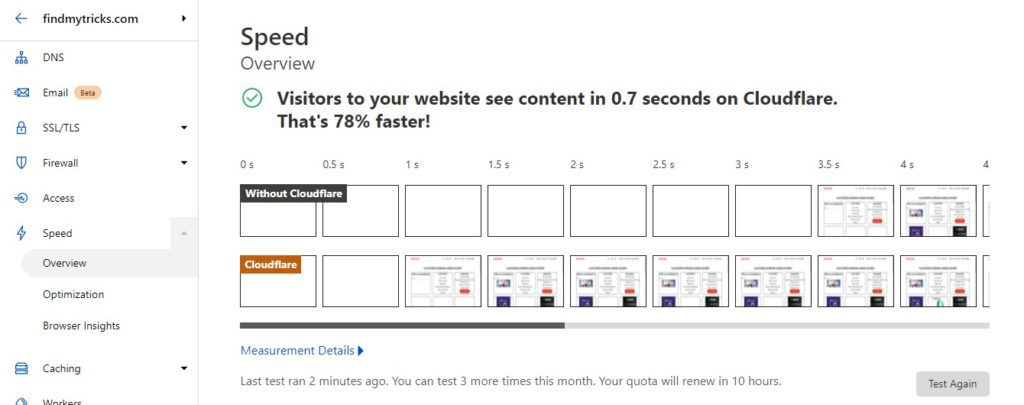
In the overview section, you can check the loading speed of your website.
A comparing chart of website speed with Cloudflare and without Cloudflare.
And some recommendations for an upgraded version to improve your speed. But, that’s not necessary.
Optimization
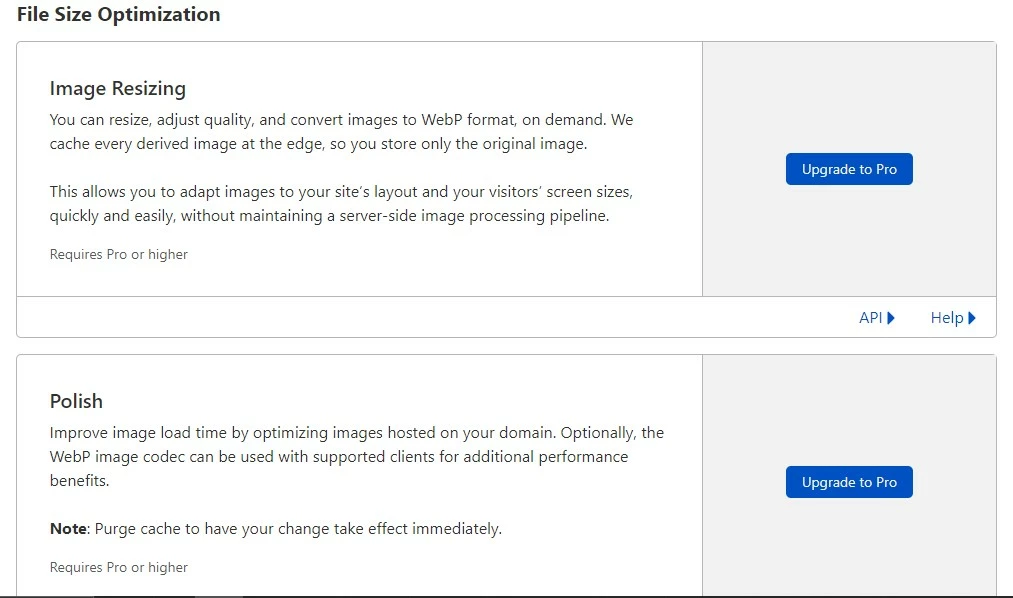
Image resizing – premium version
You can resize, adjust quality, and convert images to WebP format, on-demand.
Cloudflare caches every derived image at the edge, so you store only the original image.
This allows you to adapt images to your site’s layout and your visitors’ screen sizes, quickly and easily,
without maintaining a server-side image processing pipeline.
Polishing – premium version
Improve image load time by optimizing images hosted on your domain.
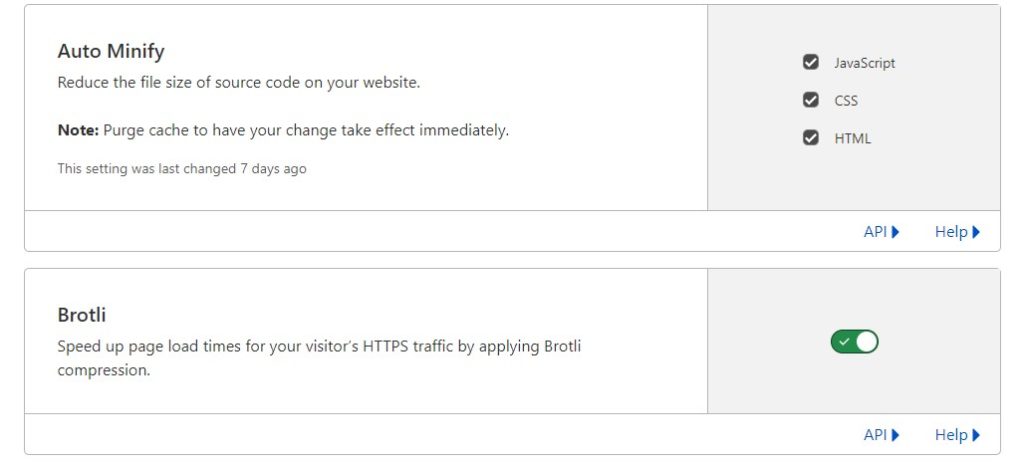
Autominify – Enable Java, CSS and HTML.
Not recommended if you are using any other cache plugin with Java, CSS and HTML enabled there.
Brotli – enable
This speeds up page load times for your visitor’s HTTPS traffic by applying Brotli compression.
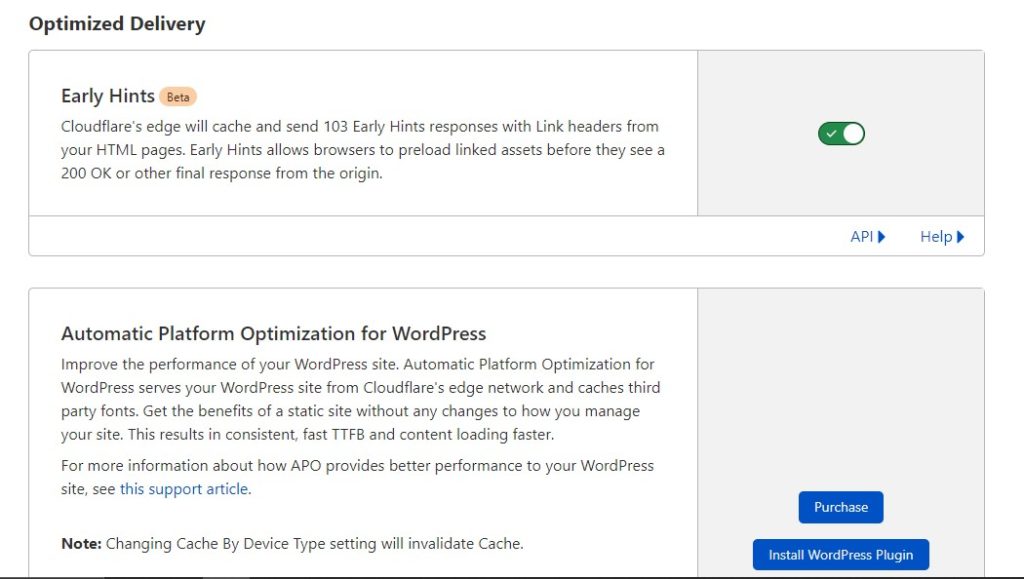
Early hints (Beta) – enable
This is the new beta feature of Cloudflare and it’s a quite good feature for users.
Early Hints allows browsers to preload linked assets before they see a 200 OK or other final response from the origin.
Results in increasing page load.
Automatic Platform Optimization for WordPress (APO by Cloudflare) – premium version
To enable Automatic Platform Optimization for WordPress, you have to purchase the subscription or upgrade to their pro plan.
They claim that the loading speed of a website increases drastically after using this plugin.
I also saw positive reviews and responses but right now I am not using this.
Cloudflare Fonts (Beta) – enable
Optimize font loading. Cloudflare Fonts reduces external requests for third-party fonts, resulting in improved privacy and performance for faster page loads.
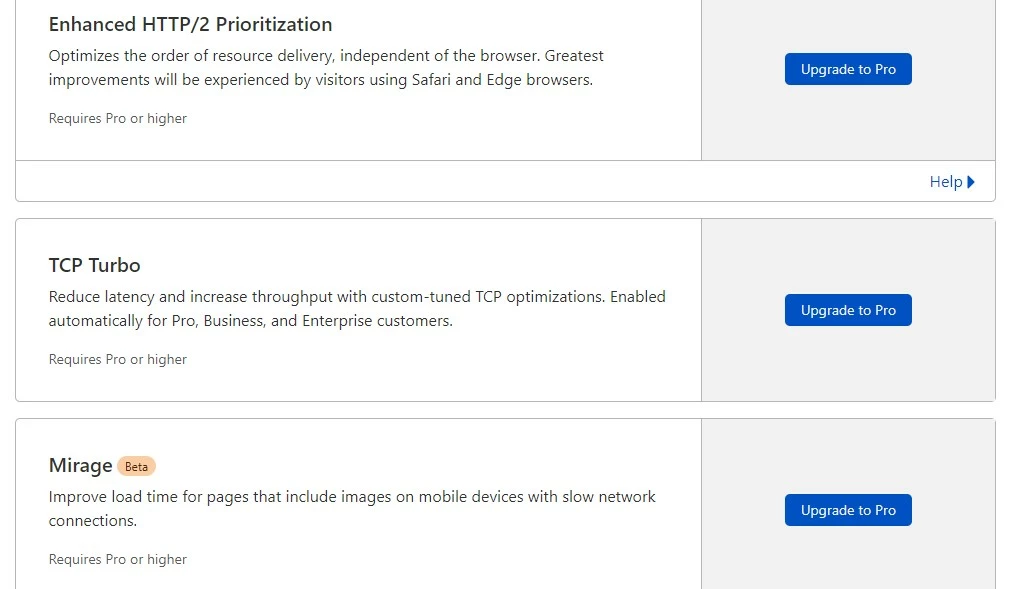
Enhanced HTTP/2 Prioritization – premium version
Optimizes the order of resource delivery, independent of the browser.
TCP Turbo – premium version
Reduce latency and increase throughput with custom-tuned TCP optimizations.
MirageBeta – premium version (this was free before)
Improve load time for pages that include images on mobile devices with slow network connections.
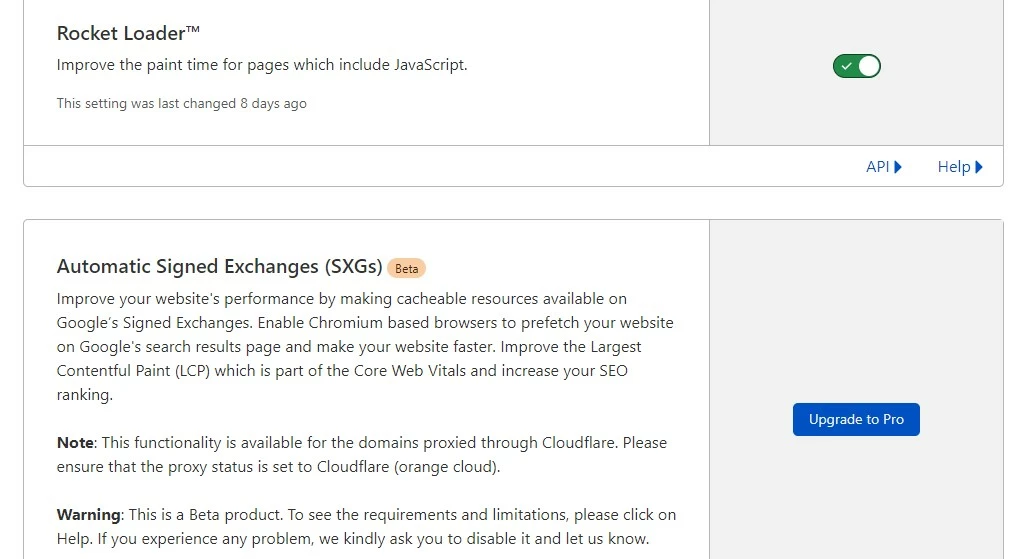
Rocket loader – enable (but not recommended)
Improve the paint time for pages that include JavaScript.
But I heard cases where this can break websites. Not in my case (It reduces extra requests).
So, crosscheck after enabling this option.
Automatic signed exchanges SXG’s (beta) – premium version
Improve the Largest Contentful Paint (LCP) which is part of the Core Web Vitals.

Prefetch Urls – premium version
Cloudflare will prefetch any URLs included in the prefetch HTTP header
AMP real URL – premium version
Display your site’s actual URL on your AMP pages, instead of the traditional Google AMP cache URL.
Mobile redirect – if you have a subdomain for mobile users then use this option, otherwise, leave the default.
This can redirect visitors that are using mobile devices to a mobile-optimized website.
Browser Insights
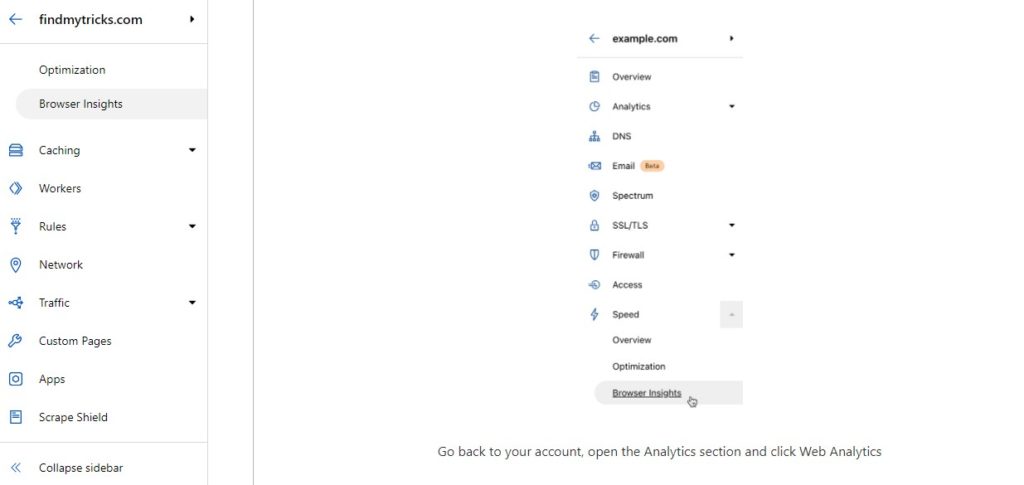
Browser Insights is now Web Analytics.
Go back to your account, open the Analytics section and click Web Analytics.
9. Caching
Overview
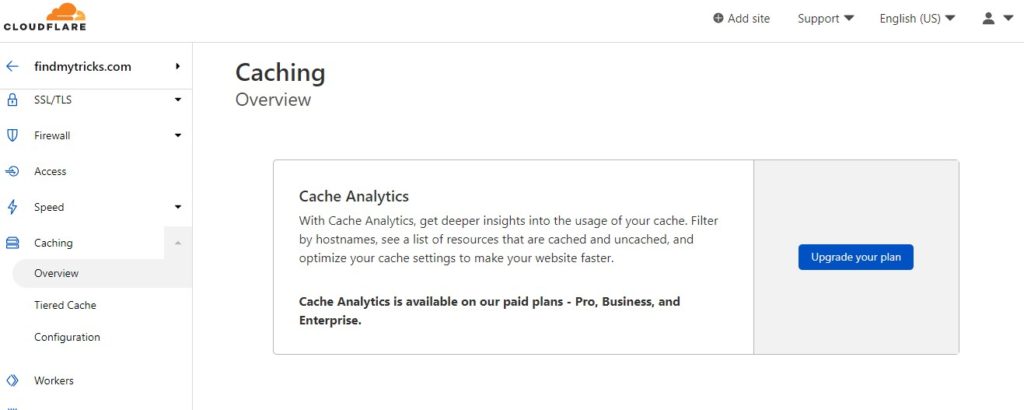
To check your cache analytics, you need to upgrade to their premium plan.
Tiered Cache
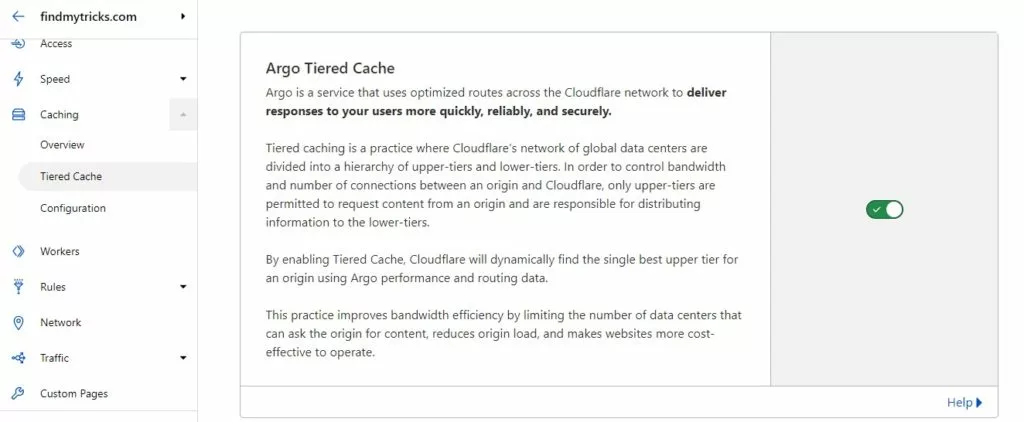
Cloudflare’s Argo is a service that uses optimized routes across the Cloudflare network to deliver responses to your users more quickly, reliably, and securely.
Tiered caching is a practice where Cloudflare’s network of global data centres is divided into a hierarchy of upper tiers and lower tiers.
In order to control bandwidth and the number of connections between an origin and Cloudflare,
only the upper tiers are permitted to request content from an origin and are responsible for distributing information to the lower tiers.
By enabling Tiered Cache, Cloudflare will dynamically find the single best upper tier for an origin using Argo performance and routing data.
This practice improves bandwidth efficiency by limiting the number of data centres,
that can ask the origin for content, reduces origin load, and makes websites more cost-effective to operate.
Configuration

Purge cache – if you are using the Cloudflare auto minify option as I mentioned earlier, then you can purge the cache here.
Caching level – set to standard
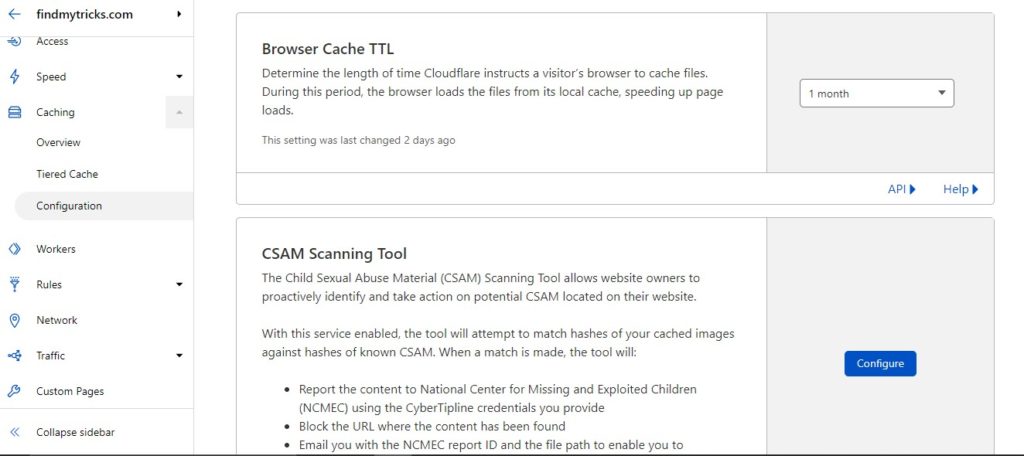
Brower cache TTL – 1 month
This is the time a visitor’s cache will expire after visiting the page.
CSAM scanning tool – Leave for now. It’s not necessary.
This feature allows website owners to proactively identify and take action on potential CSAM (Child Sexual Abuse Material) located on their website.
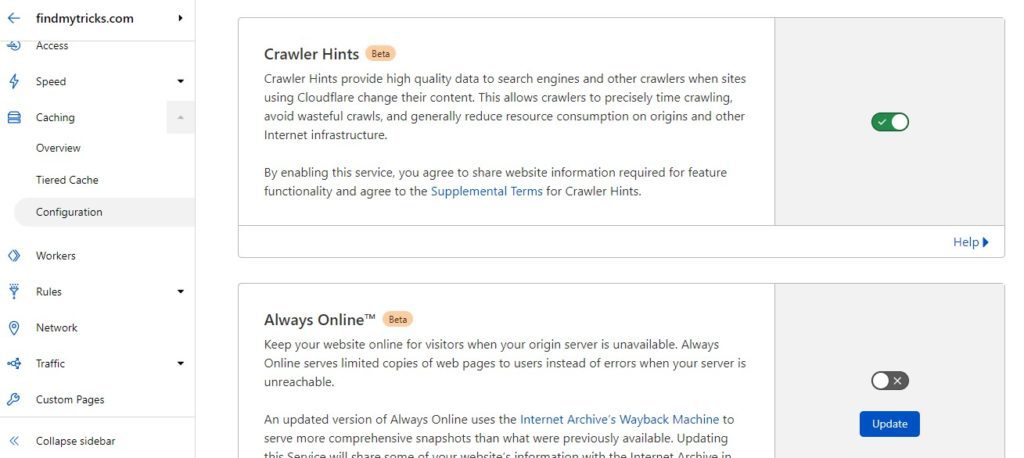
Crawler hints (beta) – enable
It is something that every user wants.
With this feature enabled, whenever you make changes to your site, Cloudflare tells search engines about the change.
Which as a result helps in crawling the real change, not the whole website.
This allows crawlers to precisely time crawling, and avoid wasteful crawls.
Always online – Disable
If your hosting is good (like Cloudways) then disable this and avoid extra load.
But if you have cheap hosting whose servers are down from time to time, then enable this.
When enabled, this keeps your website online for visitors when your origin server is unavailable.
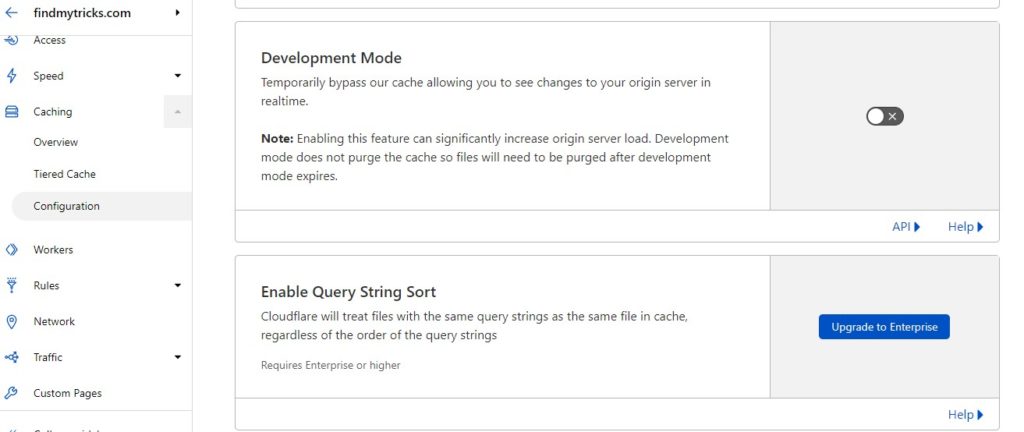
Development mode – Temporarily bypass Cloudflare cache allowing you to see changes to your origin server in real time.
When you are doing changes on your website and want to check changes made to your site immediately, then enable development mode.
But make sure to disable it after done with changes, as this can increase the origin server load.
Enable query string sort – premium version
Cloudflare will treat files with the same query strings as the same file in the cache, regardless of the order of the query strings.
10. Workers
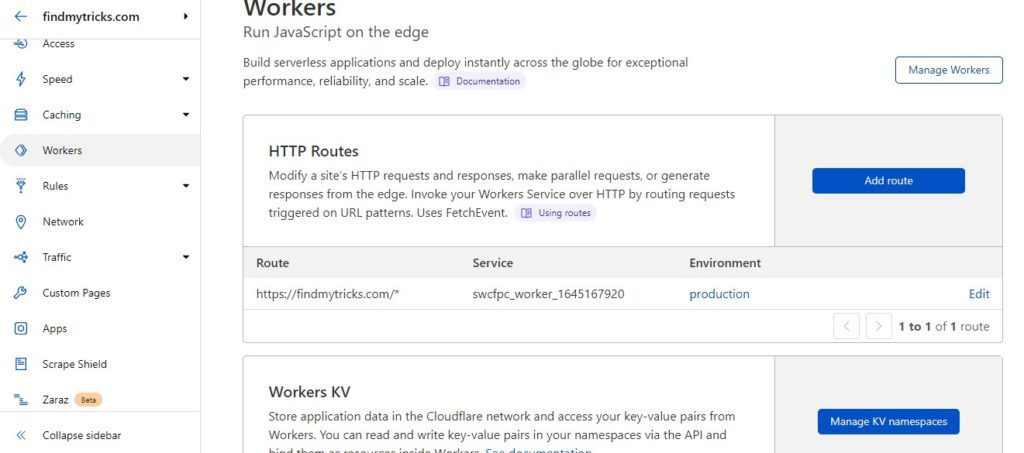
If you are using Cloudflare super cache plugin then this will be automatically added by Cloudflare.
I enabled the worker mode in the plugin to avoid URLs with swcfpc at the end.
11. Page Rules
The page rule setup allows you to customize how you want Cloudflare to work on some of your specific pages.
Cloudflare is quite useful in securing the most important pages on your WordPress site like the WPadmin area, login page, etc.
The Cloudflare account is limited to three-page rules.
However, if you are interested in adding new page rules, you will be charged $5 on a monthly basis.
This package unlocks 5 more additional rules.
However, in this guide, I will be using the free plan.
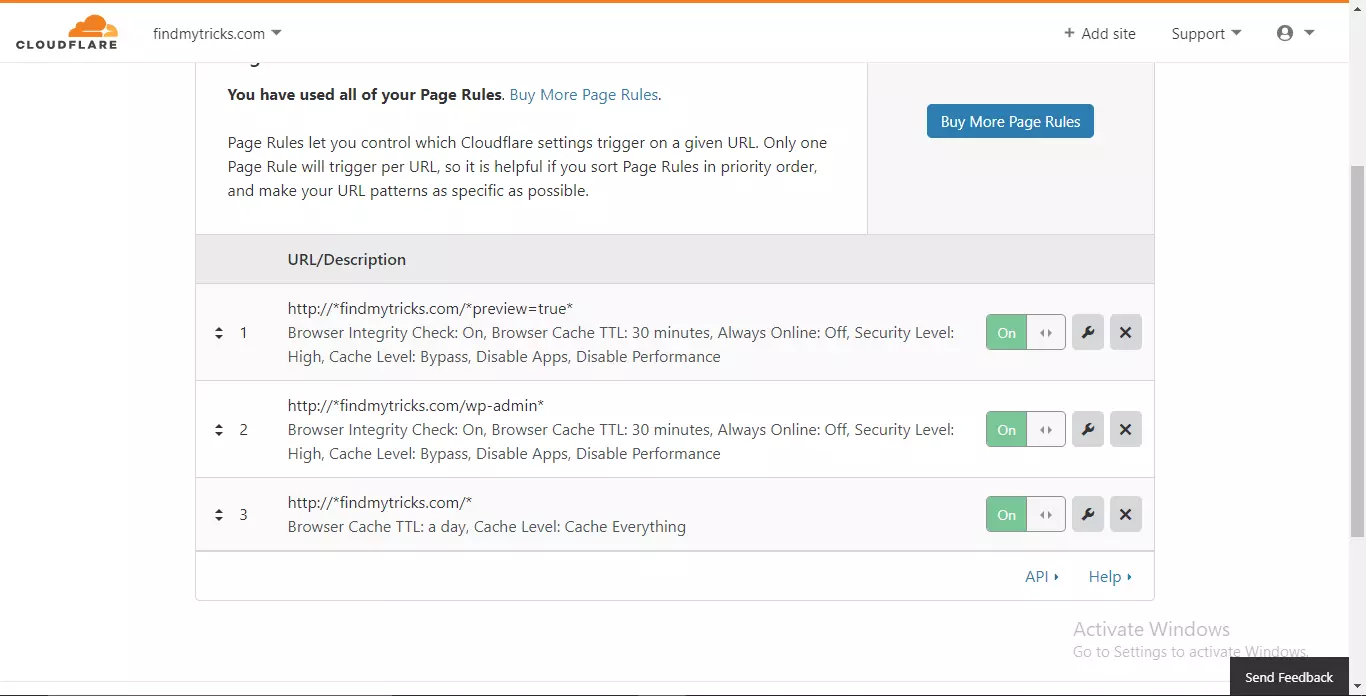
From the image below, you can see that I have already created my page rules, but not to worry, I will walk you through the process of setting yours up.
I have set different page rules for my website but I will tell you different page rules because they are more important.
To set up page rules:
First, navigate to the page rules option at the top of your Cloudflare homepage.
Click on the ‘create page rule’ button
Page rule 1 (For Caching)
Click on the Create Page rule.
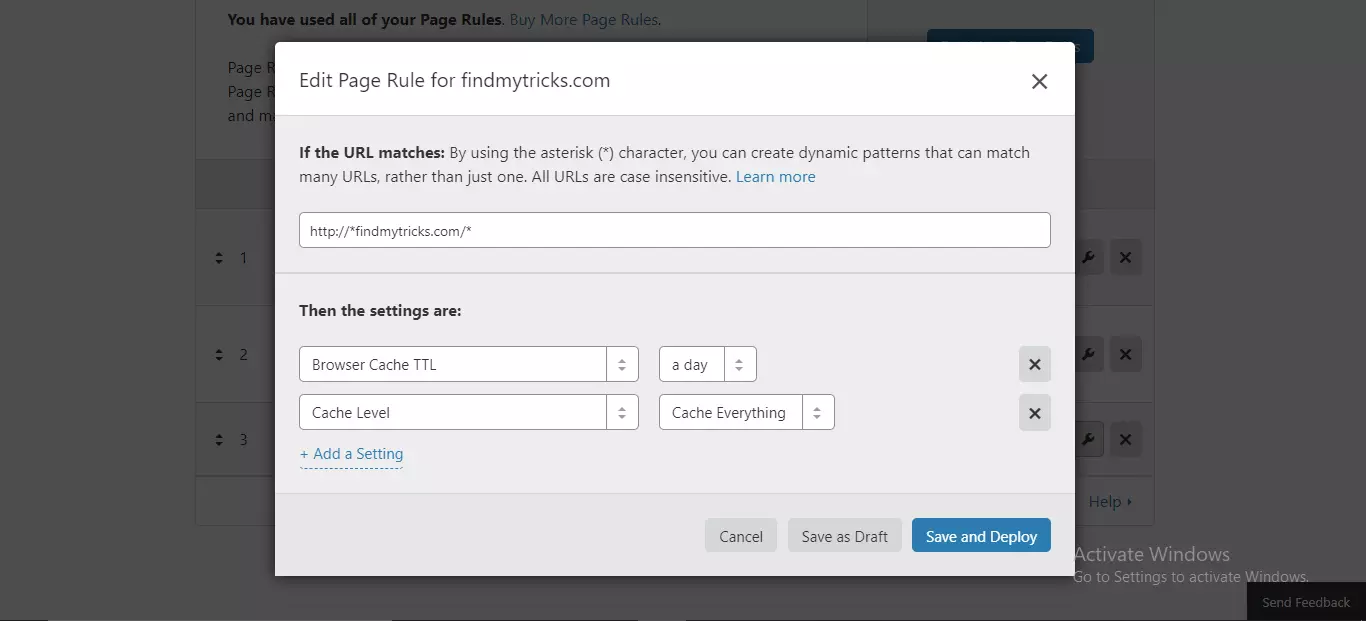
Enter your website name,
Okay, let me show you an example of my website.
findmytricks.com/* (for those who don’t have an SSL certificate)
https://*findmytricks.com/* (for SSL certificate users)
Add a setting (click)
select
Browser cache TTL – a day
Cache Level – cache everything
Save
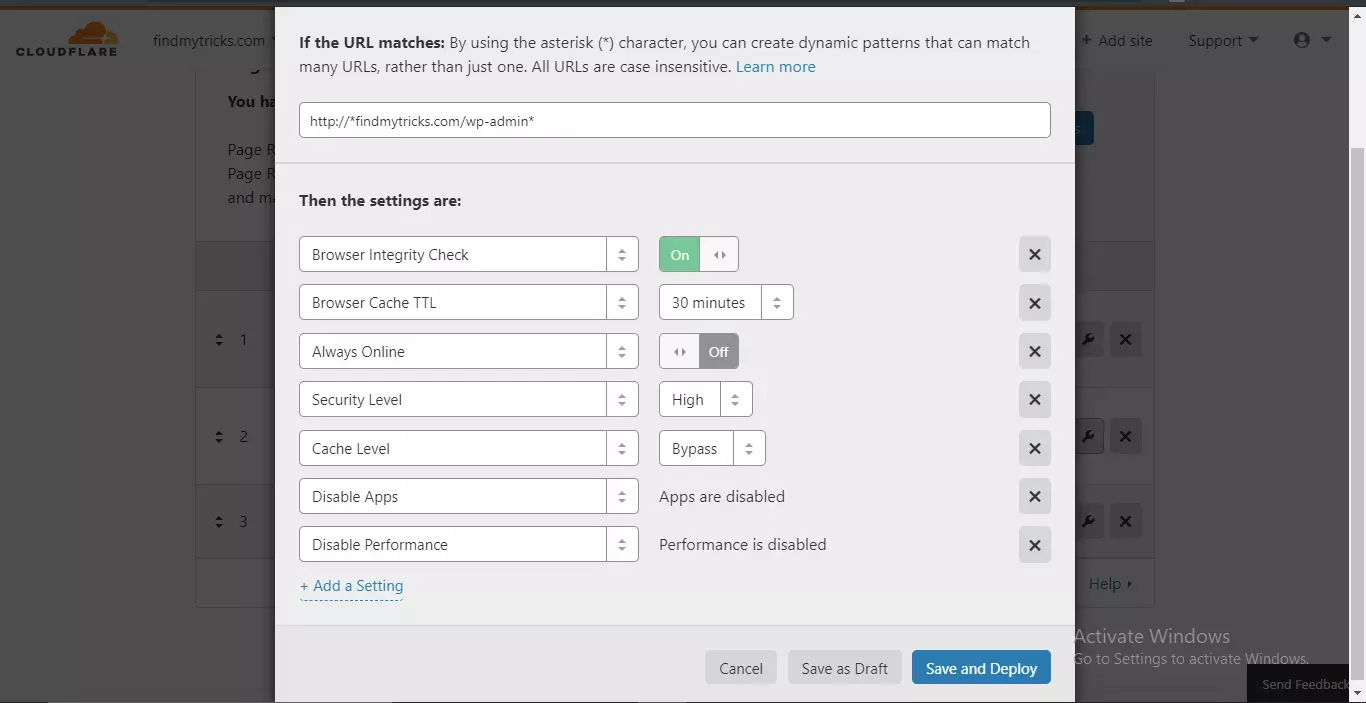
Page Rule 2 (For the Security of Login Page)
Create a new page rule.
Enter your website name
https://*findmytricks.com/wp-admin* (for SSL certificate users)
findmytricks.com/wp-admin* (for non-SSL certificate users)
Add a setting
Select
Browser integrity check – ON
(With this Cloudflare will stop blocklisted IP addresses or websites to visit your websites and make harm.)
Always online – Off
Security level – High
Browser Cache TTL – 30 minutes
Disable apps – apps are disabled
Disable performance – performance is disabled
Save
Page Rule 3 (For Security)
Create a new page rule
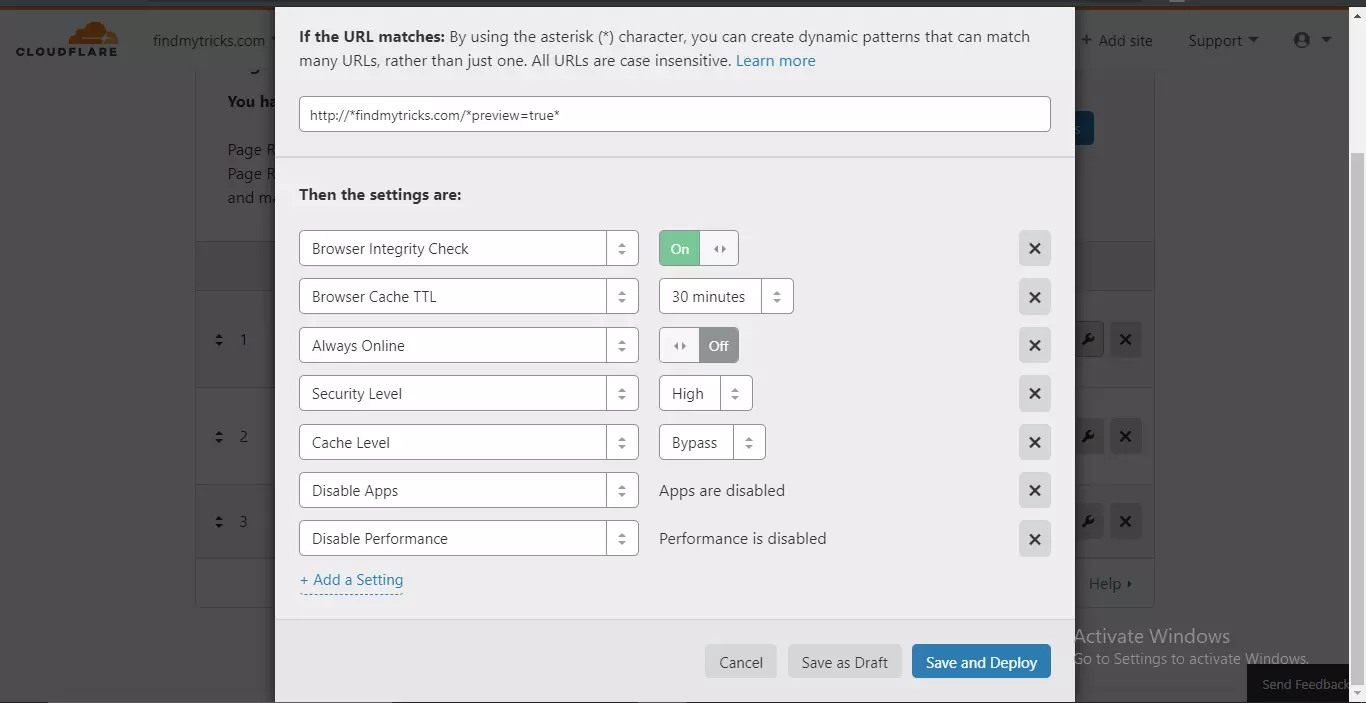
Enter https://*findmytricks.com/*preview=true* (for SSL Certificate users)
findmytricks.com/*preview=true* (for non-SSL certificate users)
Add a setting
Select
Browser Integrity Check – On
Always online – Off
Security level – High
Browser cache TTL – 30 minutes
Cache level – Bypass
Disable apps – Apps are disabled
Disable performance – Performance is disabled
Save
These 3-page rules are recommended, so if you can’t understand anything then just copy these rules.
Note: Changing your domain nameservers can take a few days to propagate the internet.
During this period, your page may or may not face any downtime issues.
To check if the nameservers update has been completed, you will receive a confirmation email from Cloudflare, on the other hand, you can check your status update on the Cloudflare website consecutively.
Following these settings – Page rules are the must haves in your list.
12. Network
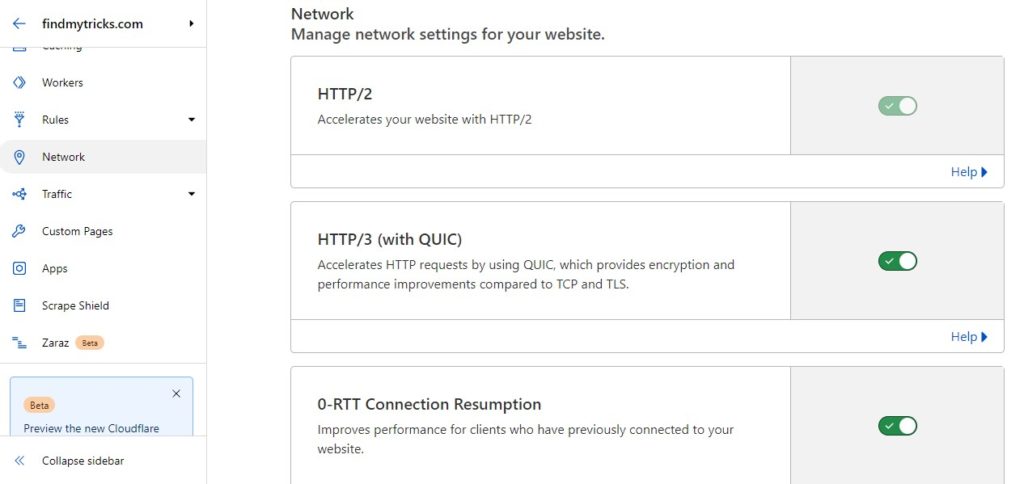
HTTP/2 – by default enabled (you can’t change this)
HTTP/3 QUIC – enable
Accelerates HTTP requests by using QUIC, which provides encryption and performance improvements compared to TCP and TLS.
0-RTT Connection Resumption – enable
Improves performance for clients who have previously connected to your website.
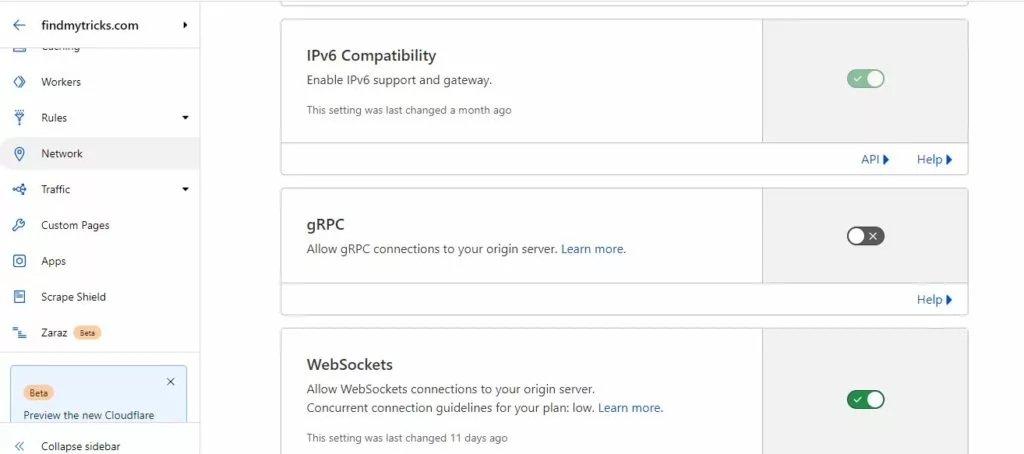
IPv6 Compatibility – by default enabled, nothing to change here
gRPC – disable
Cloudflare offers support for gRPC to protect your APIs on any orange-clouded gRPC endpoints.
However, there are some complications and requirements to use this option.
So, I don’t recommend enabling this, if you don’t know what you are doing.
WebSockets – enable
WebSockets are open connections sustained between the client and the origin server.
This makes exchanging data within a WebSockets connection fast.
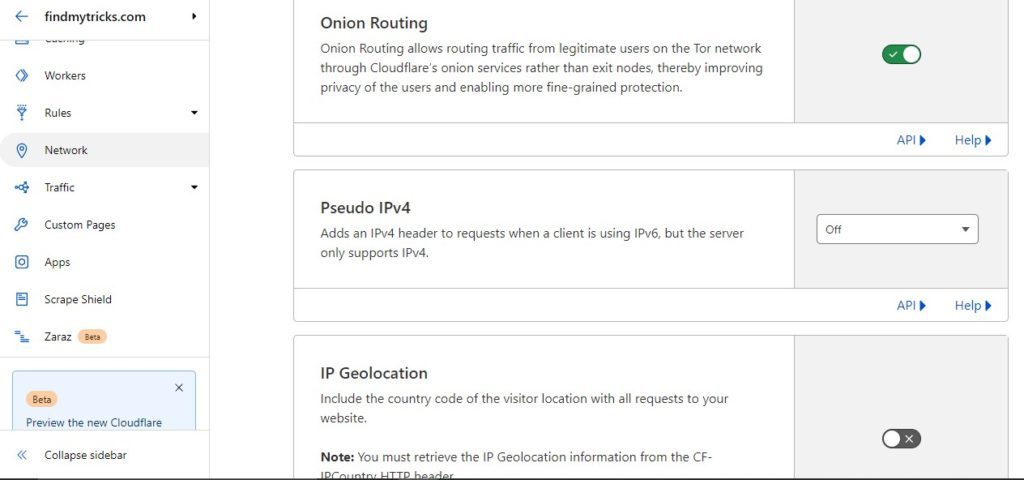
Onion routing – enable
Onion Routing allows routing traffic from legitimate users on the Tor network through Cloudflare’s onion services rather than exit nodes,
thereby improving the privacy of the users and enabling more fine-grained protection.
Pseudo IPv4 – disable
It is not necessary as it adds an IPv4 header to requests when a client is using IPv6, but the server only supports IPv4.
IP Geolocation – disable
Cloudflare can geolocate visitors to your website and pass the country code on to you.
Once enabled, Cloudflare will add an HTTP header named “CF-IPCountry” to all requests Cloudflare make to your website.
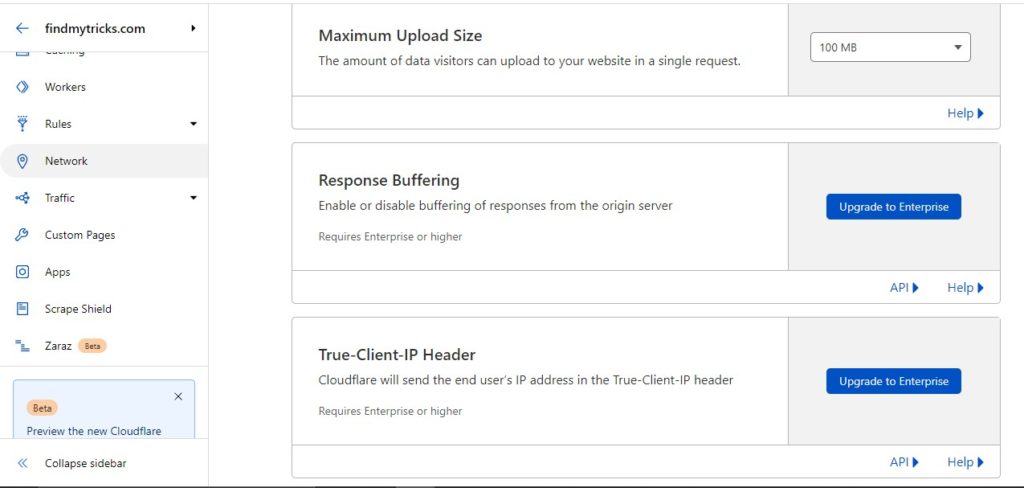
Maximum upload size – 100Mb
As a free user, this is the only option available.
Response Buffering – premium version
Use Response Buffering if you would prefer Cloudflare to deliver a full payload all at once to the client.
True Client IP Header – premium version
If True-Client-IP is enabled, Cloudflare will add a True Client IP header in the request sent to the origin with the IP address of the end user.
By default, Cloudflare sends back packets with a Cloudflare IP address.
True-Client-IP is a solution that allows Cloudflare users to see the end user’s IP address, even when the traffic to the origin is sent directly from Cloudflare.
13. Traffic
Argo
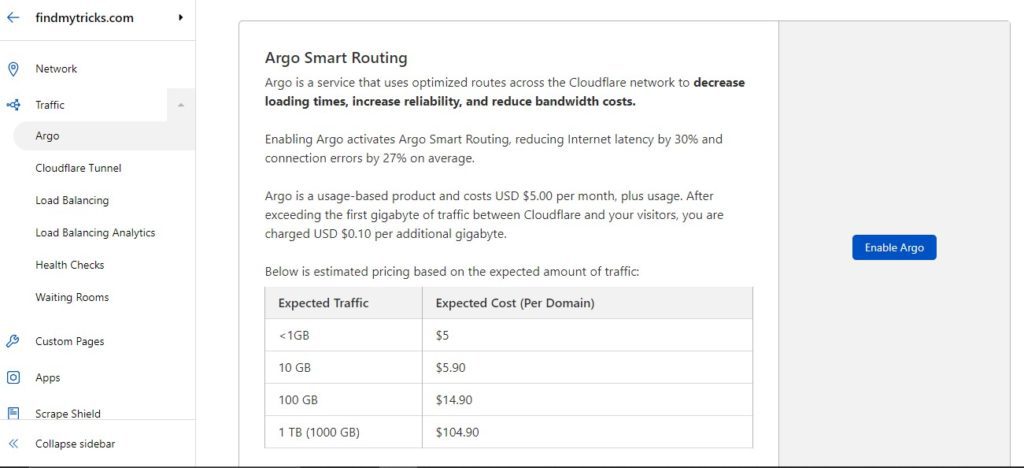
Argo is a service that uses optimized routes across the Cloudflare network to decrease loading times, increase reliability, and reduce bandwidth costs.
Enabling Argo activates Argo Smart Routing, reducing Internet latency by 30% and connection errors by 27% on average.
Argo is a usage-based product and costs USD $5.00 per month, plus usage.
After exceeding the first gigabyte of traffic between Cloudflare and your visitors, you are charged USD $0.10 per additional gigabyte.
Cloudflare Tunnel
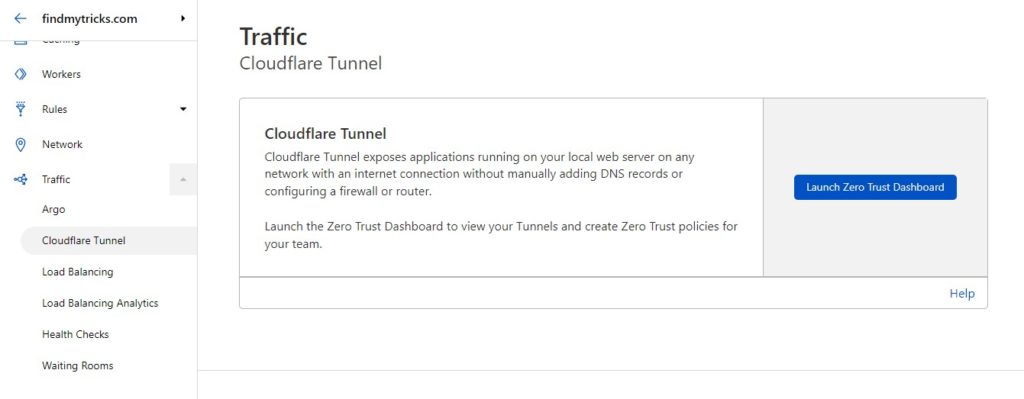
Cloudflare Tunnel provides you with a secure way to connect your resources to Cloudflare without a publicly routable IP address.
If you want then you can launch the Zero Trust Dashboard to view your Tunnels and create Zero Trust policies for your team.
Load Balancing
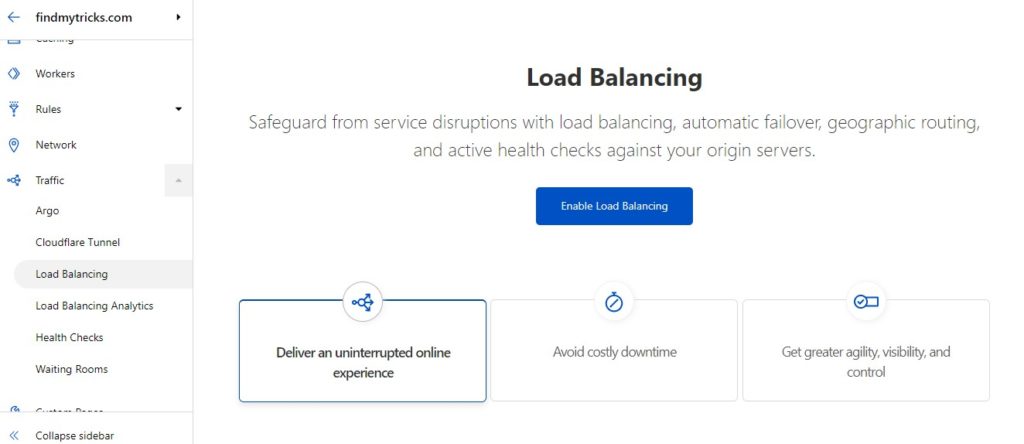
Cloudflare Load Balancing allows you to distribute traffic across your servers, which reduces server strain and latency and improves the experience for end-users.
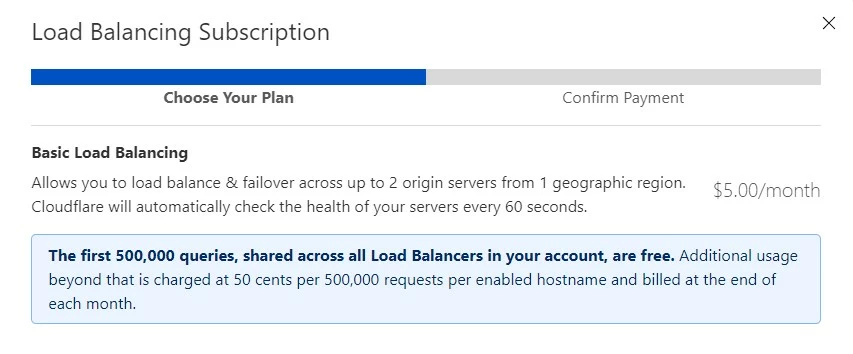
It’s a premium feature.
Load Balancing Analytics
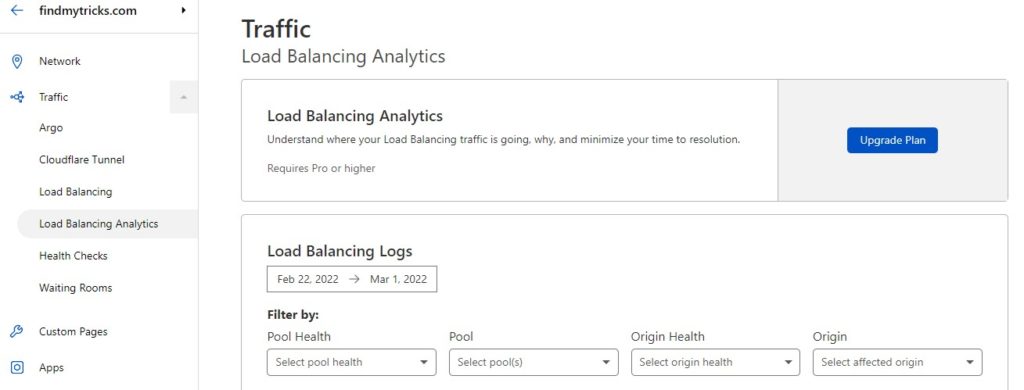
Here you can understand where your Load Balancing traffic is going, why, and minimize your time to resolution.
Health Checks
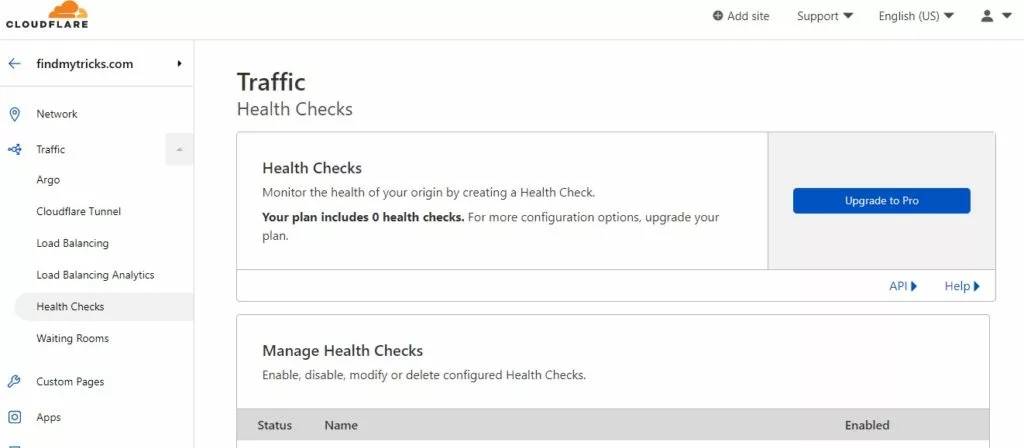
Here you can monitor the health of your origin by creating a Health Check.
Waiting rooms
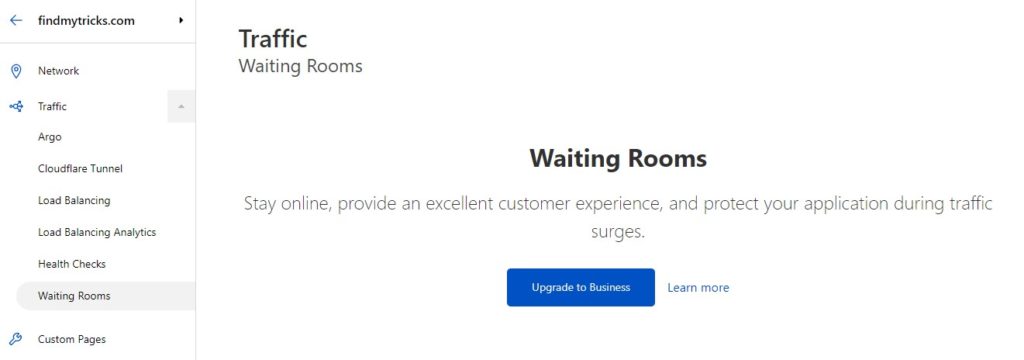
Cloudflare Waiting Room protects websites from surges in legitimate traffic that may otherwise bring an application down.
14. Custom Pages
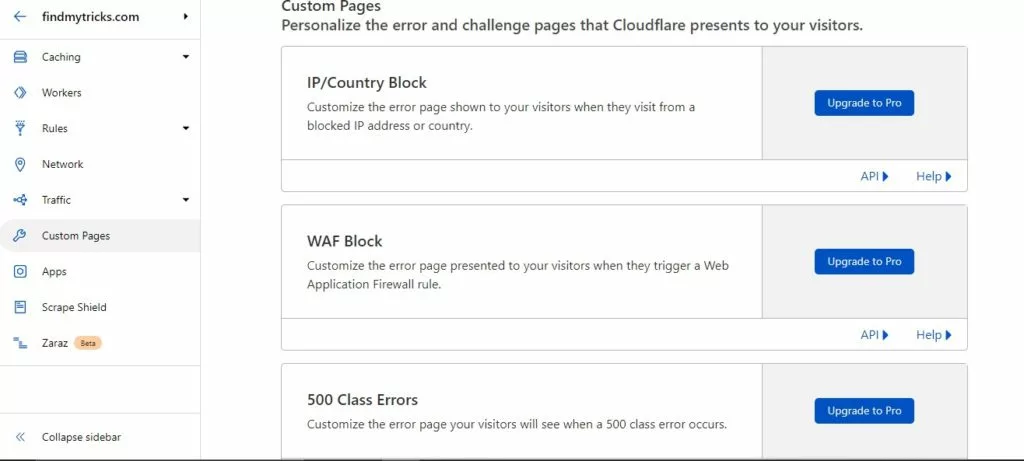
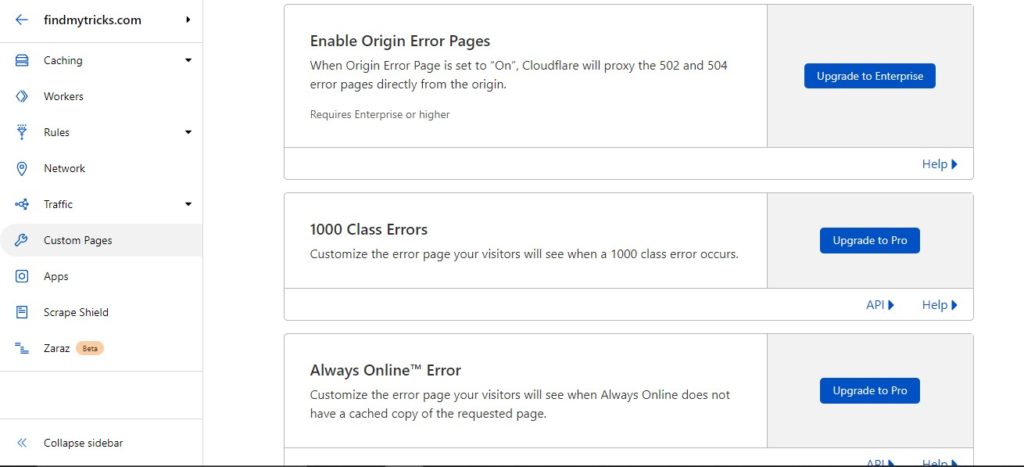
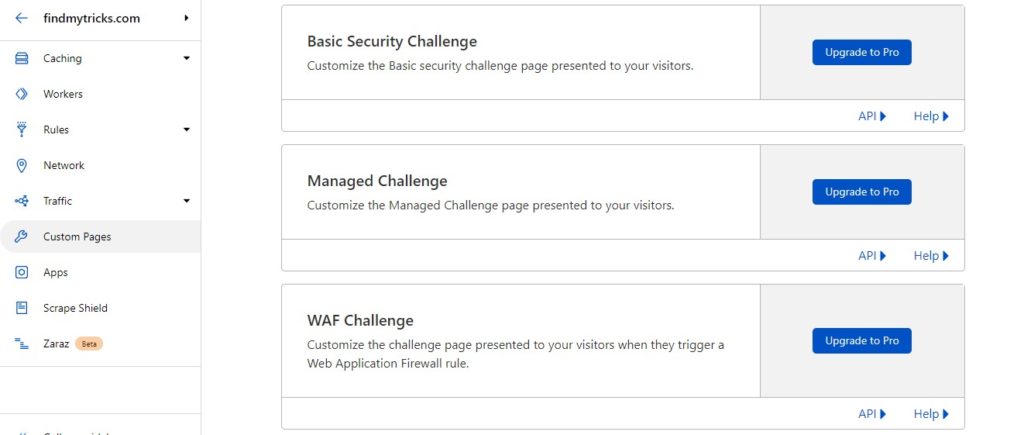
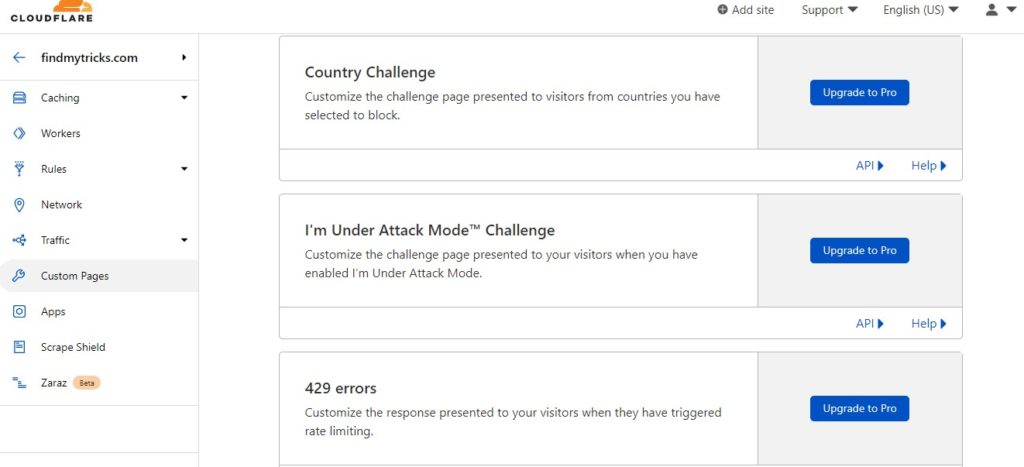
Custom Pages are used to personalize the error and challenge pages that Cloudflare presents to your visitors.
This tab is for premium users.
15. Apps
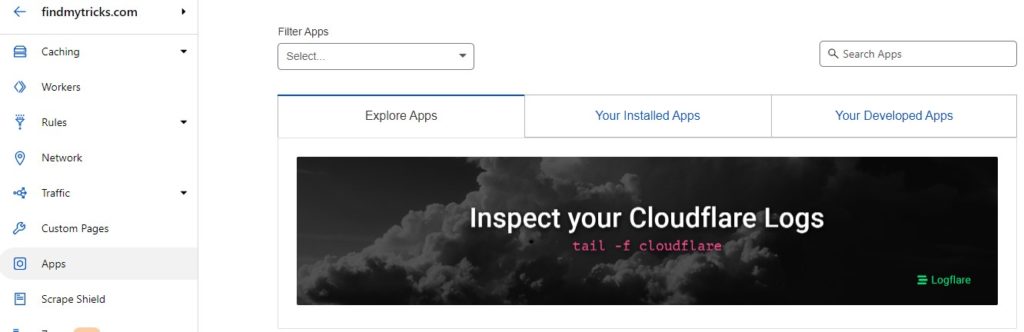
At this tab, you can explore popular apps, install apps and also develop apps.
Basically, this section is for developers and you are here for the best Cloudflare settings so let’s move on to the other tab.
16. Scrape Shield
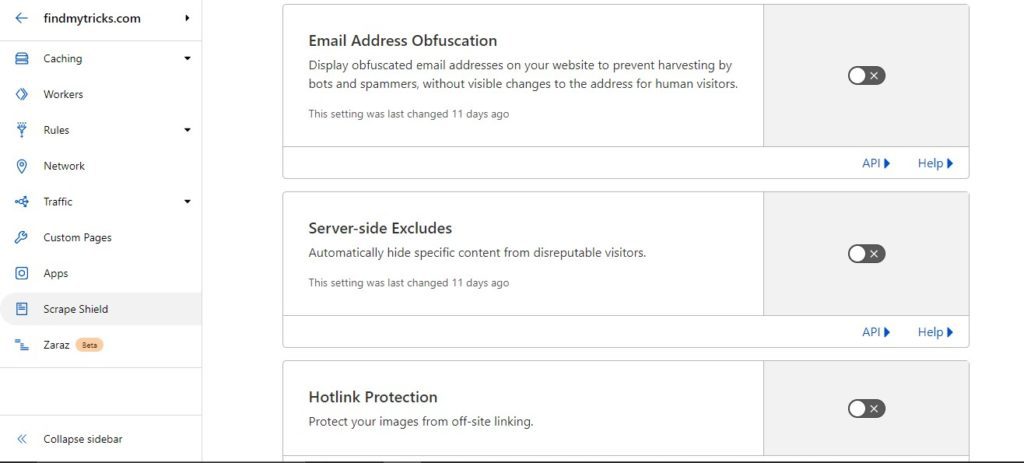
Email Address Obfuscation – disable
Email harvesters and bots are roaming the Internet looking for email addresses to add to their spam lists.
Cloudflare’s Email Address Obfuscation encrypts email addresses on your web pages.
This means that email addresses are hidden from harvesters and bots, but still visible to human visitors.
Email Address Obfuscation is only applied in certain instances.
It will work for email addresses within documents with a MIME type of text/HTML or application/xhtml+xml.
Server-side excludes – disable
This will automatically hide specific content from disreputable visitors.
Place the content you want to hide from disreputable visitors inside the following conditional comment:
<!–sse–> <!–sse–>
Not necessary, right?
Hotlink Protection – disable
Hotlink Protection prevents your images from being used by other sites. This can reduce the bandwidth consumed by your origin server.
Hotlink protection has no impact on crawling, but it will prevent the images from being displayed on sites such as Google Images, Pinterest, etc.
Not recommended.
17. Zaraz

It’s a beta feature by Cloudflare.
Zaraz is for developers who want to run third-party scripts from the cloud. You can check the full documentation here – Cloudflare Zaraz
I am not using this feature right now.
18. Web3
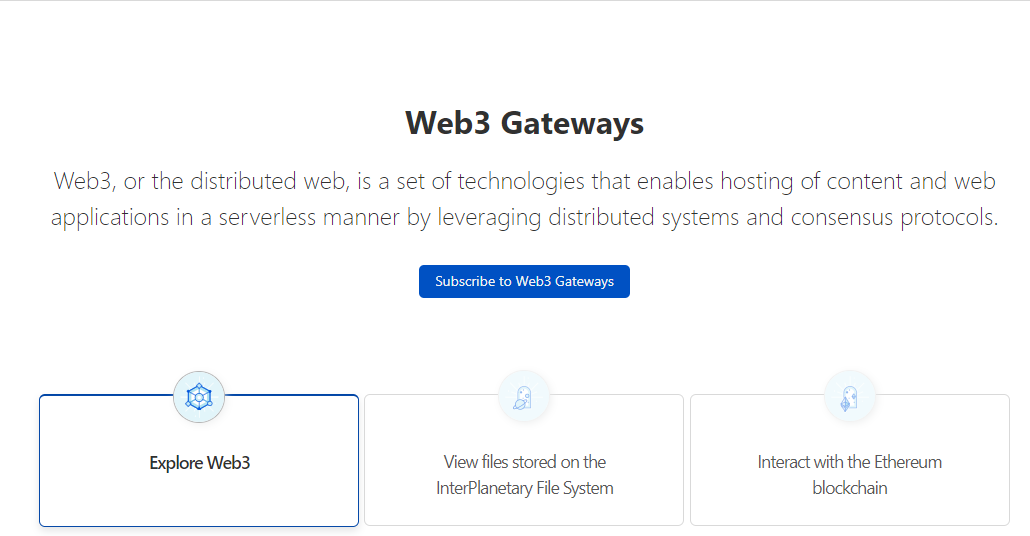
Web3, or the distributed web, is a set of technologies that enables hosting of content and web applications in a serverless manner by leveraging distributed systems and consensus protocols.
BONUS SETTINGS
Now I am done with Cloudflare’s settings, but it’s not over now.
To get the best results you need to set up Cloudflare super page cache plugin in WordPress.
I know you have a question…..Why?
Let me clear,
When you check your page speed in Gtmetrix or Google Pagespeed Insights, one thing is always common for almost every user:
Reduce initial server response time‘
You always look for the solution by searching how to reduce initial server response time, how to reduce TTFB time and in the end what solutions you get…
“choose a good hosting, upgrade your hosting plan, check bloated plugins, change the theme and all other shits….”
Yes, these things matter but not for every question asked on Google. For every question, they paste the same solution.
Want a proper solution,
Here comes the WP Cloudflare super page cache.
19. WP Cloudflare Super Page Cache Plugin Settings in WordPress
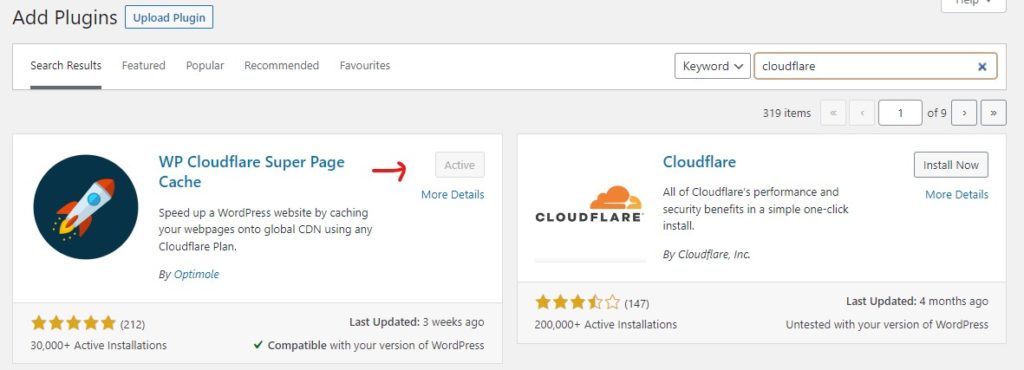
1. Visit the plugin section on your WordPress dashboard
2. Click on “Add new”
3. Type “Cloudflare” into the search query
4. Click on ‘install’
5. Click on ‘Activate’
Once you have activated the plugin, go to Settings> Cloudflare on your WordPress dashboard.
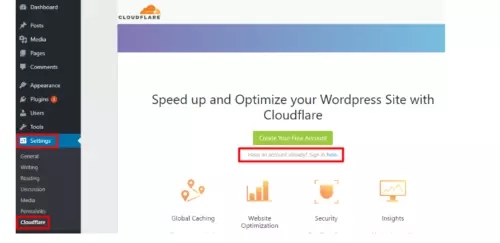
Click the link to sign in.
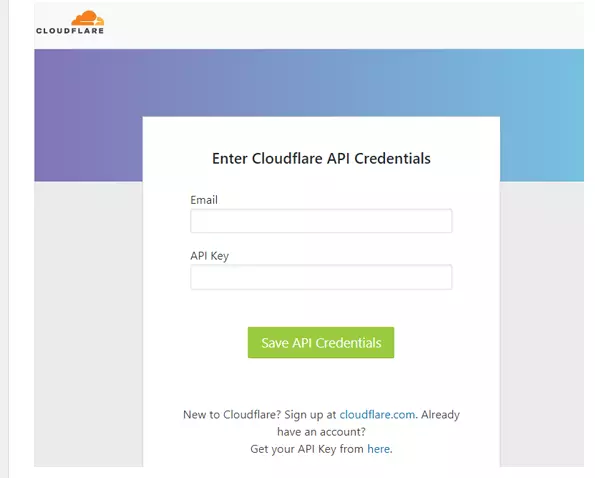
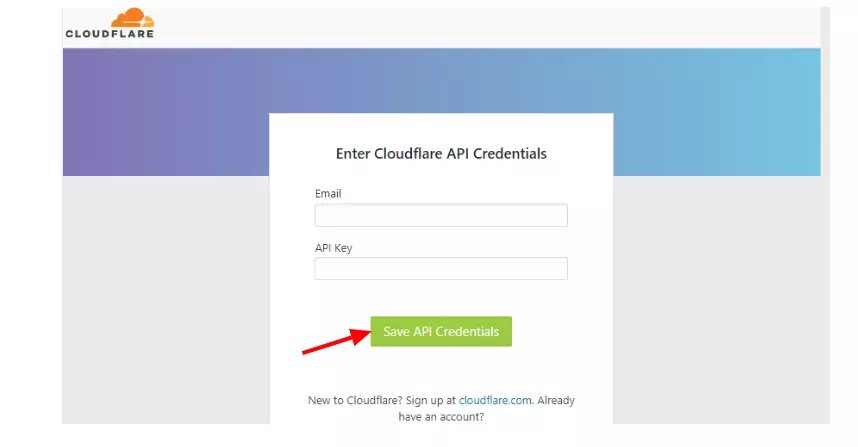
On the next page, you will need to type in your email address and API key.
To get your Cloudflare API key, visit your ‘account area’ on the Cloudflare website.
Simply navigate to the “My Profile page, open and click on the API tokens as displayed below.
After that, navigate to the global API key sections.
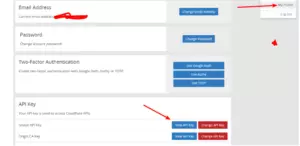
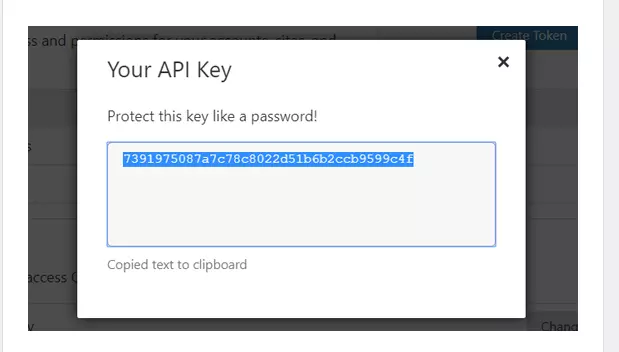
Click on the ” View” button and submit your Cloudflare password to get your API key.
Your API key will be displayed as a popup message.
Copy the key.
Return to your WordPress dashboard to enter your email address and API key.
Click on the “Save API credentials”.
Now enable page caching.
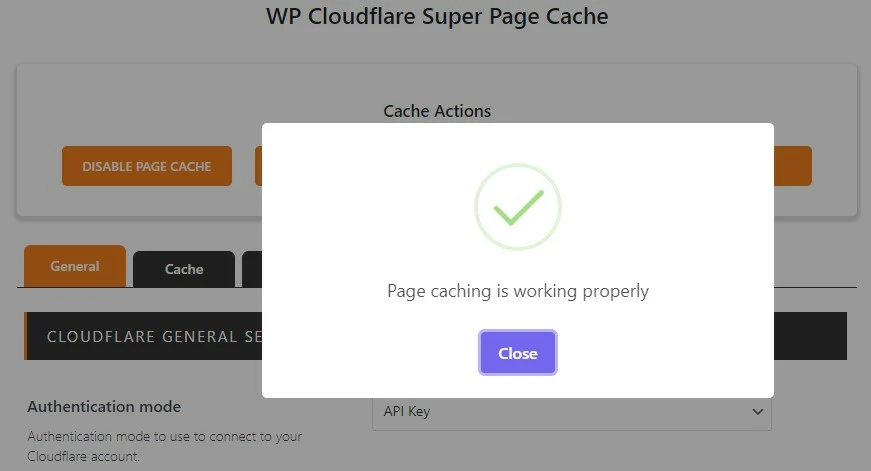
Test the cache if it’s working or not.
Done.
The default settings are working properly. No need to change other settings.
If you are using any other cache plugin then deactivate it.
Great… all settings are done, now go and check Gtmetrix or Google Pagespeed Insights report.
If this helps then don’t forget to mention it in the comments section.
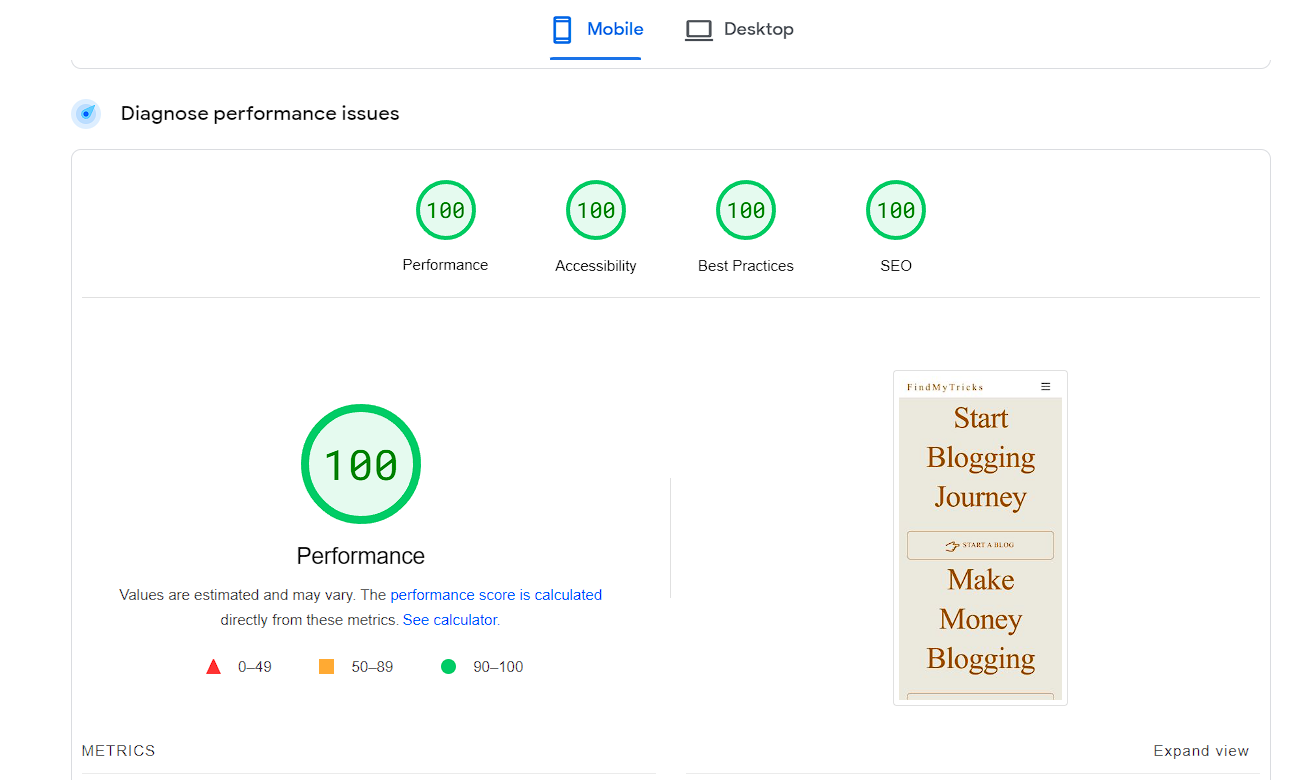
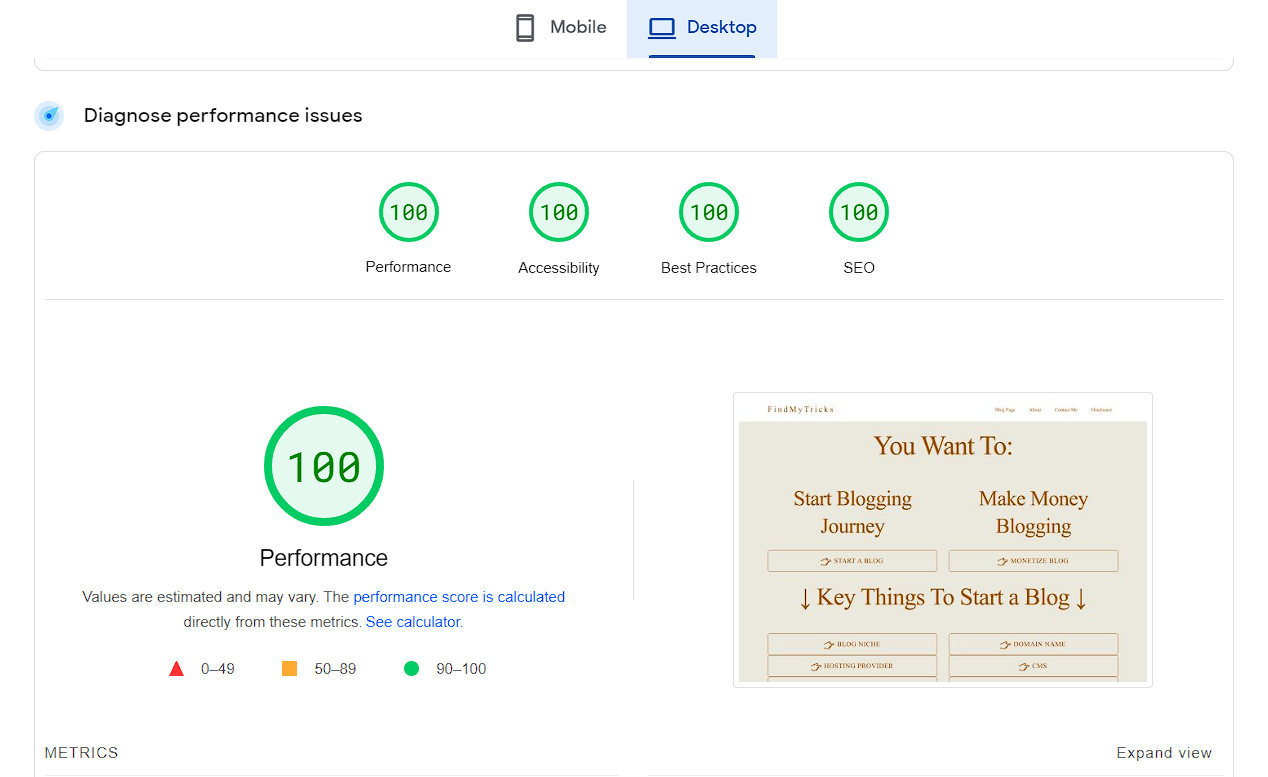
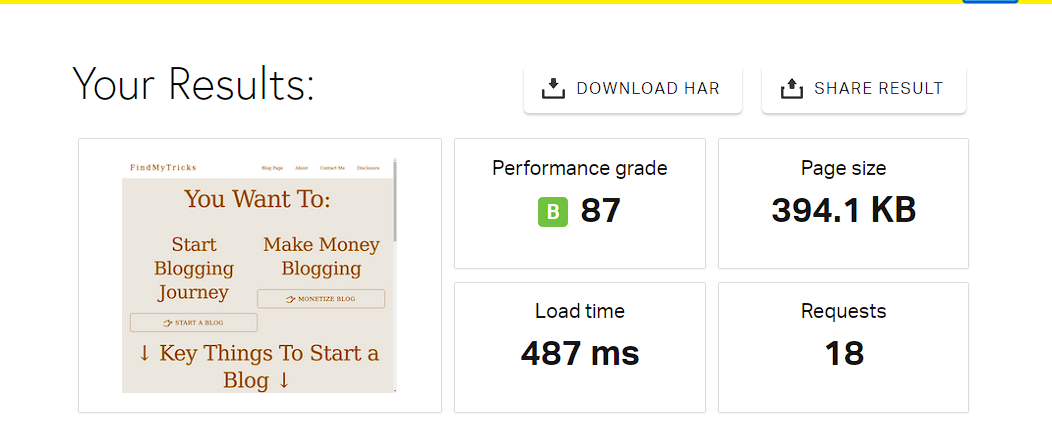
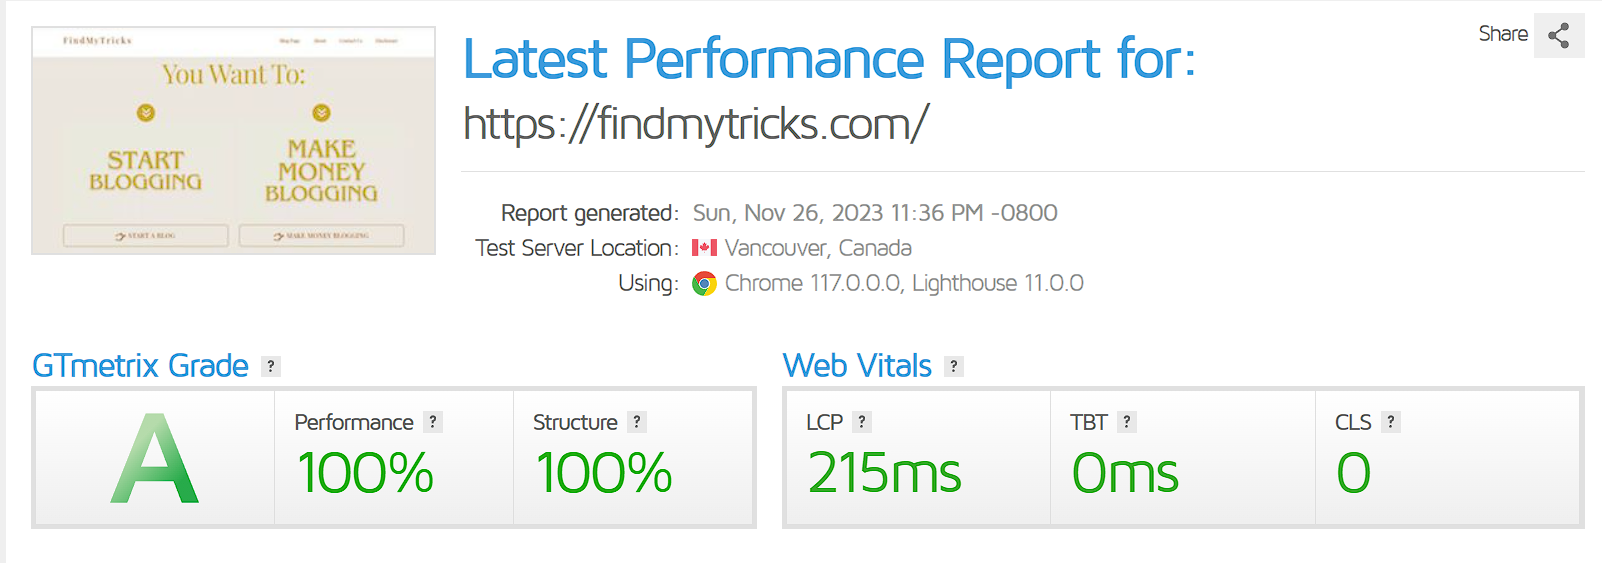
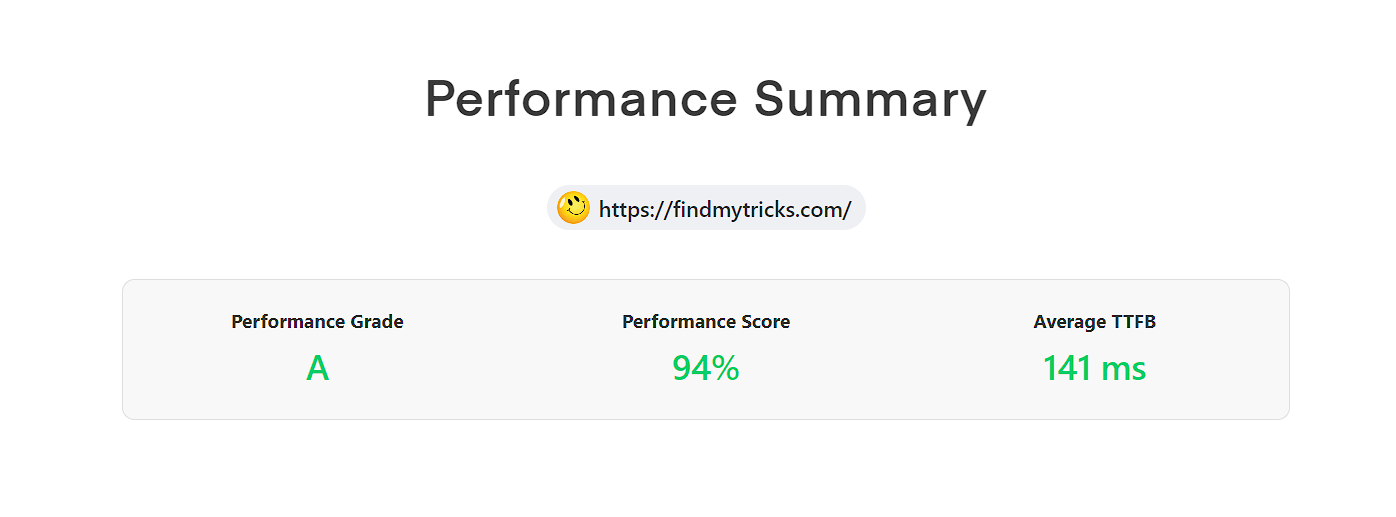
20. My page speed score reports
These are my scores after applying Cloudflare’s best settings.
My Full Setup = Cloudways Hosting + Themify Ultra Theme + Cloudflare CDN + Cloudflare Super Page Cache Plugin
Wrapping Up
Configuring these settings for your website can significantly improve its performance, security, and reliability.
Fine-tuning features like caching, security, and content optimization can ensure you a better user experience and protect your site from online threats.
Make sure to customize these Cloudflare settings according to your specific needs and regularly review and adjust them to keep your website running at its best.
Cloudflare’s flexible options can help you achieve a faster and safer online presence, making it a valuable tool for website owners.
Have questions, comment below.
Neal Umphred
October 22, 2023 @ 6:29 pm
Thanks.
Next, I will be reading your articles on getting more traffic from Pinterest and Quora.
Ajmer Singh
October 22, 2023 @ 7:16 pm
Great 🙂
Neal Umphred
October 22, 2023 @ 12:21 pm
AJMER
I used this site for instructions on setting up Super Page Cache for Cloudflare with LiteSpeed Cache: https://webspeedtools.com/litespeed-cache-cloudflare/#What_Is_LiteSpeed_Cache
Results were superb: on GTMetrix, LCP improved from 646ms to 160ms (TBT and CLS remained at 0).
On PageSpeed Insights, all numbers improved on both the mobile and desktop tests.
Needless to say, I am very pleased with these superb results.
Thanks again for your article above.
Keep on keepin’ on!
NEAL
Ajmer Singh
October 22, 2023 @ 12:35 pm
I am very glad it helps.
Stay Safe and Happy Blogging.
Neal Umphred
October 16, 2023 @ 6:29 am
AJMER
Thanks for the article and the instructions/suggestions.
I use LiteSpeed Cache.
Are you suggesting I replace LiteSpeed with WP Cloudflare Super Page Cache?
Or are the two compatible? If so, what would the settings for each plugin be?
NEAL
Ajmer Singh
October 16, 2023 @ 3:44 pm
Litespeed cache is compatible with WP Cloudflare Super Page cache. Let me know the results after this plugin…
Arjun
March 6, 2023 @ 1:20 pm
Hey.. thanks for the article… I got a doubt
https://*findmytricks.com/wp.admin* … are you sure its wp.admin ?
Cuz usually login URL is will wp-admin right ? Hence the URL should be https://*findmytricks.com/wp-admin* in this format know?
Ajmer Singh
March 6, 2023 @ 2:51 pm
Hi Arjun, Thank you for noticing.
Yes, that’s a typing mistake. Correct URL should be https://*findmytricks.com/wp-admin*
JJ
May 26, 2022 @ 10:43 pm
Could you add additional setup for autoptimize and themify builder?
Ajmer Singh
May 27, 2022 @ 12:24 pm
Autoptimize Settings: https://findmytricks.com/autoptimize-best-settings-configuration-for-wordpress/
Themify Builder Settings: https://findmytricks.com/themify-ultra-builder-settings/