WordPress Favicon – Meaning, Definition, Size, How to Add and Change
Estimated reading time: 5 minutes
Last updated on March 26th, 2024 at 07:16 am
Do you want to know “How to Add WordPress Favicon”?
Imagine you’re walking down a busy street, trying to find a specific shop.
You look for its unique sign or logo to spot it among the crowd.
Well, a favicon is like that little sign for your website.
It’s a small icon that appears in your browser’s tab when someone visits your site.
It might seem tiny, but it plays a big role in helping people recognize and remember your website.
Did you know that having a favicon can make your website look more professional?
Studies have shown that websites with favicons are perceived as more credible and trustworthy by visitors.
Plus, it helps your site stand out in a sea of tabs!
Around 50% of internet users open multiple tabs while browsing, so having a distinctive favicon can make it easier for them to find your site again.
So, don’t underestimate the power of the WordPress favicon.
It’s a small detail that can make a big difference in how people perceive and remember your website!
What Exactly is WordPress Favicon?
Imagine you’re browsing the internet, and you see a tiny icon next to the website name in the browser tab.
That’s a favicon!
In simple terms, it’s like a tiny logo for a website.
For WordPress, it’s the small image that appears in your browser tab when you visit a WordPress site.
It helps make your site recognizable among many tabs open in a browser.
Favicon comes from “favourite icon,” and it’s a neat way to brand your website.
Fun fact: WordPress powers around 40% of all websites on the internet, so there are millions of WordPress favicons out there!
Ideal Size for WordPress Favicon
Just like when you’re picking a profile picture for social media, you want your favicon to look sharp and clear, even when it’s tiny.
The ideal size for a WordPress favicon is usually 512×512 pixels.
That might sound big, but remember, it shrinks down to a tiny icon, so you want to start with a larger image to maintain quality.
Once you have your 512×512 pixel image, WordPress will automatically resize it to fit different devices and browsers.
So, aim for that size to ensure your favicon looks crisp and professional across all platforms!
Step-by-Step Guide: Adding Favicon to WordPress
Adding a favicon to your WordPress site is like giving it a finishing touch, making it look more polished and professional.
Here’s a simple step-by-step guide:
1. Choose or create your favicon: Start by selecting or designing an image that represents your website well.
Remember, it should be square and ideally 512×512 pixels for best results.
2. Convert your image to a favicon format: You’ll need to convert your image into a .ico file format, which is the standard for favicons.
There are many online tools available that can help you do this for free.
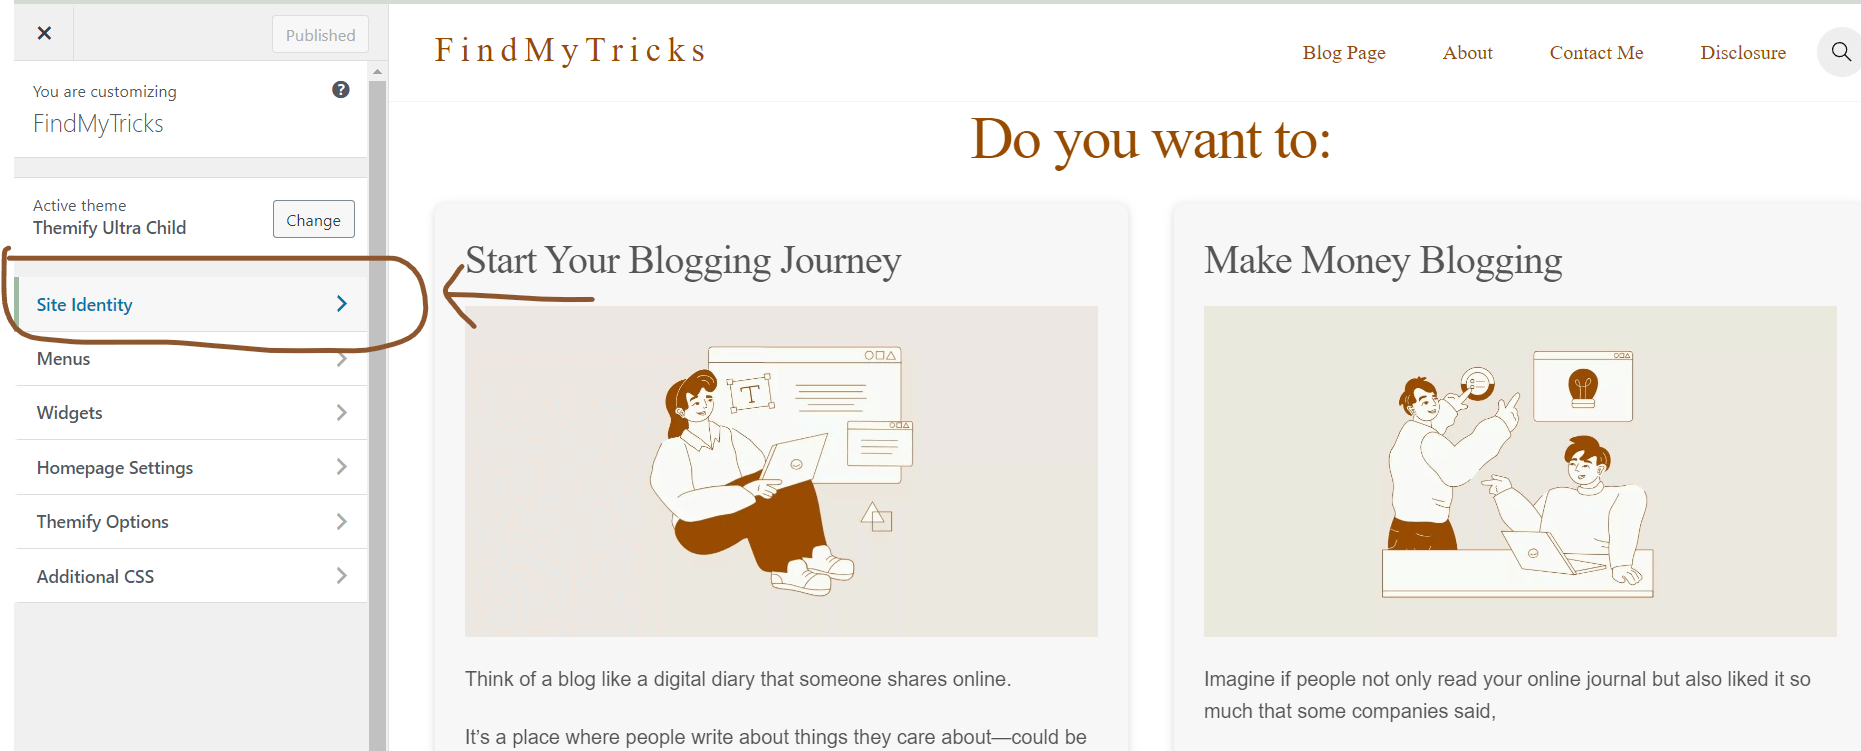
3. Upload your favicon to WordPress: Log in to your WordPress dashboard, go to Appearance > Customize, and look for the “Site Identity” or “Site Icon” option.
Upload your favicon file here.
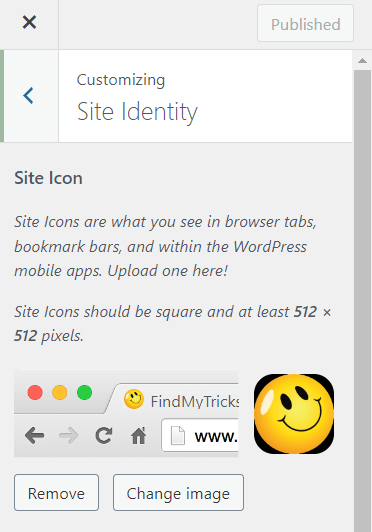
4. Save your changes: Once you’ve uploaded your favicon, don’t forget to save your changes.
Your new favicon should now be visible in the browser tab whenever someone visits your site!
How to Change Favicon in WordPress Theme?
If you want to change the favicon in your WordPress theme to match your site’s design or branding, here’s how you can do it:
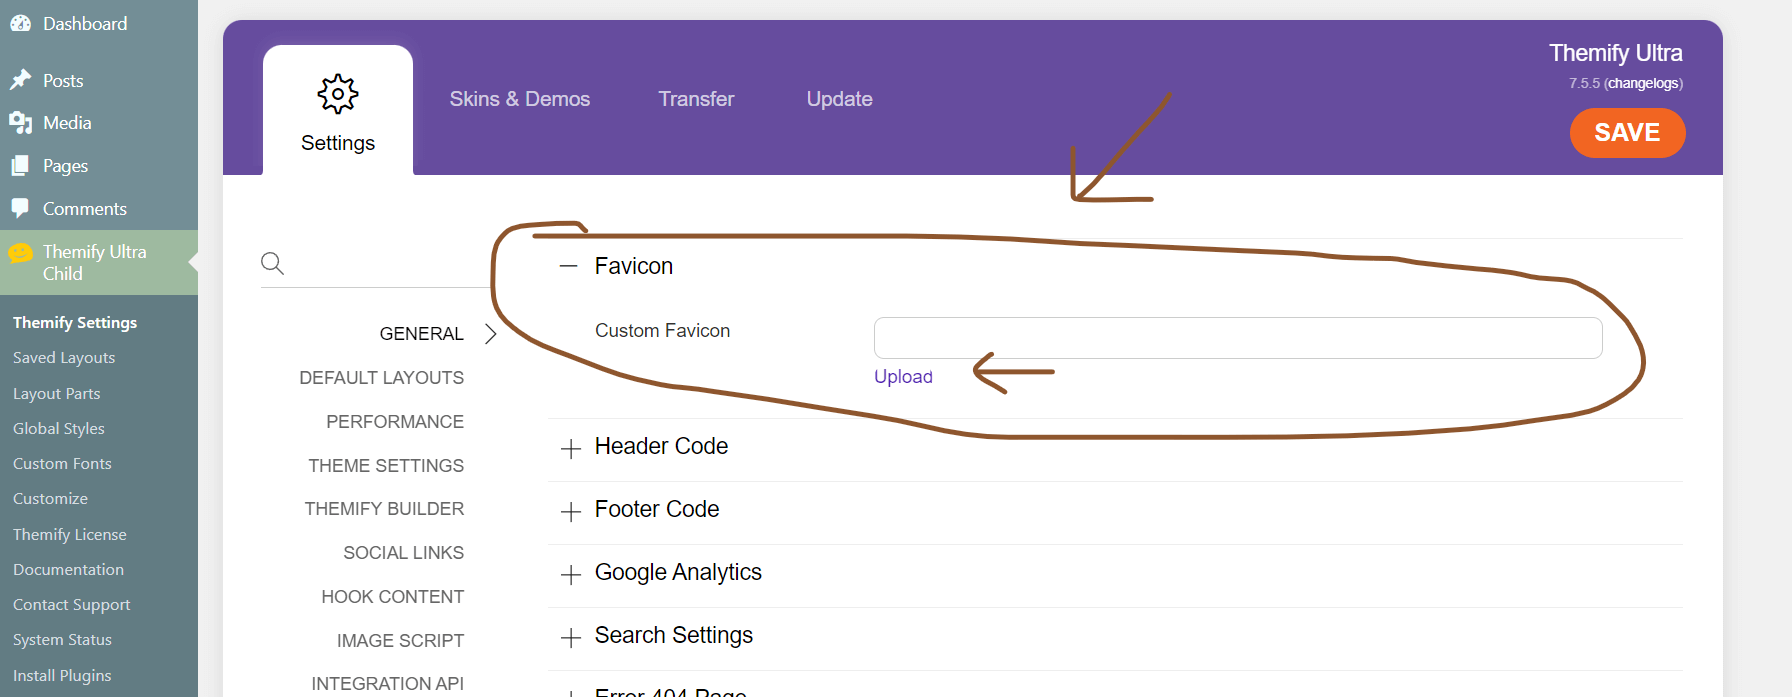
1. Access your theme settings: Depending on your WordPress theme, you may find the option to change the favicon within the theme settings or customization options.
2. Upload your new favicon: Look for the section where you can upload a custom favicon image.
Follow the same steps as mentioned earlier for choosing and converting your image.
3. Save your changes: Once you’ve uploaded the new favicon, remember to save your changes.
Your theme should now display the updated favicon across your site.
In my Theme, there is an option where you can directly upload the favicon.
Best Practices for Favicon Optimization
Optimizing your favicon ensures that it looks great and loads quickly on all devices. Here are some best practices to follow:
1. Keep it simple: Since favicons are tiny, intricate designs may not translate well. Stick to simple, recognizable images.
2. Use a transparent background: A transparent background helps your favicon blend seamlessly with different browser themes.
3. Test across devices: Make sure to test your favicon on various devices and browsers to ensure it displays correctly everywhere.
4. Optimize file size: Aim for a small file size without sacrificing quality to ensure fast loading times.
5. Consider accessibility: Ensure your favicon is visible and identifiable to users with visual impairments by using clear shapes or symbols.
Wrapping Up – How to Add WordPress Favicon
Adding a favicon to your WordPress website is like putting a tiny logo or symbol in the corner of a browser tab.
It’s a small detail, but it makes your site look more polished and professional.
Just follow the steps I’ve discussed, pick a small image that represents your site well, and voila!
Your website will stand out more and look better to visitors. It’s an easy way to make a big difference.