The Importance of SSL: Securing Your WordPress Site with HTTPS
Estimated reading time: 7 minutes
Last updated on May 20th, 2024 at 07:09 am
Imagine sending a postcard with personal information, and anyone who picks it up can read it. Not very safe, right?
An SSL certificate is like a magical shield that protects the information going between your computer and a website.
It encrypts the data, making it unreadable for anyone trying to snoop.
Did you know that 85% of people won’t continue browsing if a website is not secure?
That’s because, without SSL, sensitive information like passwords or credit card details can be easily intercepted by hackers.
Google also loves secure sites.
They’ve been using SSL as a ranking factor, meaning secure websites get a little boost in search rankings.
Around 94% of web users are more likely to trust a website with an SSL certificate.
What exactly is an SSL Certificate?

Imagine you’re sending a letter through the mail, and you want to make sure nobody can peek at it while it’s on its way.
An SSL certificate is like a special envelope that you put your letter in.
This envelope has a lock on it, and only the person you’re sending the letter to has the key to open it.
Similarly, websites also send and receive information, like passwords or credit card details.
An SSL certificate is like that special envelope, and it’s used to keep this information safe while it travels from your computer to the website you’re using.
It ensures that only you and the website can understand the information, and nobody else can spy on it.
Why SSL Certificates Matter?
Imagine sending a postcard with your personal details for everyone to see. Not cool, right?
Without SSL, it’s like your website is sending information openly.
SSL certificates, on the other hand, encrypt this info, making it unreadable for anyone trying to snoop.
In fact, Google favors websites with SSL.
About 94% of users are more likely to trust a website with HTTPS, which is the secure version thanks to SSL.
Types of SSL Certificates
Just like in the real world, there are different types of envelopes with different levels of security.
SSL certificates also come in various types, and they offer different levels of protection.
Domain Validation (DV): Think of this like a basic envelope. It checks if the website you’re using is who they say they are.
It’s like confirming that the return address on the envelope matches the sender.
Organization Validation (OV): This is like a slightly more secure envelope. It not only checks the website’s identity but also verifies that it’s a legitimate business.
It’s like checking the sender’s ID before sending the letter.
Extended Validation (EV): This is the most secure envelope. It goes through a strict process to confirm the website’s identity and business credentials.
It’s like having a certified, high-security envelope for your important documents.
Wildcard SSL: This is a special type of envelope that can protect multiple pages on a website with a single certificate.
It’s like having one key to open all the envelopes in your mailbox.
Multi-Domain SSL (SAN SSL): This envelope can secure multiple websites or domains with one certificate.
It’s like having one key to open different envelopes for various websites you own.
You can get your SSL certificates for free with Cloudways Web Hosting.
Why did You need to Switch to HTTPS?
Switching to HTTPS is like upgrading from regular postal mail to secure, registered mail with a locked envelope. Here’s why it’s important:
Security: With HTTPS, your data is encrypted and secure as it travels between your computer and the website you’re visiting.
This makes it extremely difficult for hackers to intercept or steal your personal information.
Trust: Websites with HTTPS show a padlock in the address bar, indicating a secure connection.
This builds trust with your users, and they’re more likely to share their information with you or buy things from your website.
SEO Benefits: Search engines like Google prefer secure websites. They may rank HTTPS websites higher in search results, so more people can find your site.
Compliance: Some industries and regulations require websites to use HTTPS to protect user data and maintain privacy standards.
How to Change the URL from HTTP to HTTPS?
The first step to moving from HTTP to HTTPS is to get an SSL certificate.
Hosting providers like Cloudways provide a free SSL certificate with any of their plans.
They install, update and renew the certificate automatically (for free) without any tension from your side.
Looking for a more secure third-party SSL certificate then get it from Godaddy.
After getting an SSL certificate, you need to follow some steps.
1. Install Really Simple SSL plugin
This method is easy to navigate for beginners. Search and install the really simple SSL plugin.
Upon activation, navigate to the Settings>SSL page.
What the plugin does is detect the SSL certificate of your page automatically and it also helps in setting up your WordPress site to use HTTPS.
The plugin fixes the following issues:
- Detects SSL certificate.
- Modifies WordPress to use HTTPS in the URL.
- 301 redirect from HTTP to HTTPS.
- Fixes contents URL still loading from HTTPS sources.
2. Backup your site
Whenever you are about to make a major change to your site, what I advise is that you back up your site first.
This is because if anything goes wrong, you can always go back to the working version.
3. Update your site address
To update your WordPress site address, simply go to the settings>general and add https:// to both URLs, then click on the save changes button at the bottom of the page.
4. Change links containing HTTP to HTTPS
The next step in moving your site from HTTP to HTTPS is to update the links in your content that contain the HTTP protocol.
For easy updates, you can make use of the Velvet Blues update URL plugin.
Links that will be altered include:
- Media (Images, audio files, PDF, videos)
- Internal links
- CSS and Javascript files
- Web fonts
5. Add the 301 redirects in your .htaccess file
The next step you should take in moving your sites to HTTPS is implementing a redirect that leads visitors to the secured version of your site automatically.
To enable this, I will make use of the .htaccess file that is located in the WordPress root directory of your site.
The file contains settings for permalinks, so it’s very possible you have one already.
To locate it, allow your FTP clients to show hidden files because by default the .htaccess is invisible.
If you don’t have one, simply create a plain text file and name it .htaccess, then upload it to the WordPress root directory of your site.
RewriteEngine On
RewriteCond %{HTTPS} off
RewriteRule (.*) https://%{HTTP_HOST}%{REQUEST_URI} [L,R=301]
Copy the above code.
With the redirect in place, rest assured that your visitors will be directed to the HTTPS version of your site.
Cross-check to be sure that none of your content is available in HTTP and HTTPS versions.
Duplicate content poses a threat to your site’s SEO.
Note: Most of the good hosting providers will add the rule by itself. So make sure to check before adding the code.
6. Run a test for your site
After the above steps have been implemented, it’s now time to check that your site functions correctly.
To do this, use the SSL test to do a total check-up of your site.
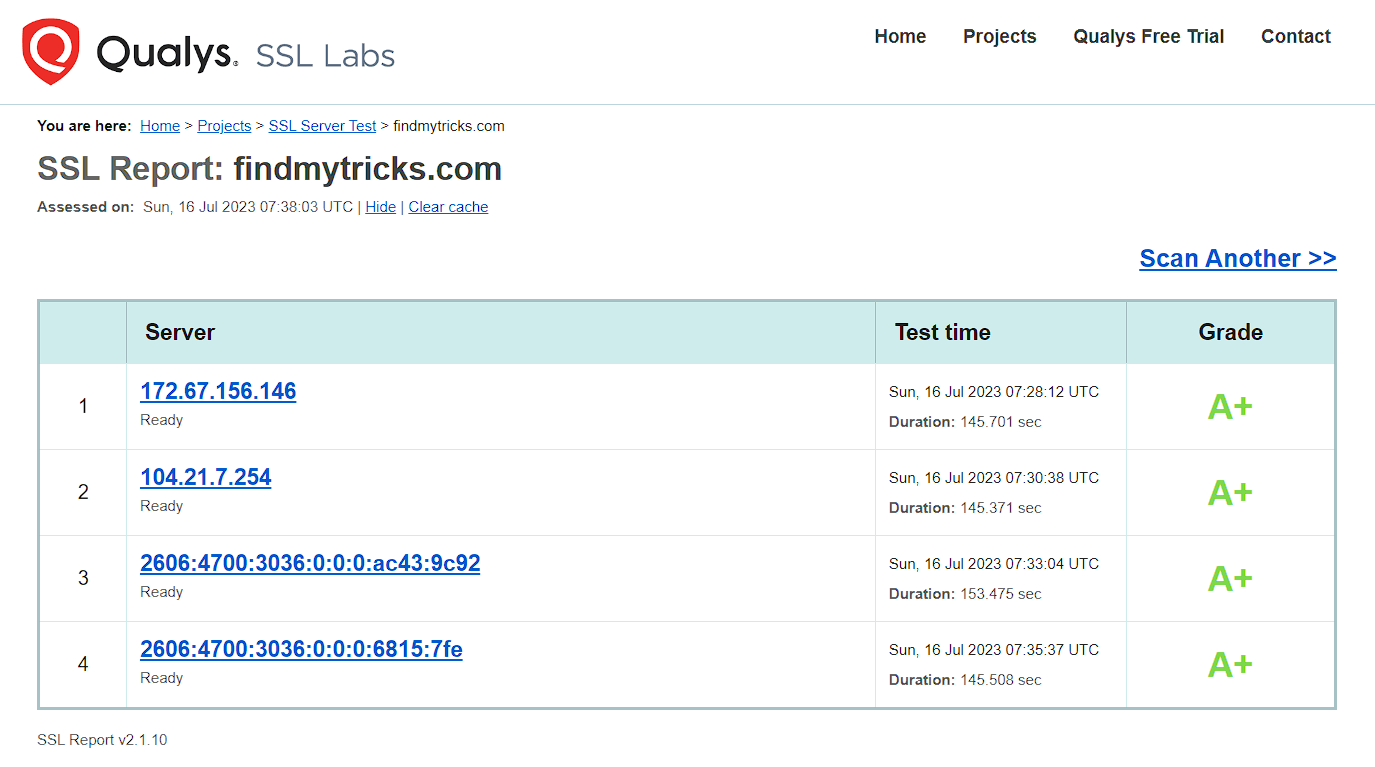
Simply input your site’s URL and click on the submit button. After this is done, patiently wait for your result.
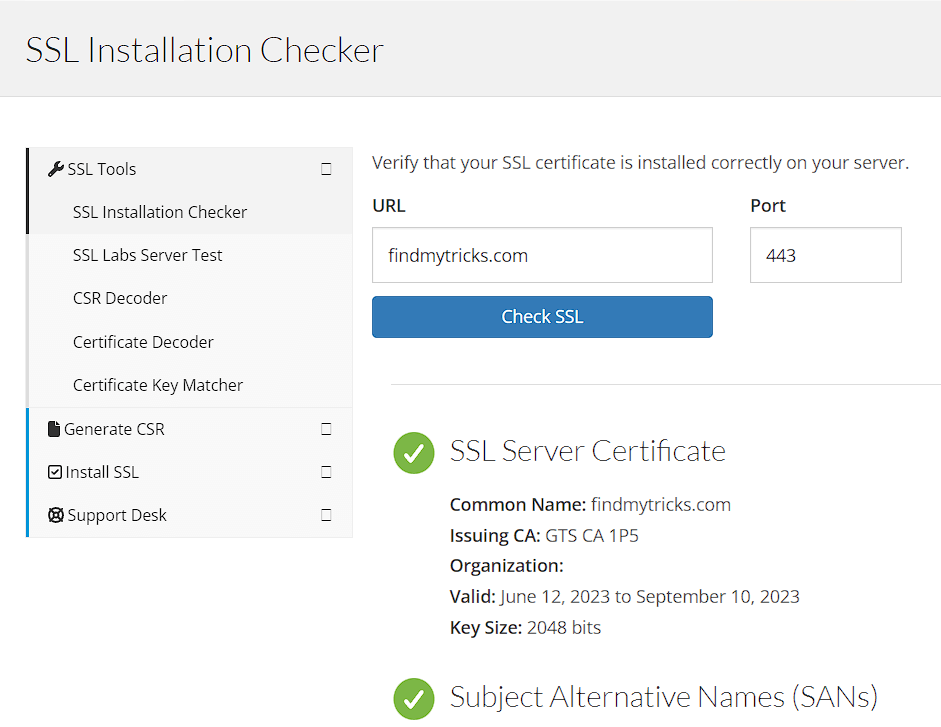
Once the test is completed, you should also make use of the SSL check to check for leftover images, scripts, CSS, and files that are not secured.
Wrapping Up
Now, that your website is secured and showing such signs of safety, the visitors seeing your website will be comfortable to use the same without any hesitation.
And thereby increasing the traffic on your website and you will get a higher rank in the list of most seen websites.
So, it is important to purchase the SSL certificate so that you get to enjoy the benefits of SEO (Search Engine Optimization)
After Google announced that the SSL certificate is mandatory for websites, many developers switched to the HTTPS connection in place of the HTTP connection.
Above all, the main reason for the HTTPS connection is to ensure secure communication for users when they access your site.