The Complete Yoast SEO Settings Walkthrough for Beginners
Estimated reading time: 14 minutes
Last updated on May 21st, 2024 at 08:09 am
Imagine having a super helpful guide that makes your website more appealing to search engines like Google.
That’s what the Yoast SEO plugin does!
It’s like having a friendly assistant who helps you optimize your website so more people can find it online.
Yoast SEO is used by millions of websites worldwide to improve their search engine visibility.
In fact, over 5+ million active installations of Yoast SEO were reported.
To set up Yoast SEO on WordPress, follow the step-by-step guide I have provided below.
But before make sure to transfer the data if you are using any other SEO plugin.
Import & Export
You can easily import or export settings using the Yoast SEO tool.
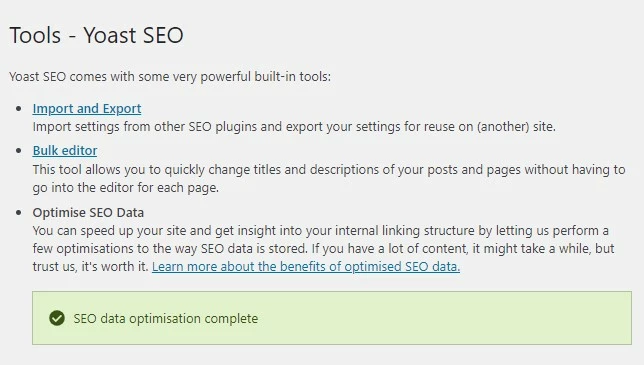
However, if you have never used an SEO plugin on your site, or your blog is new, then there is no need for data transfer.
Just skip this step.
It can also be used to import and export Yoast SEO plugin settings from your site to another website.
Bulk Editor
With the help of this tool, you can make changes to your titles and descriptions without going into the editor for each page.
Optimize SEO Data
Whenever you make a lot of changes, you get a notification of this. Just click on SEO data optimization and it will take 1-2 min to complete the task.
(Especially when you change your permalink structure)
Yoast SEO Plugin Settings
1. General
Once you have clicked on the Yoast SEO icon, you will be taken to the settings page of the plugin, Click on the ‘General’ tab.
In the next paragraph, I will walk you through a step-by-step process of the configuration.
Dashboard
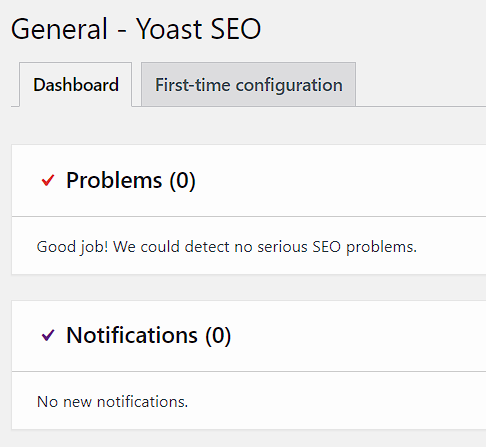
Yoast will show your SEO problems here. (if found any)
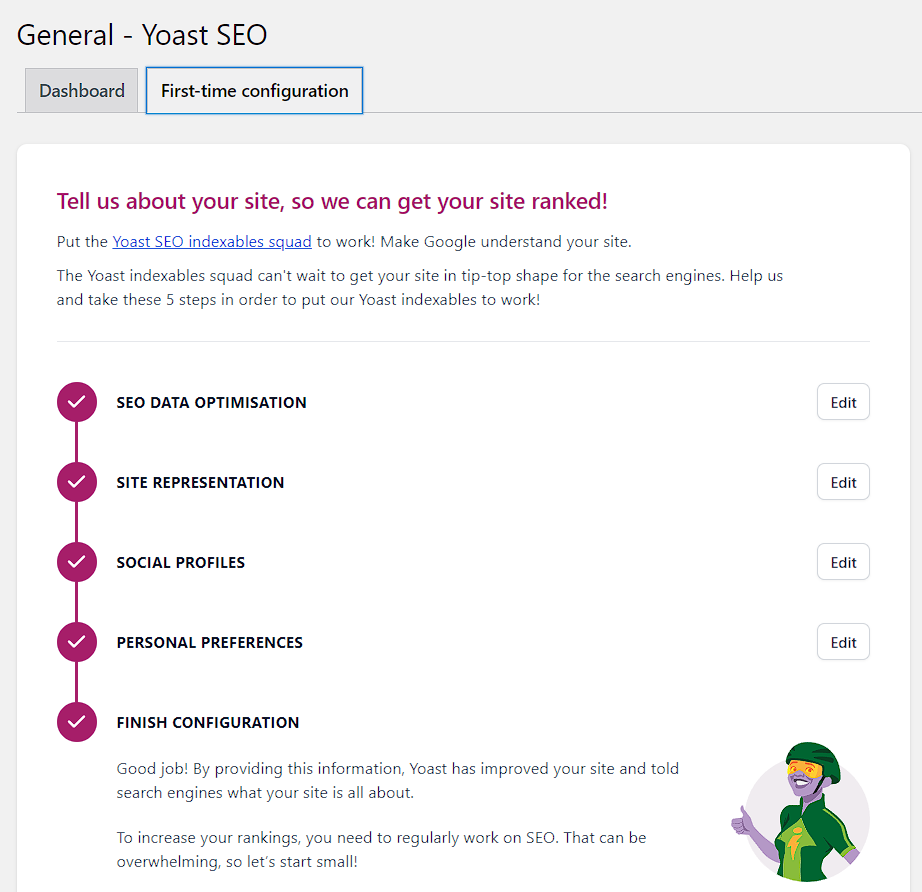
Next, you can visit the first-time configuration. But that is for beginners and only do this if you want basic settings.
2. Settings (General)
Site Features

The Yoast SEO comes with a lot of features and by default, it is automatically turned on.
You have to enable or disable these features.
Let’s analyze these features a bit further.
SEO Analysis: Enable – This indicates the SEO analysis and score of your content, to check whether your content is SEO friendly or not.
Readability Analysis: Enable – This similarly gives the readability analysis score for your content.
It is also known as a flesh-easy score.
(Meaning – How easy it is to read your content)
Inclusive Language Analysis: Enable – Enabling this will check your content for words or phrases that could be offensive or alienating to certain groups of people.
For example, the analysis might flag the use of the word “mankind” as being gender-biased, or the use of the phrase “wheelchair-bound” as being ableist.
Cornerstone Content: Enable – This option allows you to select your most important article.
In the end, I will let you know how to use these features.
Text link counter: Enable – This displays the total number of internal and external links on your blog posts.
However, I don’t find this feature useful for advanced users. It is good for beginners.
Insights: Premium Feature – Get relevant data about your content. (Which words you use the most)
Link suggestions: Premium Feature – Get internal link suggestions when writing your content.
XML Sitemaps: Enable – With the help of XML Sitemap, Google can find and crawl all pages of your website. (Important)
Admin Bar Menu: Disable – If Enabled, Yoast will display it in your admin page menu bar. I don’t find it useful.
Security: No advanced settings for your authors: Enable – If you have multiple authors or a team then enable this feature.
This prevents you from others having access to the advanced SEO settings of your site.
Usage Tracking: Disable – If enabled, Yoast can use some data from your website to improve their plugin.
Rest API: Head Endpoint – Enable – This will provide you with all the metadata you need.
Enhanced Slack sharing: Enable – If someone shares your article on slack then this feature adds an author byline and estimated reading time to the snippet of the article.
Index now: Premium feature – If your articles are not indexing immediately then this feature is for you.
This feature automatically pings search engines like Bing, Yandex, etc. whenever you publish, update or delete a post.
Site Basics

Write your Sitename that appears in the search engines.
Also, select the separator.
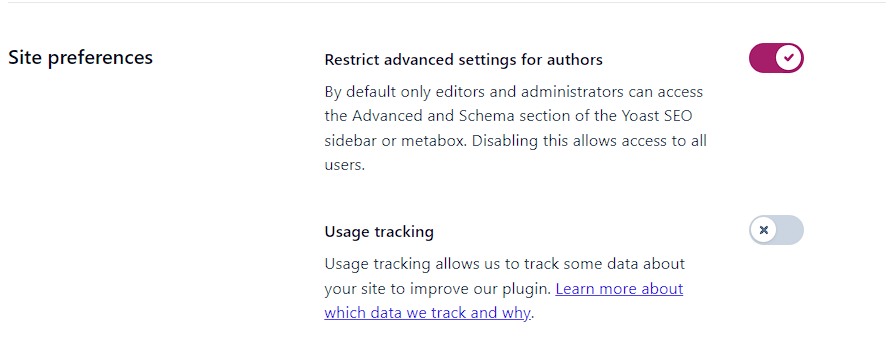
Enable advanced restriction settings for authors, so that no other user except admin and editors can use schema and advanced settings.
Site Representation
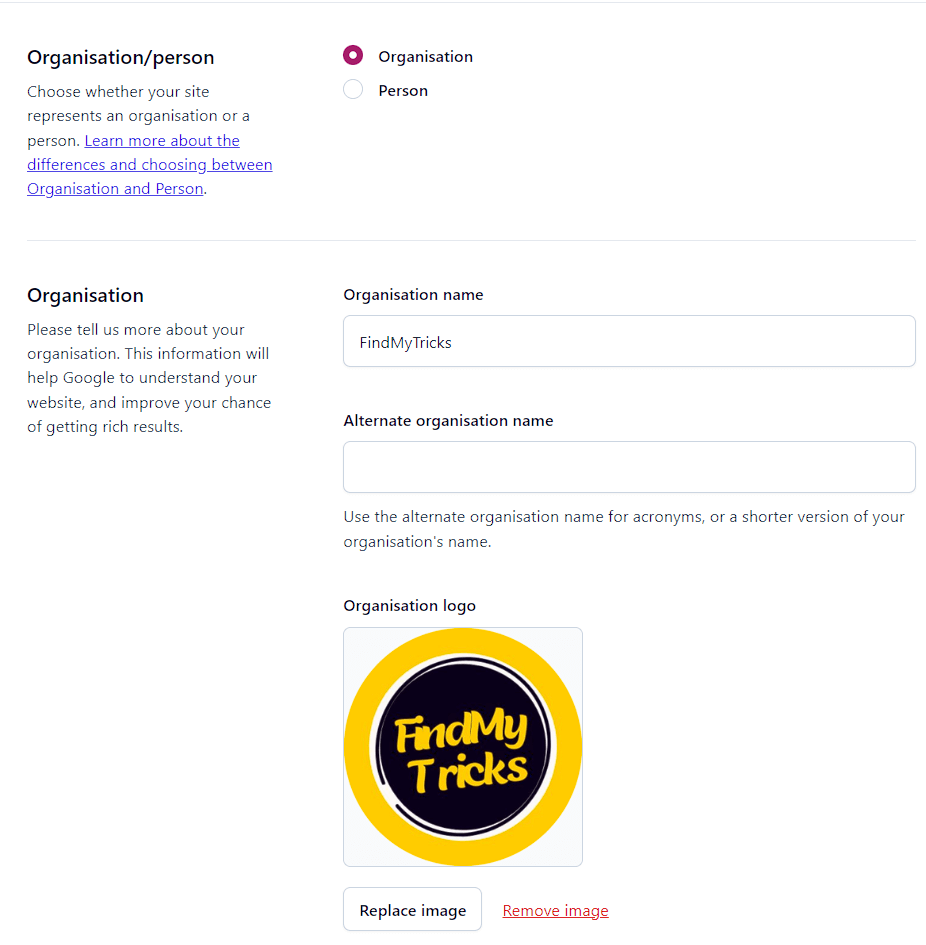
What represents your website – person or organization?
Select person if you are the only one handling your site or organization if you have a team.
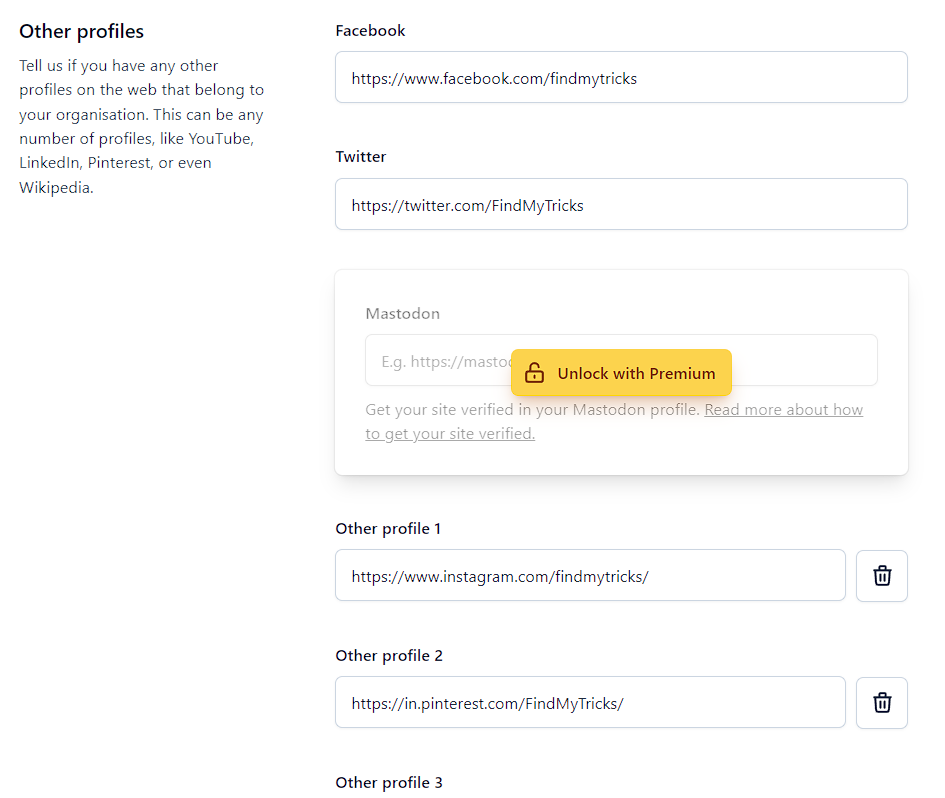
Enter your social media site’s URL.
Site Connections

To be able to do that, you need to sign up for each webmaster tools program.
After that, you will be given a meta tag to add to the head section of your website for verification of ownership.
Follow the proceedings for Google verification below:
Google verification process:
First, click on the Google search console.

Then log in with your Google account.
Choose one of the verification methods.
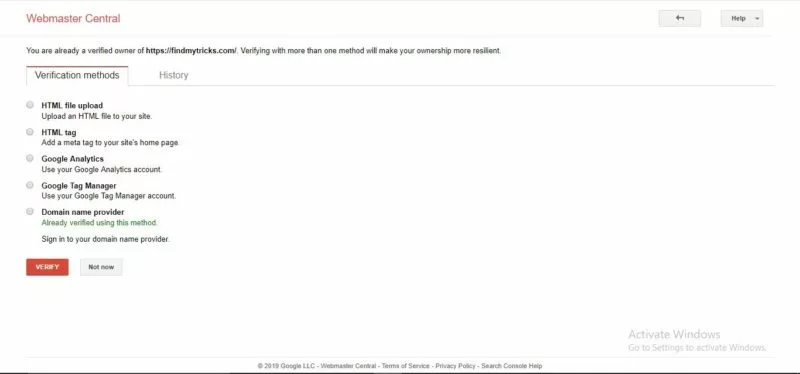
I recommend the HTML tag, the easiest one.
Copy the code and paste it into the Yoast.

Save changes on Yoast then click verify. Done!
3. Settings (Content Types)
Homepage
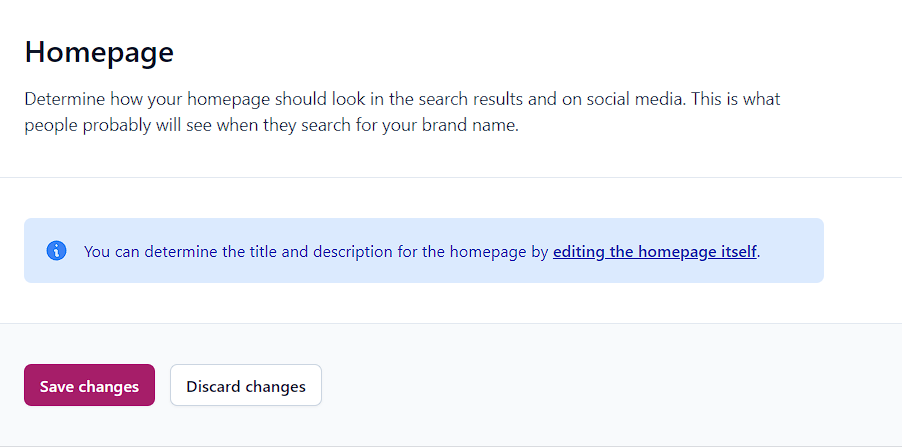
You can change the Homepage settings only by visiting the pages – all pages – homepage – edit.
Posts
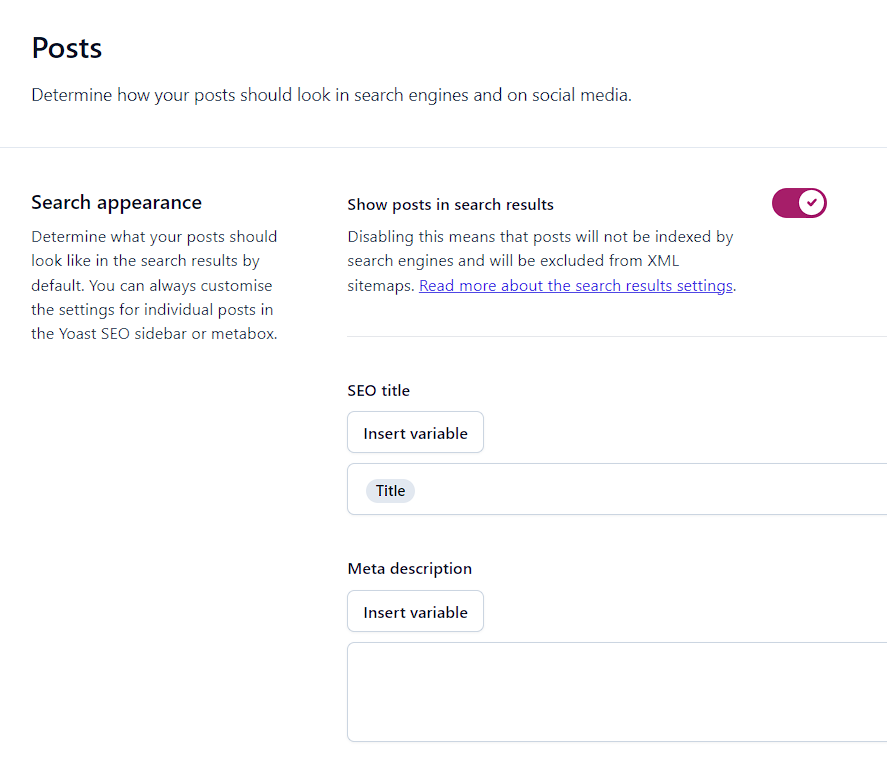
Do not disable until you intentionally want your posts to be removed from search engines like Google.
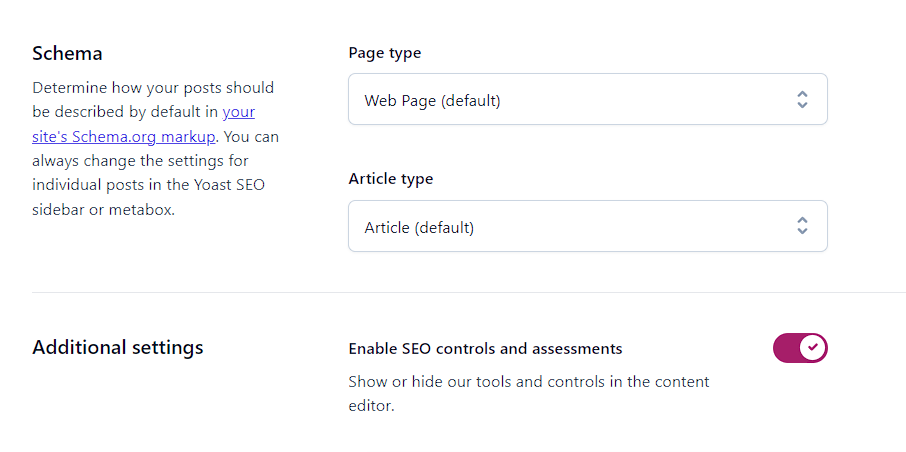
Have it default if you don’t know about schemas.
Pages
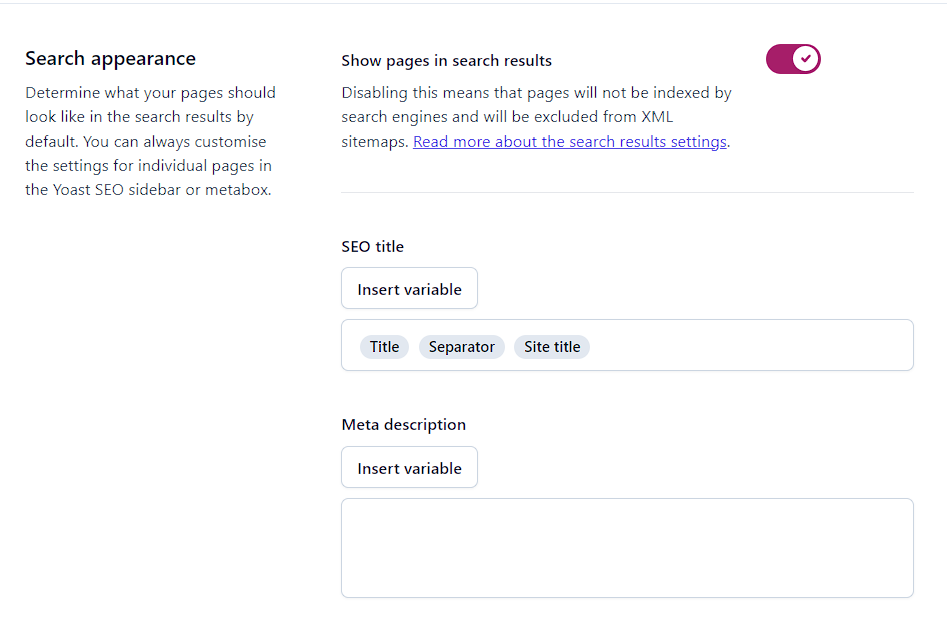
Enable if you want your pages to appear in search engines like Google.
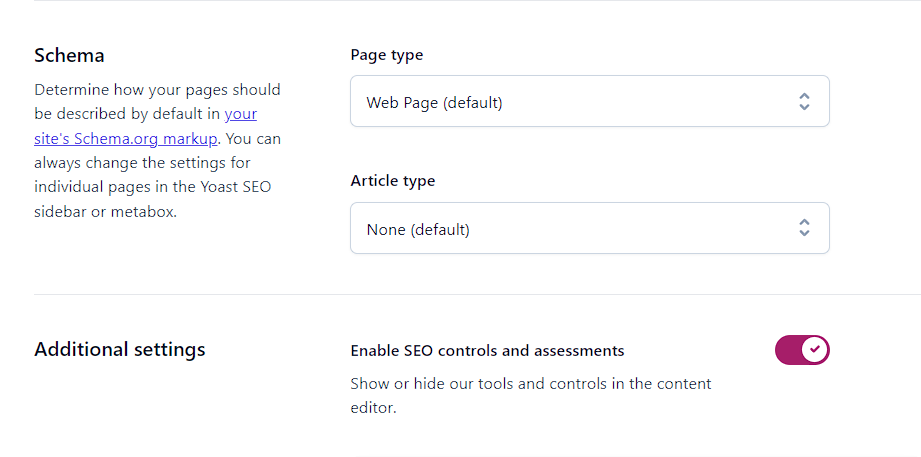
Leave default.
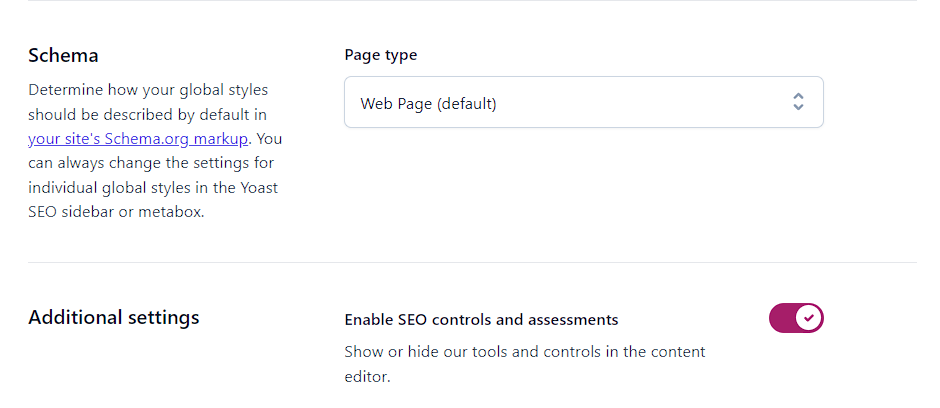
Global Styles
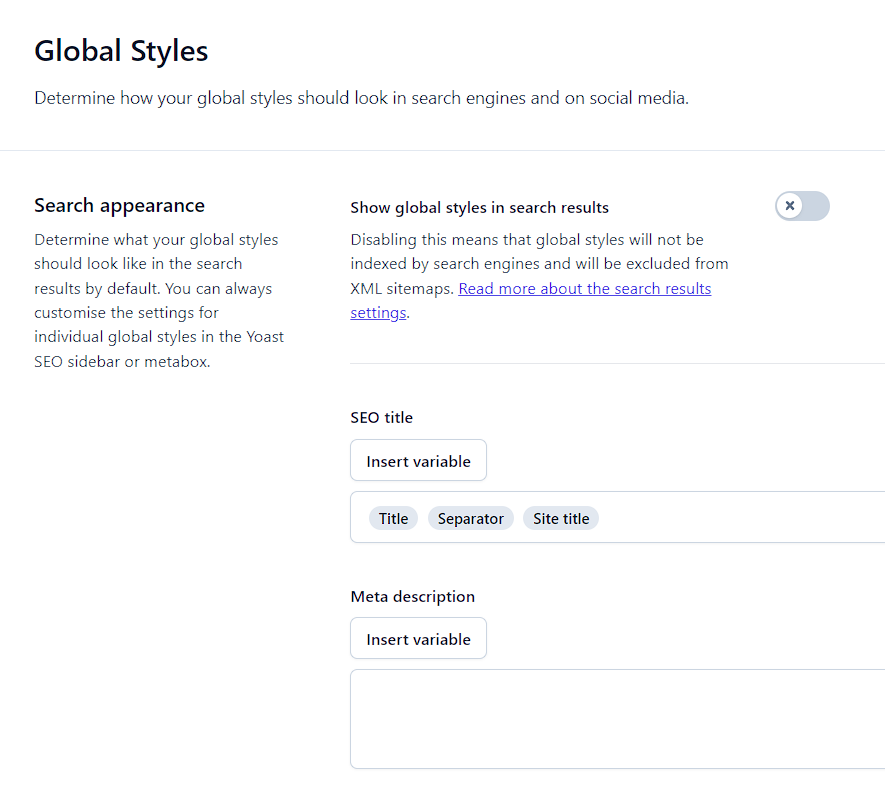
Disable them – These are the theme layouts that you do not want to appear in search engines.
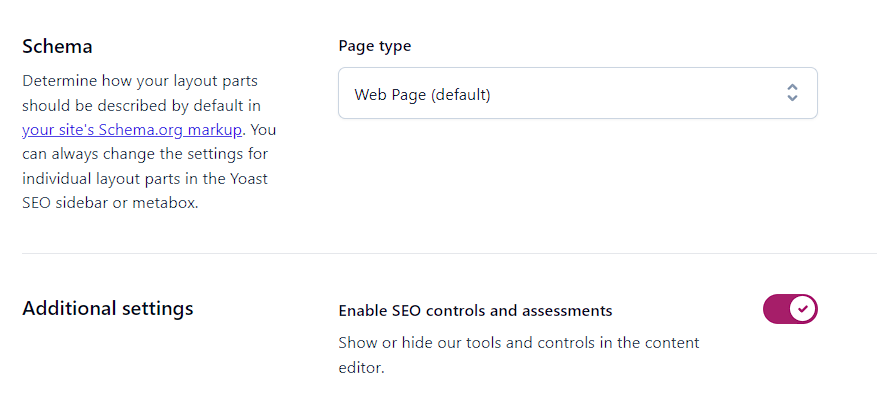
Layout Parts
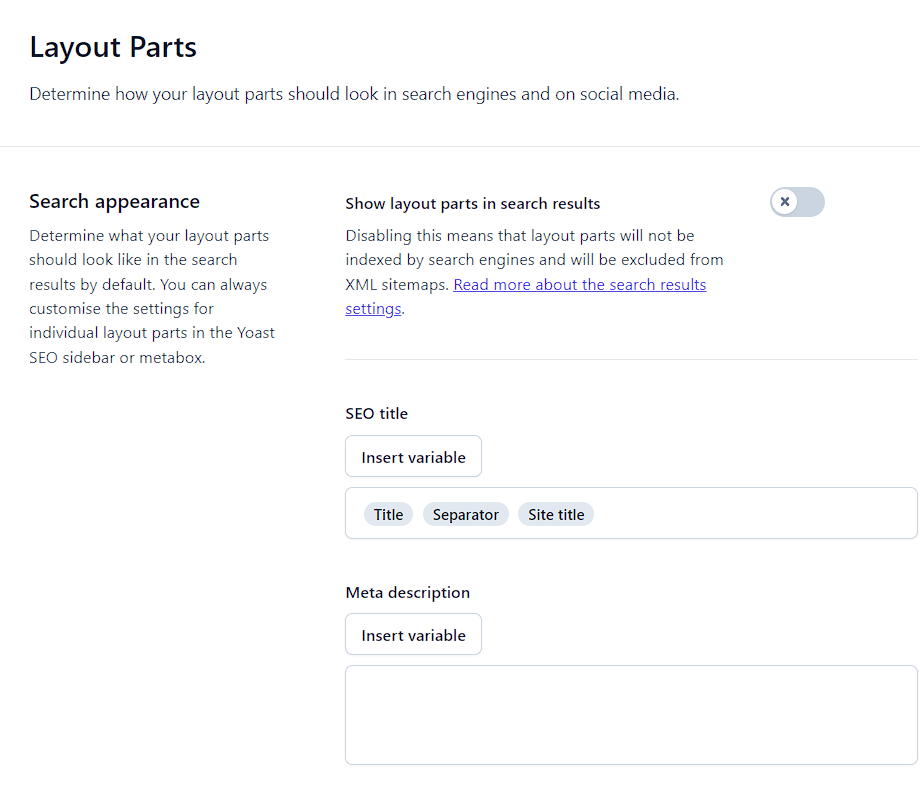
Disable.
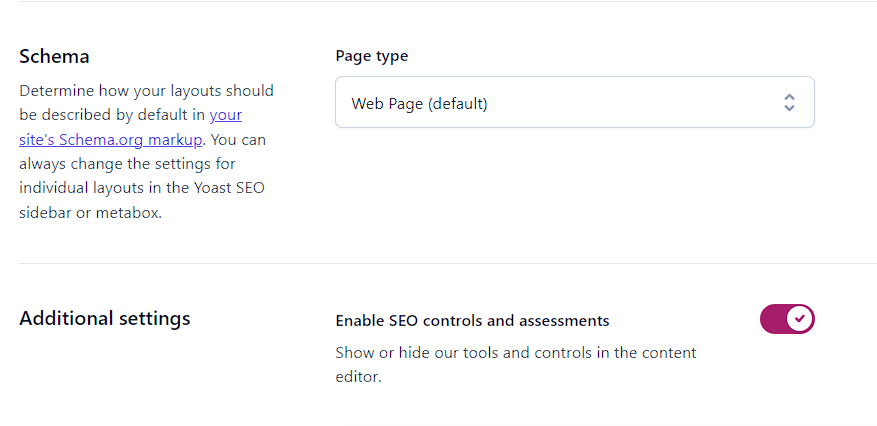
Layouts
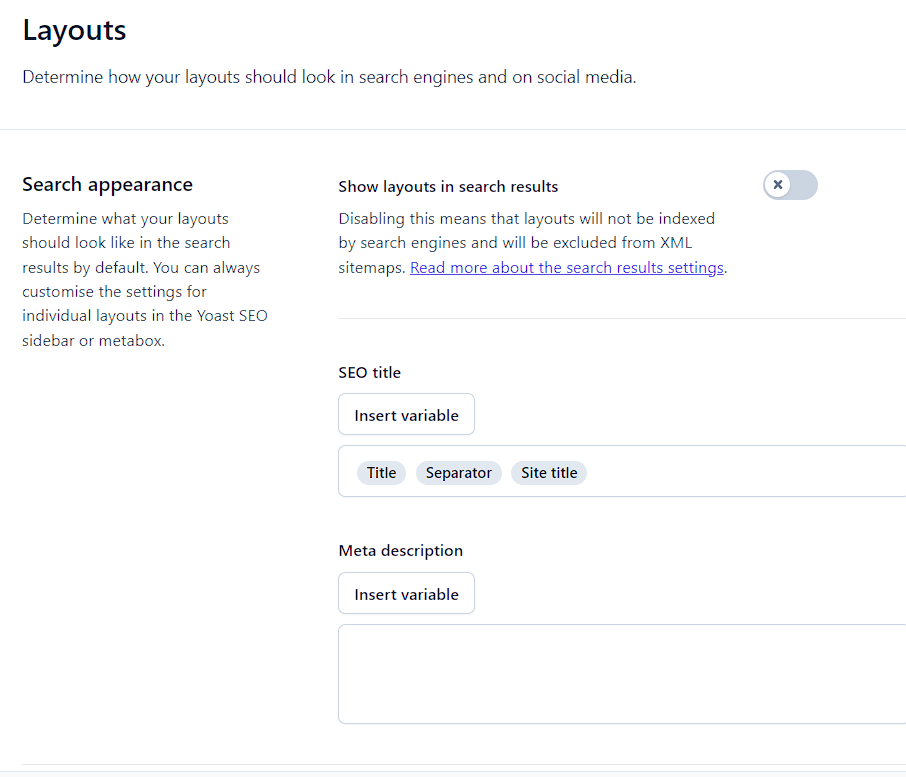
Disable.
4. Settings (Categories & Tags)
Categories
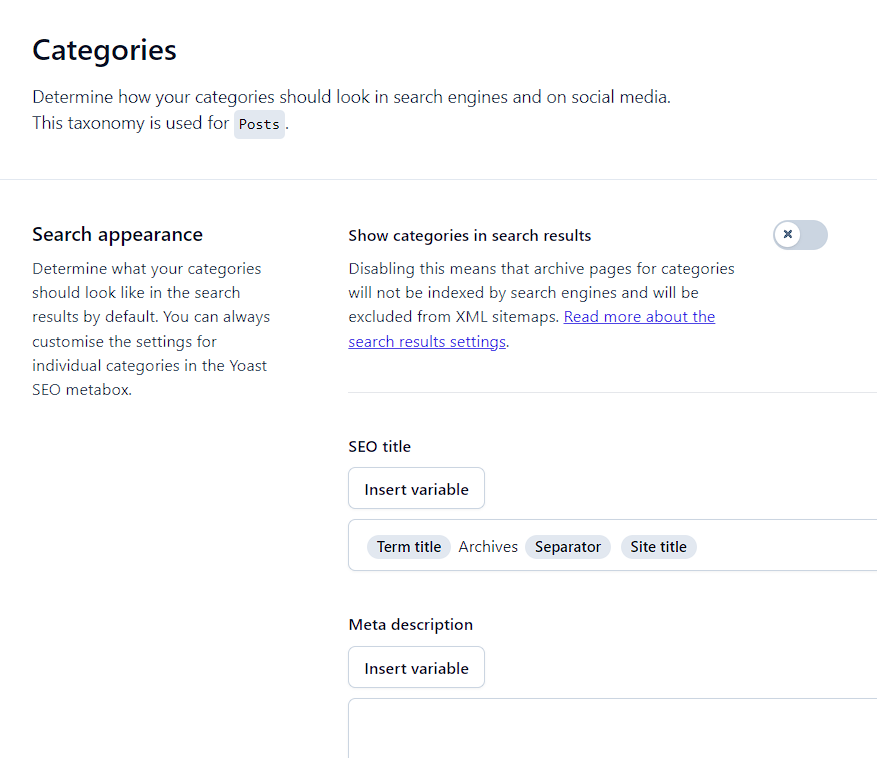
If you are an eCommerce user then enable it, otherwise, I recommend disabling tags and categories as these can create duplicate content issues for Google.
Tags
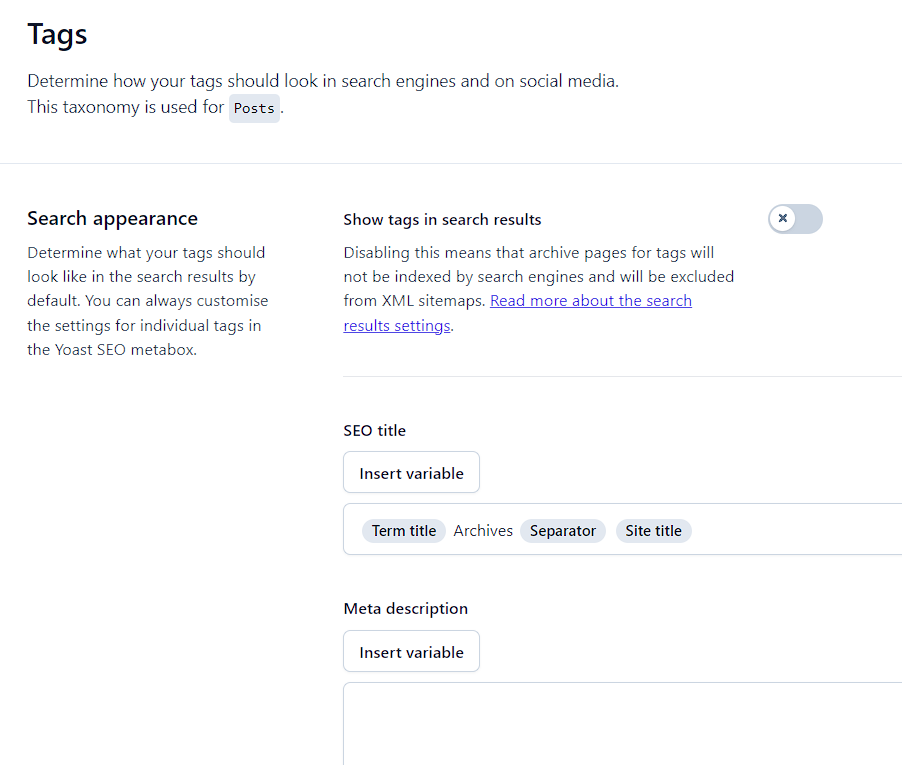

5. Settings (Advanced)
Crawl Optimization
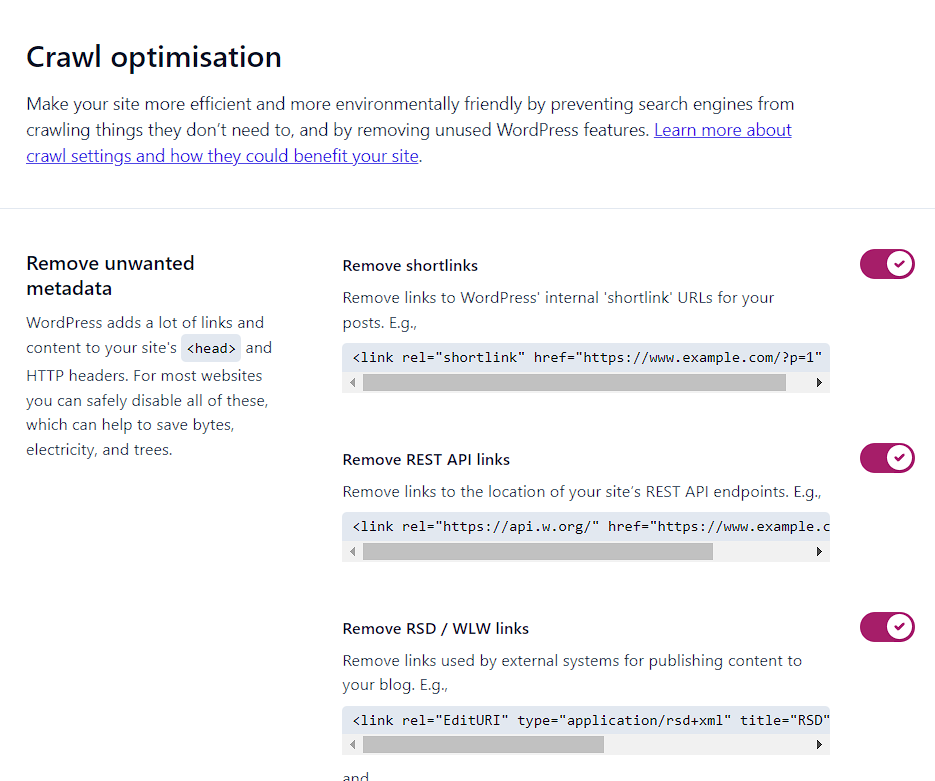


Remove shortlinks: Enable – Remove links to WordPress’ internal ‘shortlink’ URLs for your posts.
Remove REST API links: Enable – The REST API allows external applications to interact with your WordPress site.
If you don’t use the REST API or want to restrict access, enabling this setting will remove the REST API links.
Remove RSD / WLW links: Enable – RSD (Really Simple Discovery) and WLW (Windows Live Writer) are services that allow external tools to interact with your WordPress site.
If you don’t use these services, enabling this setting will remove the related links.
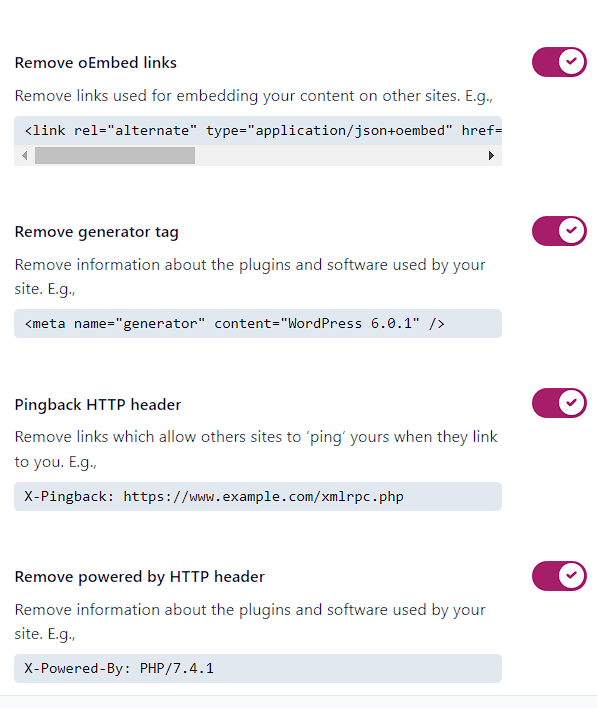
Remove oEmbed links: Enable – oEmbed is a feature that allows you to embed external content (e.g., YouTube videos) into your WordPress posts without using plugins.
Enabling this setting will remove oEmbed links.
Remove generator tag: Enable – The generator tag is a meta tag in the HTML source code that indicates which version of WordPress you are using.
Enabling this setting will remove the generator tag for security and privacy purposes.
Pingback HTTP header: Enable – Pingbacks are notifications sent from one WordPress site to another when a link is created.
Enabling this setting will control the handling of pingback HTTP headers.
Remove powered by HTTP header: Enable – By default, WordPress adds a “Powered by WordPress” tag in the HTTP header. Enabling this setting will remove that tag.
Remove global feed: Enable – WordPress provides a global RSS feed by default. Enabling this setting will remove that global feed.
Remove global comment feeds: Enable – Similarly, WordPress offers global comment feeds. Enabling this setting will remove them.
Remove post author’s feeds: Enable – When enabled, this setting will remove the individual author’s RSS feeds.
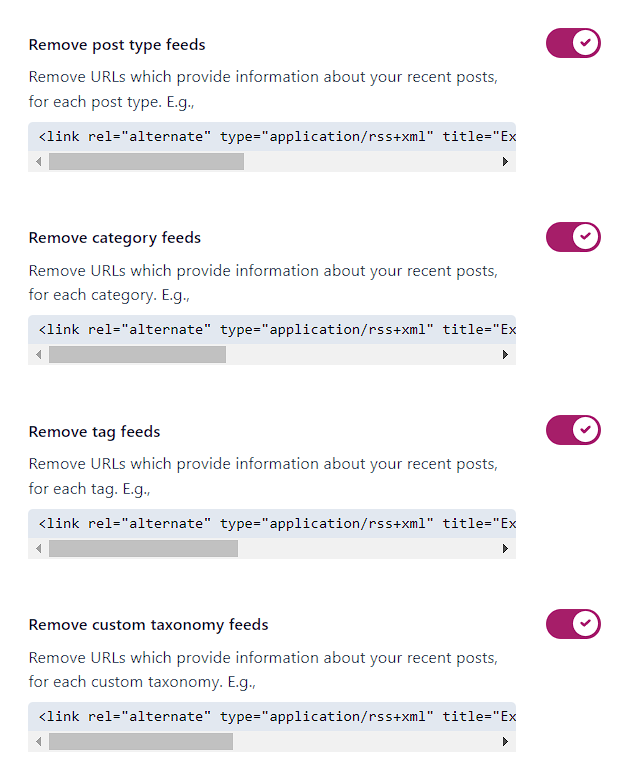
Remove post type feeds: Enable – WordPress creates separate feeds for different content types (e.g., posts, pages, custom post types).
Enabling this setting will remove the feeds for all post types.
Remove category feeds: Enable – By default, WordPress creates RSS feeds for categories. Enabling this setting will remove those feeds.
Remove tag feeds: Enable – Just like category feeds, WordPress generates RSS feeds for tags. Enabling this setting will remove those feeds.
Remove custom taxonomy feeds: Enable – Custom taxonomies are additional ways to categorize content.
Enabling this setting will remove the RSS feeds for custom taxonomies.
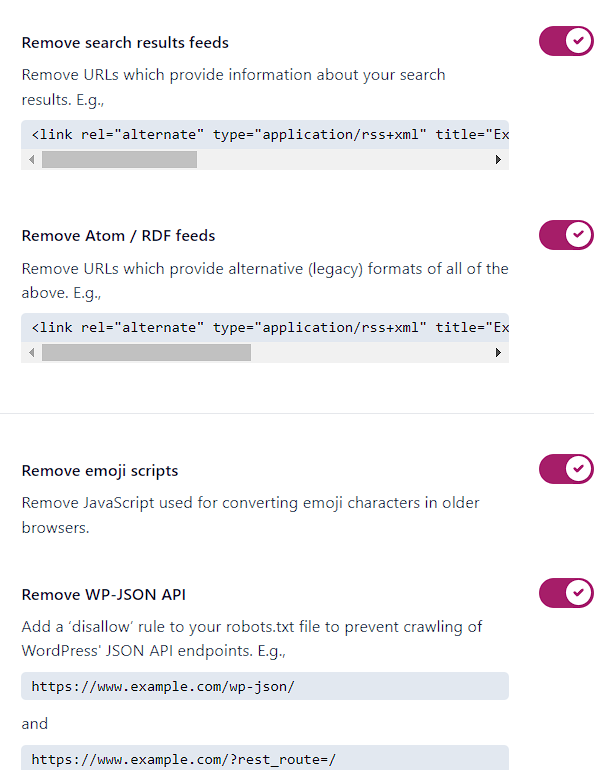
Remove search results feeds: Enable – When users search on your site, WordPress generates search result feeds. Enabling this setting will remove those feeds.
Remove Atom / RDF feeds: Enable – These are other feed formats that WordPress generates by default. Enabling this setting will remove Atom and RDF feeds.
Remove emoji scripts: Enable – Emojis can add unnecessary script files to your site. Enabling this setting will remove the emoji scripts.
Remove WP-JSON API: Enable – WP-JSON is another way to access data from your WordPress site. If you don’t need to use this API, enabling this setting will remove it.
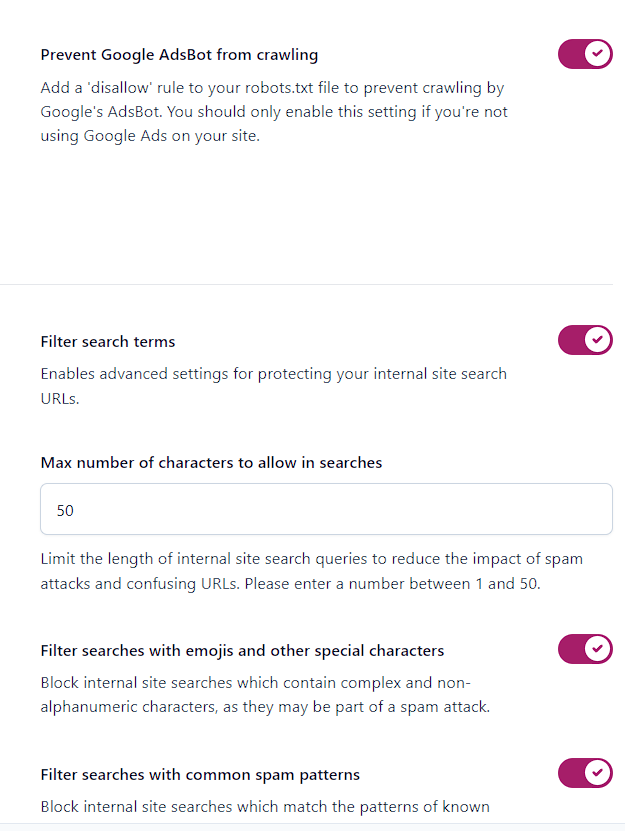
Prevent Google AdsBot from crawling: Enable – If you don’t want Google AdsBot to crawl certain pages on your site, enabling this setting will block its access.
You should only enable this setting if you’re not using Google Ads on your site.
Filter search terms: Enable – Enables advanced settings for protecting your internal site search URLs.
Max number of characters to allow in searches: Enable – Default 50 – You can set a limit on the maximum number of characters (1-50) allowed in search queries using this setting.
Filter searches with emojis and other special characters: Enable – Block internal site searches which contain complex and non-alphanumeric characters, as they may be part of a spam attack.
Filter searches with common spam patterns: Enable – This setting helps prevent spammy search queries from affecting your search results.
Redirect pretty URLs to ‘raw’ formats: Enable – When users access pretty URLs (e.g., /post-title/), this setting can redirect them to raw formats (e.g., /?p=123) if enabled.
Prevent crawling of internal site search URLs: Disable –If you don’t want search engines to crawl your site’s internal search results pages, this setting can help.
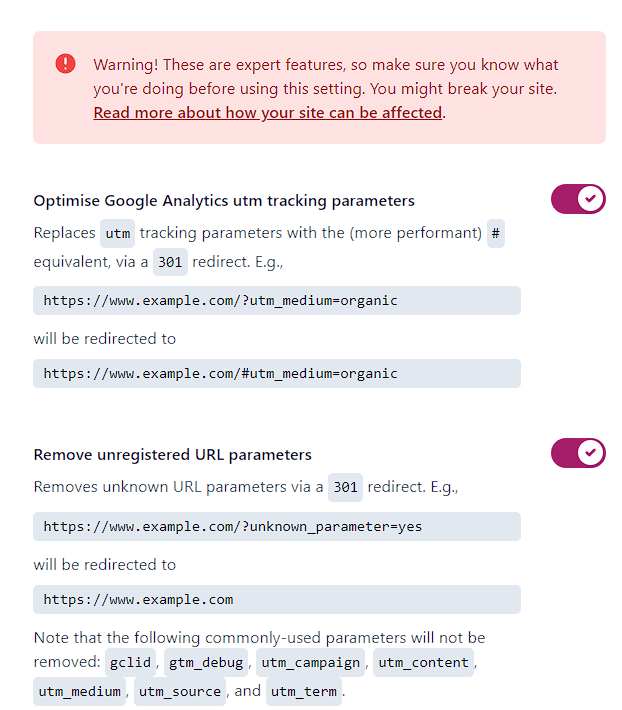
Optimize Google Analytics UTM tracking parameters: Enable –This setting helps optimize the handling of UTM tracking parameters for Google Analytics.
Remove unregistered URL parameters: Enable – Enabling this setting will remove any unregistered URL parameters from your website.
Additional URL parameters to allow: Enable – You can specify additional URL parameters that you want to allow on your site using this setting.
Breadcrumbs
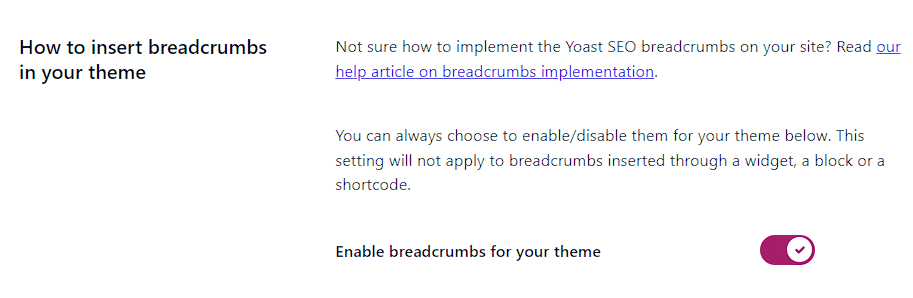
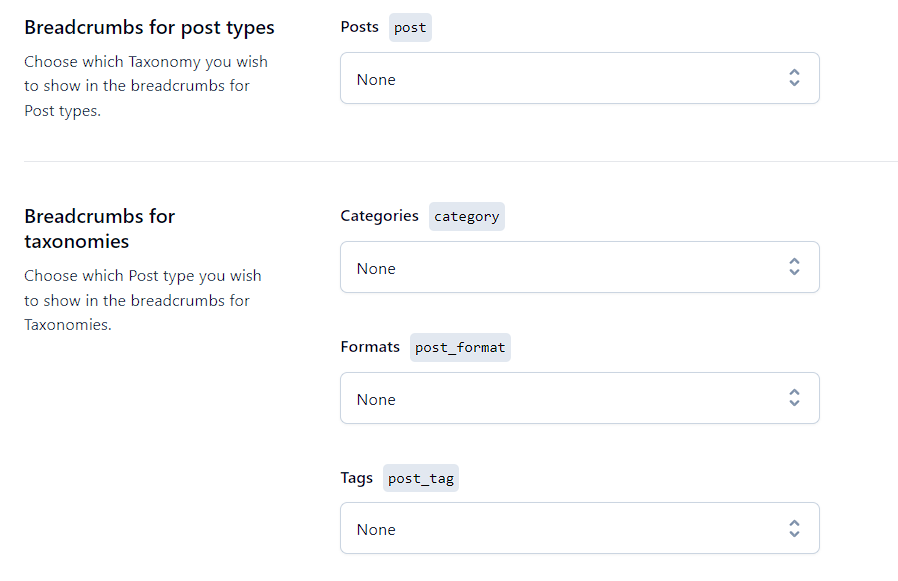
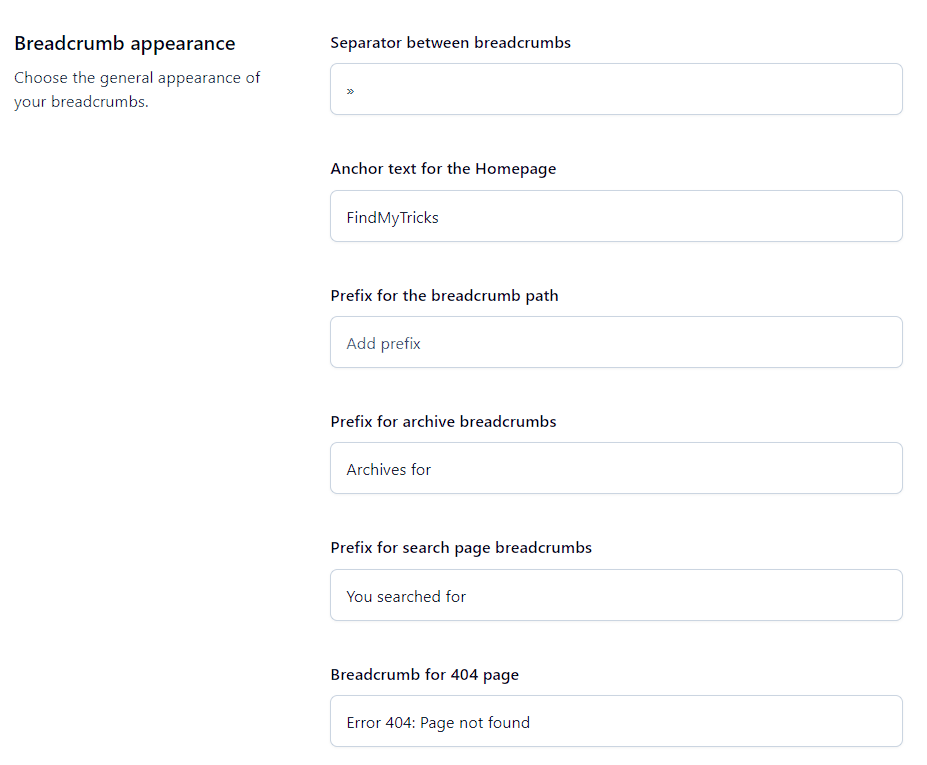
Breadcrumbs are important for navigation and also important for SEO.
You can use Yoast breadcrumb by using this Shortcode.
However, I am not using it because I set no index tag to my categories.

Author Archives
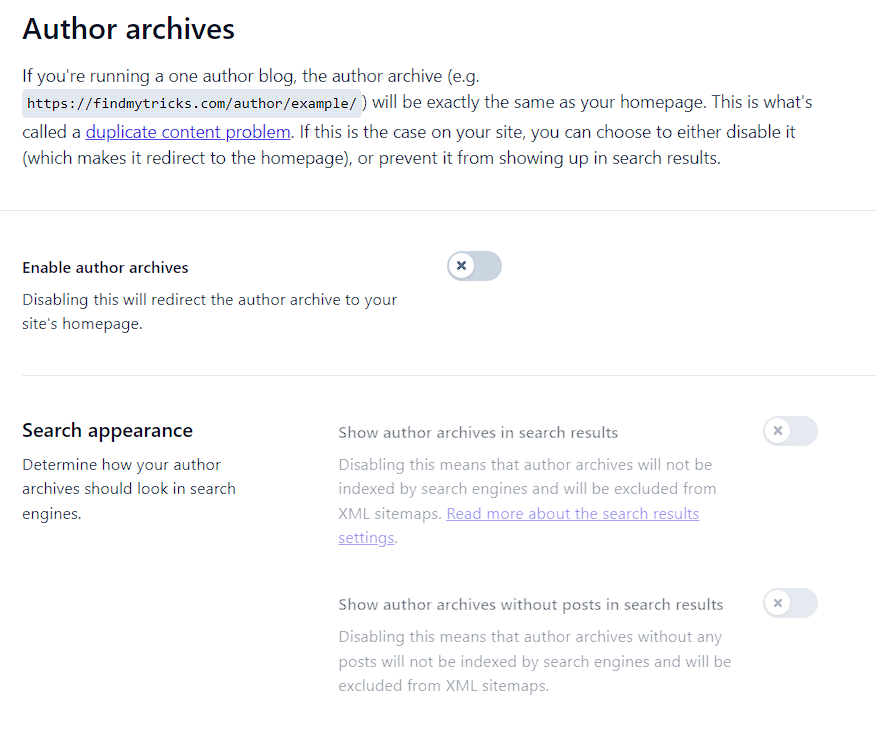
This could lead to duplicate content issues. This is why I recommend you to disable Author archives.
Date Archives
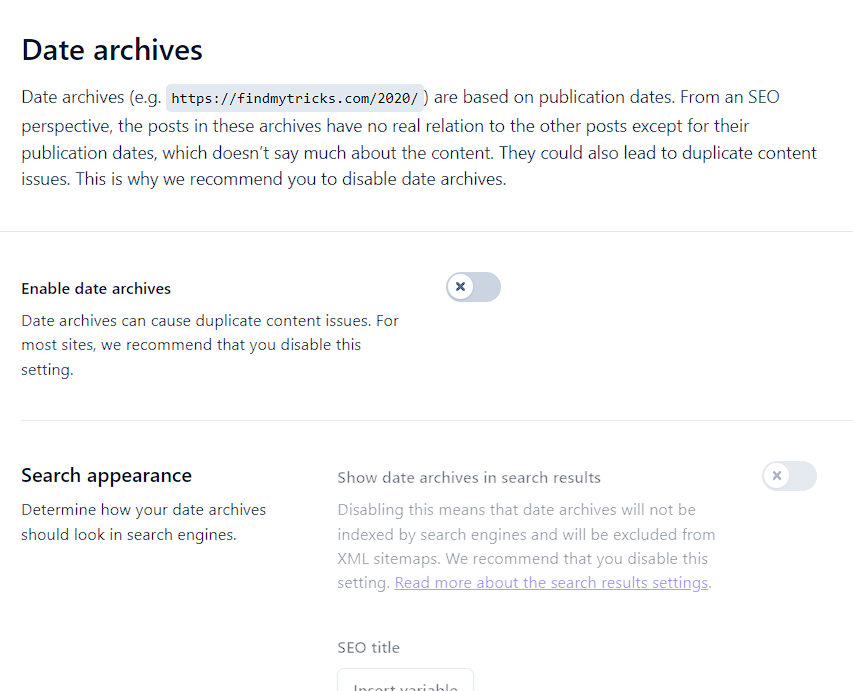
This could also lead to duplicate content issues. Disable Date archives.
Format Archives
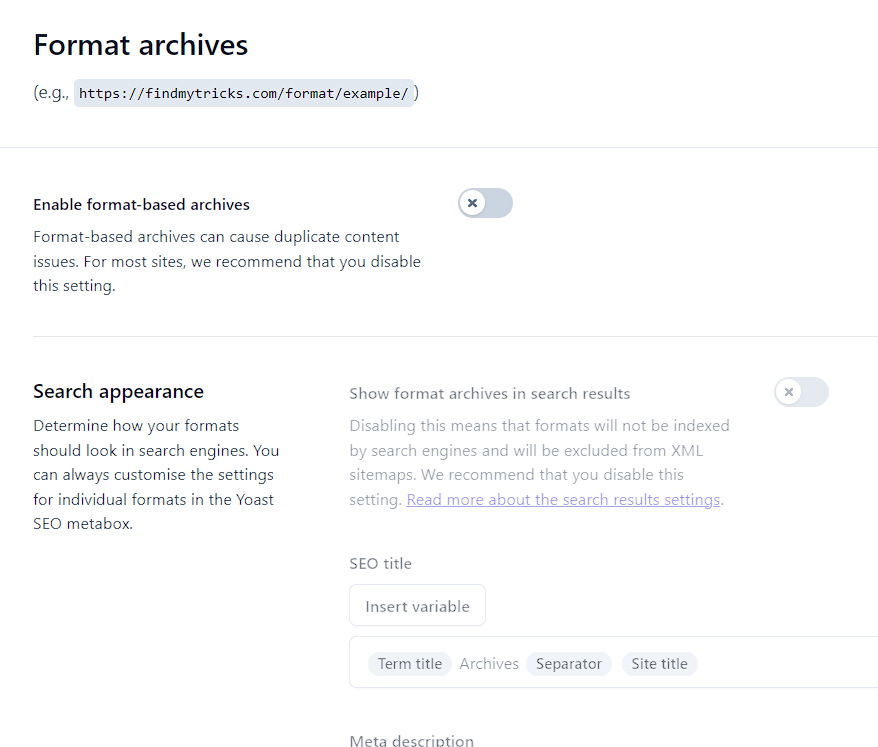
This could also lead to duplicate content issues. Disable Format archives.
Special Pages
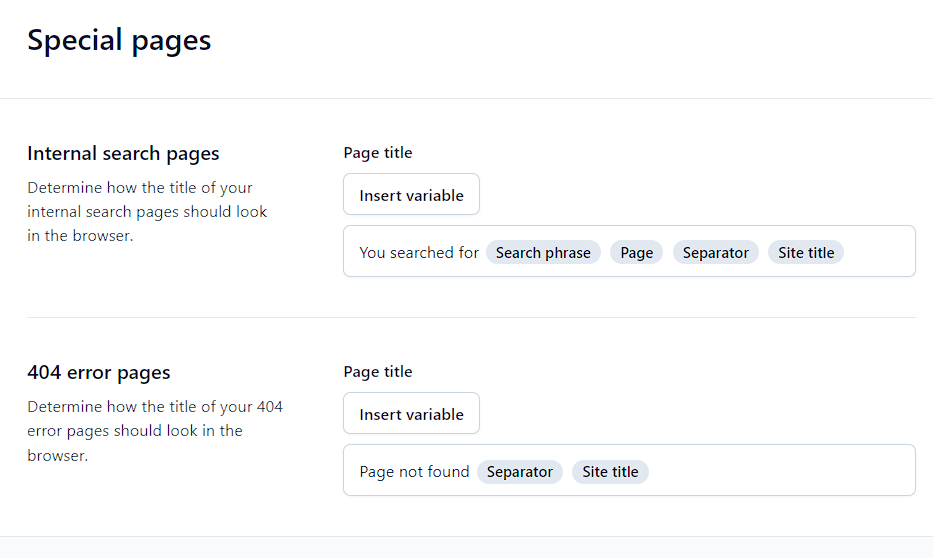
Leave it default.
Media Pages
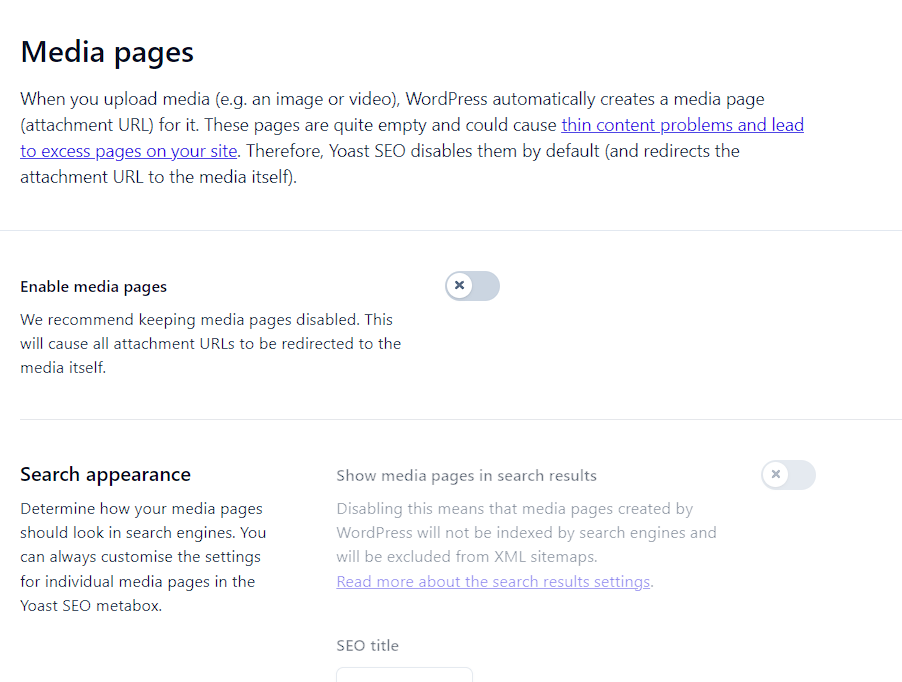
When you upload media, WordPress automatically creates a media page for it.
These pages are quite empty and could cause thin content problems and lead to excess pages on your site.
I recommend keeping media pages disabled. This will cause all attachment URLs to be redirected to the media itself.
RSS
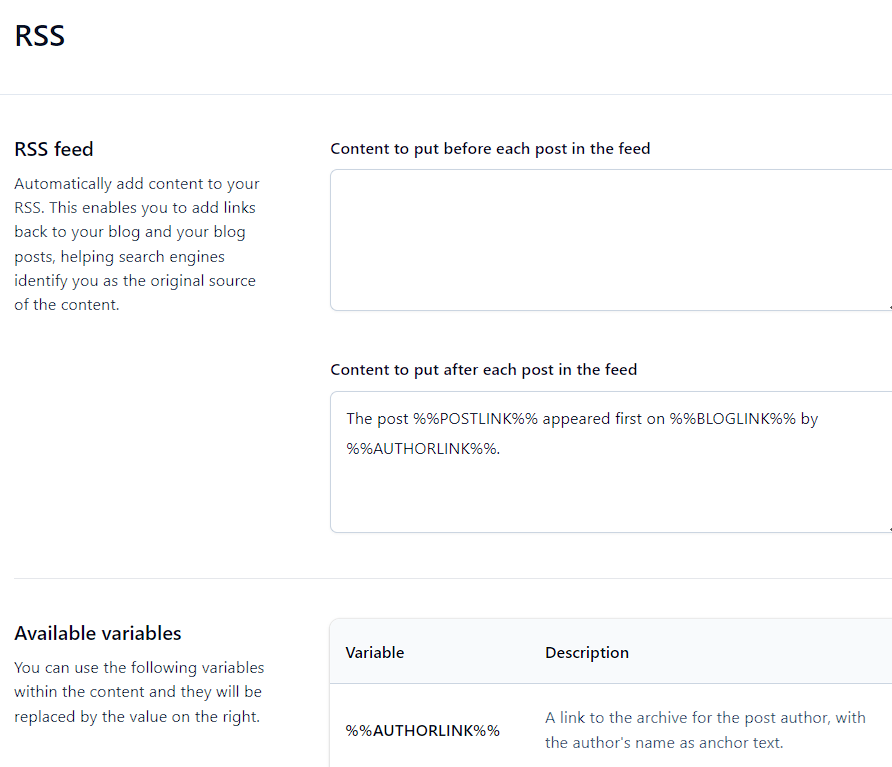
I already disabled RSS for posts and other in crawl optimization settings but you can leave this setting default as the homepage is not disabled for feed.
6. Integration

There are a lot of integrations available, so choose according to your needs. However some of them are,
Semrush integration: Enable – This feature is useful when you are entering your focus keywords.
This will show you related keywords with their search volume. You can also search your keyword within a specific country.
Very helpful for keyword research. And as you know Semrush is one of the best SEO tools in the market.
However, you can use this feature by integrating your free Semrush account.
You don’t need a premium account to use this feature.
Wincher integration: Enable – This will help you track specific keywords and their positions.
However, I am not using this feature as I am already using Semrush for this.
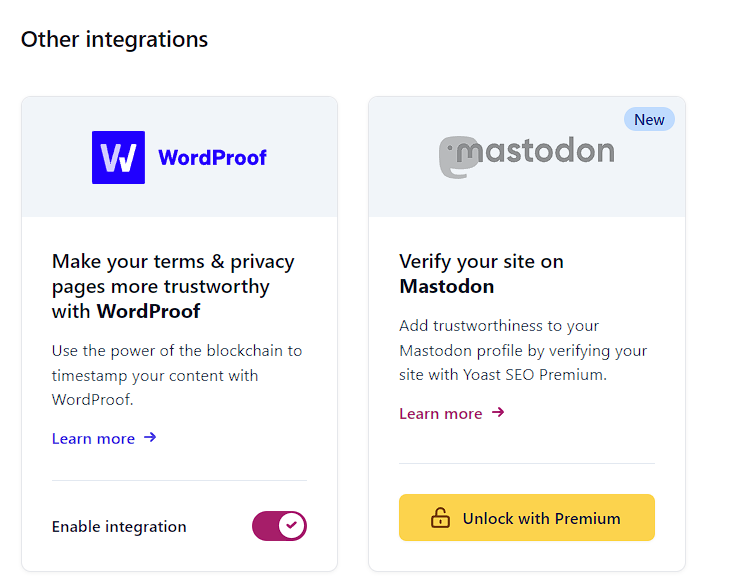
WordProof integration: Enable – This is a newly launched integration feature by Yoast.
Yoast partnered with WordProof which is using blockchain technology “Timestamp” for trust and security.
Currently, you can only enable and use this feature for your privacy policy pages with a limit of 10 updates per month. (Which is enough)
For more updates, you have to purchase their premium subscription.

Algolia integration: Automatically helps your users find your cornerstone and most important content in your internal search results.
It also removes no-indexed posts and pages from your site’s search results.
How to use Yoast SEO on your blog posts?
Upon the installation and configuration of this plugin, it’s time to use Yoast to optimize your content.
Note that optimization has to be done for each of your posts.
Let’s walk you through this process.
Open one of your blog posts, you will notice a new Yoast meta box beneath your text editor.
SEO
Focus Keyphrase
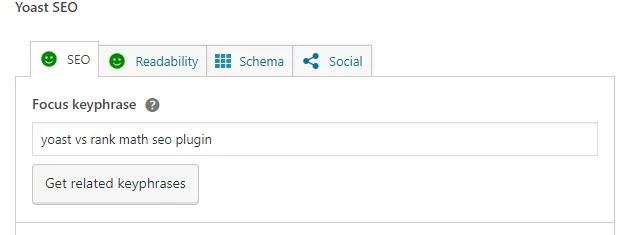
Set your focus keyword. It is the main keyword you want your article to rank for in search engines.
If you enabled Semrush integration, you can use this feature – Get related keyphrases.
Google Preview
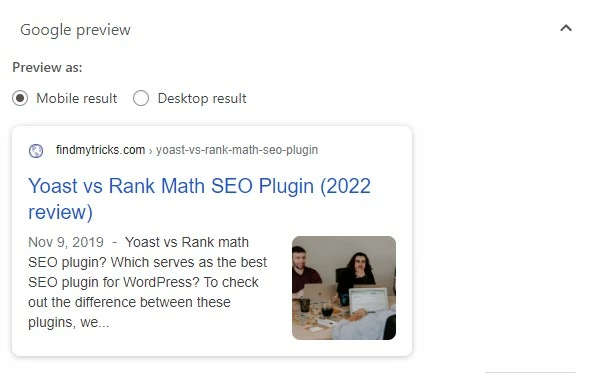
You can check how your article appears on Google (mobile and desktop).
SEO Title
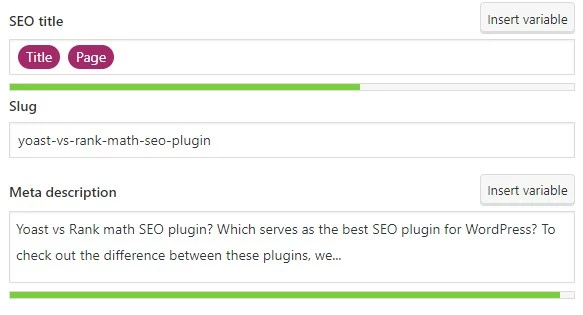
You can set your Article SEO Title, Slug (URL of the article) and meta description.
Look at the screenshots for a clear understanding.
SEO Title
Slug
Meta-Description
SEO Analysis
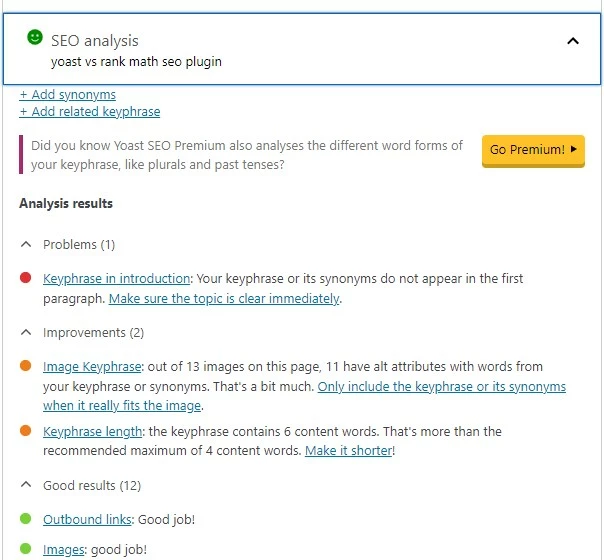
You can use this section to resolve the SEO errors that Yoast recommends.
Related Keyphrase & Cornerstone Content
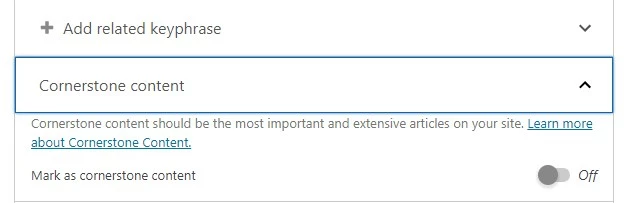
Related Keyphrase – Premium – You can add multiple focus keywords by unlocking Yoast Premium.
Cornerstone Content – These are the most important, detailed, long articles on your website.
You can make 5-10 cornerstone content on your website.
Note: Do not enable Cornerstone on every blog post.
Advanced
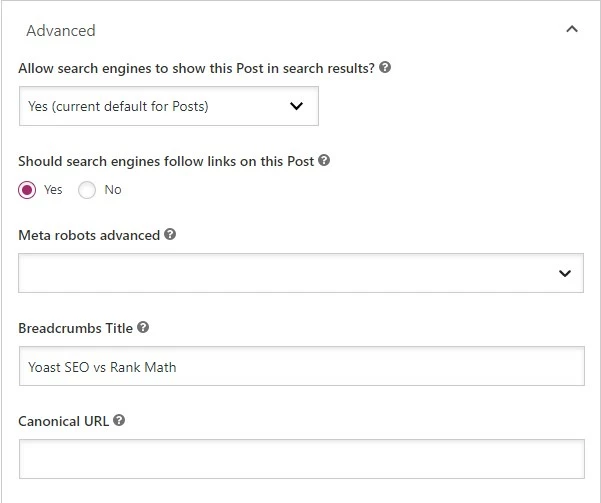
Allow search engines to show this post on search results: I already enabled this to yes under search appearance settings.
But if you want any particular post or page to be removed from the search engine then use this tab.
Setting to No will add a no-index-follow meta tag on your post/page.
Meta robots advanced:
- no image index, which means you disallow search engines from crawling images on this page or post
- no archive, which prevents the search engines from showing a cached copy of this page
- no snippet, which prevents the search engines from showing a snippet of this page in the search results and prevents them from caching the page.
Breadcrumbs Title
This is your breadcrumbs title,

Canonical URL
By default, Yoast set self canonical to every URL of your website. But if you want to declare another URL as your original URL then paste it into this box.
Readability
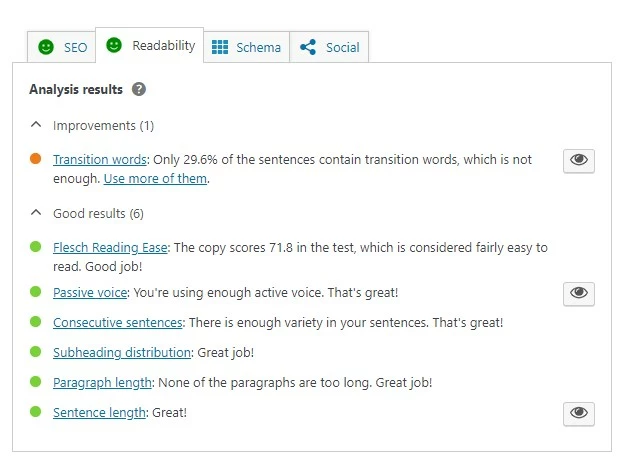
Go to the readability section and find out if there is any problem with the blog post. Then resolve.
Readability analysis – It helps in understanding how easy is it to understand your article by an average person.
Schema
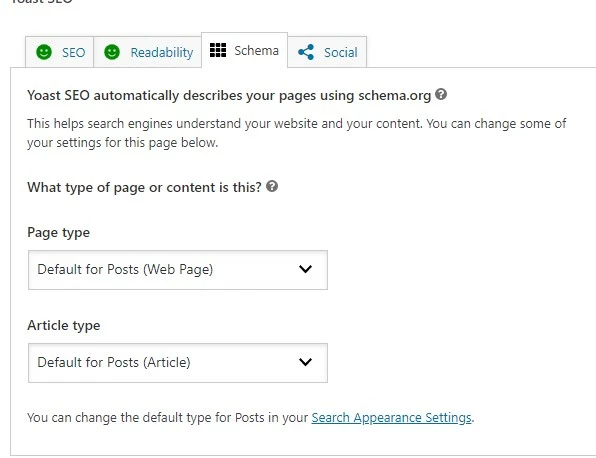
I already set schema under search appearance settings. However, you can change the schema of any post/page under this tab.
Social
By default, Yoast displays your featured image when shared on these social media platforms.
But if you want to display a different image then you can upload it here.
Wrapping Up
The Yoast SEO plugin is the best WordPress plugin for SEO. It is very useful for on-page SEO and technical SEO.
Most importantly, It is very easy to set up as long as you follow the steps I have provided above.
I recommend Yoast SEO (More features, More bloated) to Beginners and SEO Framework (Less features, Less Bloated) to Advanced users.
Have questions, comment below.