Revive Old Posts Plugin Settings – Auto Share and Schedule Old Blog Posts to Social Media
Estimated reading time: 7 minutes
Last updated on March 26th, 2024 at 07:00 am
Are you looking for “Revive old posts plugin settings”?
Imagine your website is a treasure chest, and some of your older posts are like hidden gems inside it.
The Revive Old Posts plugin is like having a magical assistant that brings those gems back into the spotlight.
Think of it this way – you have great content from the past that people loved, but it’s kind of like an old song not played for a while.
The plugin helps share those ‘golden oldies’ on your social media, giving them a second chance to shine.
Websites using the Revive Old Posts plugin report an average increase of 250% in social media traffic.
Now, picture this: your old posts get shared, liked, and clicked on again.
This not only boosts your website’s overall engagement but also tells search engines that your content is timeless and valuable.
Websites using this plugin often see a 75% increase in overall website traffic.
Revive Old Posts Plugin Settings to Auto Share Old Posts
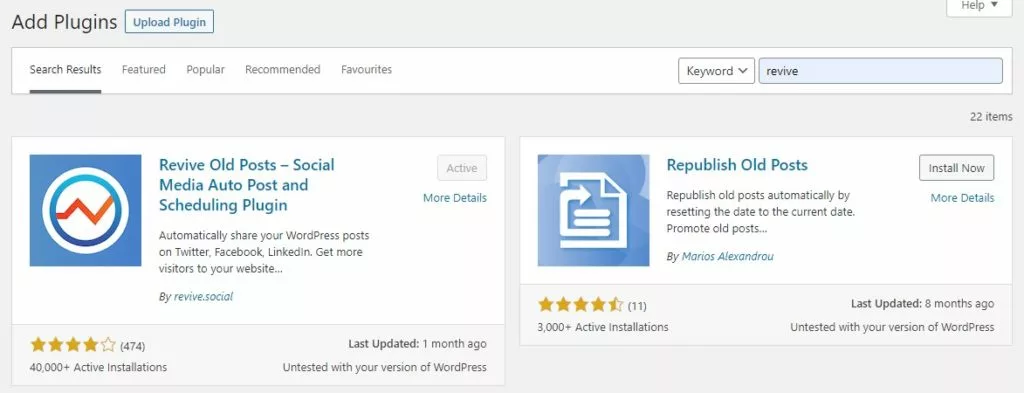
Login to your admin dashboard, click on plugins – add new plugins – search for revive old posts.
Install and activate the plugin.
After the installation, go to revive old posts. There you can see some tabs,
1. Dashboard
- Accounts
- General settings
- Post format
- Custom schedule
- Sharing queue
- Sharing logs
2. Exclude Posts
3. Addons
4. Plugin Roadmap
Let’s start one by one,
1. Dashboard
Accounts
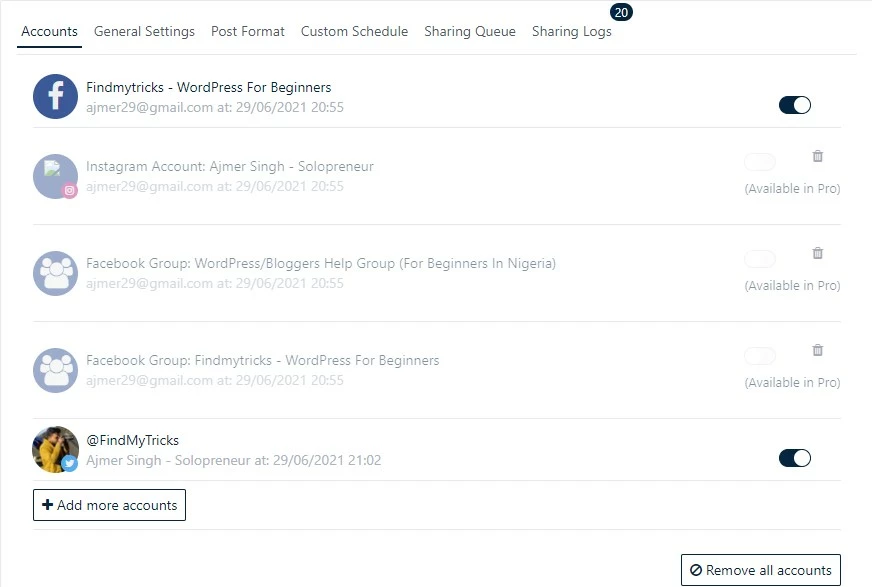
Here you can connect your social media accounts. But in the free version, you can only connect your Facebook page and Twitter account.
For other accounts, you need to purchase their premium version.
In the premium version, they offer Facebook groups, Instagram, Linkedin, Tumblr, GMB, and VK.
Today we check only the freemium version, so connect your Facebook page and Twitter account for now.
General Settings

Cron Job type: Local cron
You can switch to remote cron which is a beta version of revive old team.
You can check if it’s working or not. In my case, both are working properly.
But in case, the remote cron not sharing your posts then switch back to the local cron.
Minimum Interval Between Shares:
Here, you can set the minimum number of hours between every share.
For example, you can set 6 hours, so now when your first post is shared, the next post will be shared right after 6 hours.
(With the gap of every 6 hours the plugin shared a post)
Minimum post age:
Here, you can set the minimum age of posts to be shared.
For example, you can set 10, which means the posts that you recently published will be started sharing after 10 days.
Maximum post age:
As same as the minimum post age, you can also set the maximum post age to be shared.
Default is 365 days, you can not change it in the free version.
But if you are using the premium version, then let’s say you set it to 100 days, which means your posts that are older than 100 days will not be shared by this plugin.
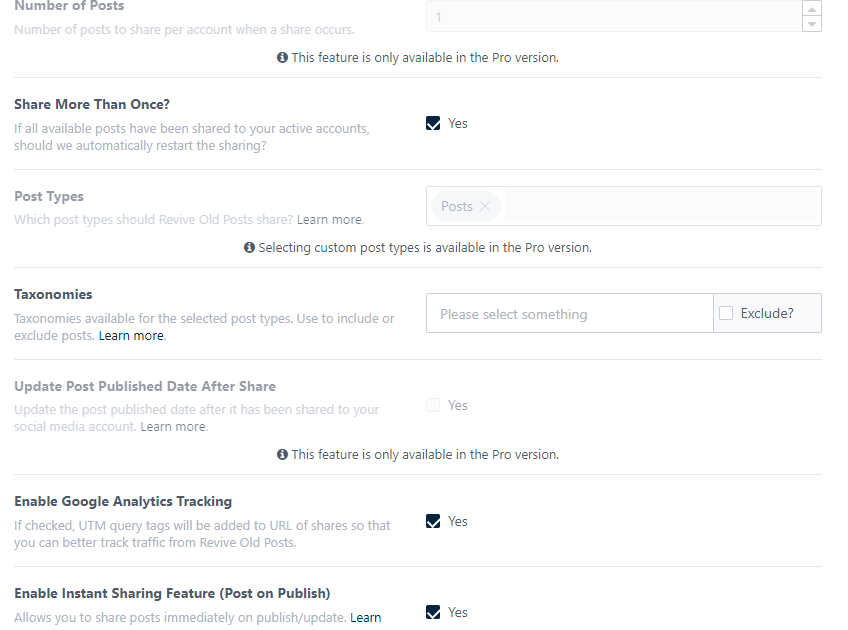
Number of posts:
It is also available in premium. Here, you can set the number of posts to share per account when a share occurs.
Share more than once:
If you enable this, they can start resharing the posts when all the posts are shared and completed.
For example, you have 10 posts, after sharing all the 10 posts they start sharing again.
Post types:
Which post types should Revive Old Posts share? You can select custom post types but this is also available in the pro version.
Enable Google Analytics tracking: Enable
If checked, UTM query tags will be added to the URL of shares so that you can better track traffic from Revive Old Posts.
Enable Instant Sharing Feature (Post on Publish): Enable
This allows you to share posts immediately on publish/update.
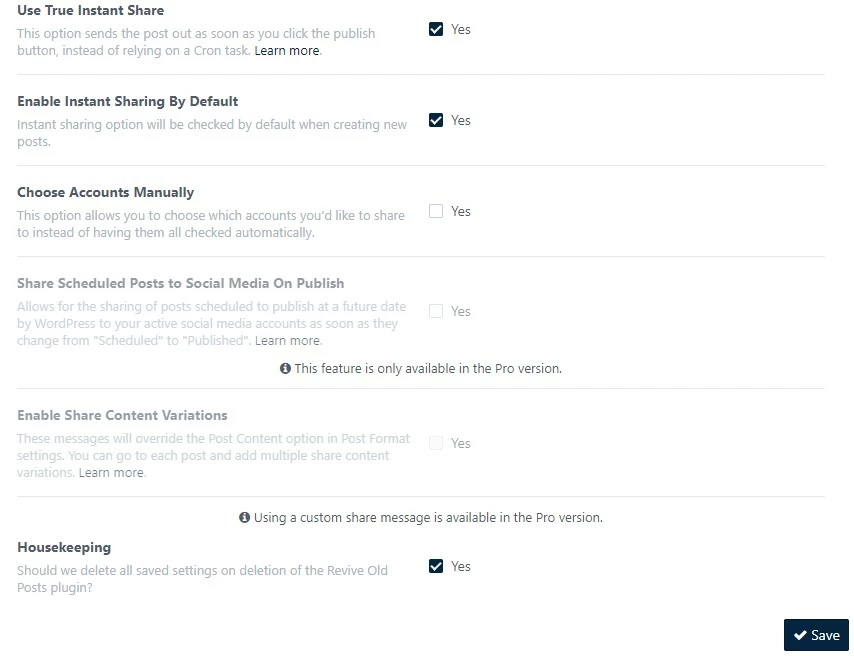
Use True Instant Share: Enable
This option sends the post out as soon as you click the publish button, instead of relying on a Cron task.
Enable Instant Sharing By Default: Enable
Instant sharing option will be checked by default when creating new posts.
Choose Accounts Manually: Disable –
This option allows you to choose which accounts you’d like to share instead of having them all checked automatically.
Share Scheduled Posts to Social Media On Publish: pro version
This allows for the sharing of posts scheduled to publish at a future date by WordPress to your active social media accounts.
As soon as they change from “Scheduled” to “Published”.
Enable Share Content Variations: pro version
These messages will override the Post Content option in Post Format settings.
You can go to each post and add multiple share content variations.
Housekeeping: Depends on your needs
This option deletes all saved settings on the deletion of the Revive Old Posts plugin.
Post Format

Here you can set the format of the posts shared for each account you connect.
This setting totally depends on your needs.
Post title, maximum characters, additional text, include a link, custom field, taxonomies, URL shortener, hashtags, maximum hashtags length, randomised hashtags, share as image post, campaign medium, campaign name, etc.
If you are confused about anything in this setting, then ask me in the comments section.
Each account can have its own options for sharing, on the left you can see the current selected account and network, below are the options for the account.
Don’t forget to save after each change and remember, you can always reset an account to the network defaults.
Custom schedule
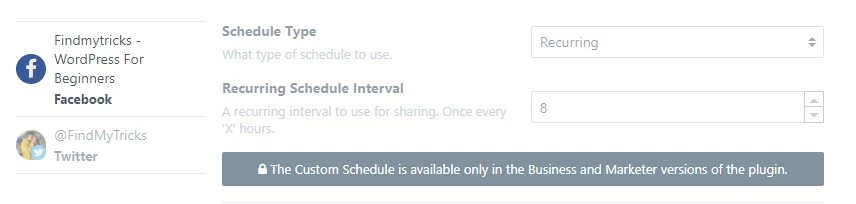
This option is available in the pro version.
In the free version, the posts are shared after every interval of X hours that you selected.
But here you can set the custom interval of sharing for each account.
For example, for the Facebook account, you can set 6 hours and for the Twitter account, you can set 8 hours interval.
Now the posts are shared after every 6 hours to your Facebook account and after every 8 hours to your Twitter account.
Sharing queue
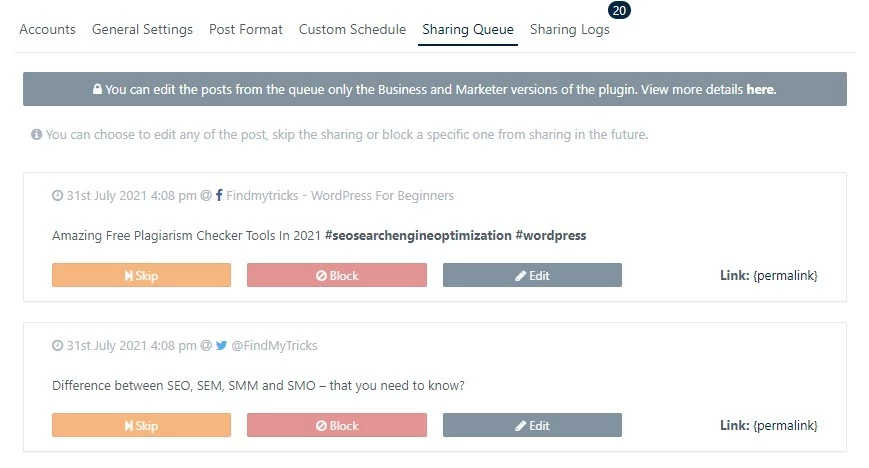
At this tab, You can choose to edit any of the posts, skip the sharing or block a specific one from sharing in the future.
This is also a pro version.
Sharing logs
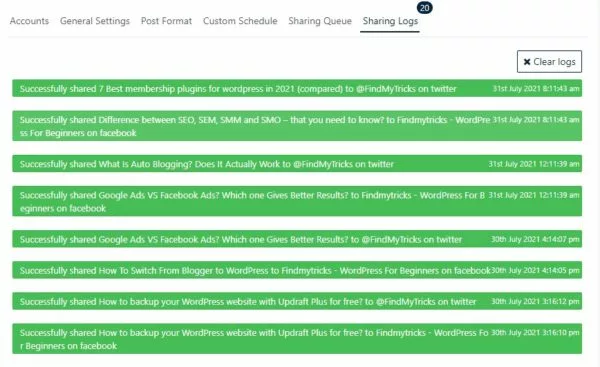
Here, you can check your sharing logs. Like, which post is shared to which account at what date and time.
You can also clear logs whenever not needed.
After all these settings, click on start sharing and the posts are started sharing by the revive old posts plugin.
2. Exclude Posts

At exclude posts, you can manually select the posts that you don’t want to share on your social media accounts.
It’s simple, just hover over to the post and click exclude.
3. Addons
Revive Network is the premium add-on plugin.
Revive Network allows you to share content from multiple RSS or Atom feeds from any website on the web to your connected social media accounts.
An active Revive Old Posts Pro subscription is required to download and use Revive Network.
4. Plugin Roadmap
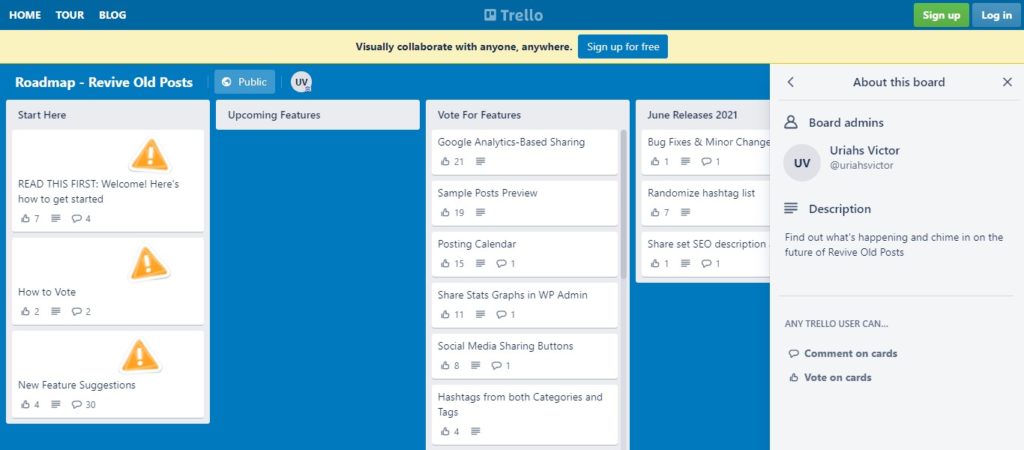
Leave this if you don’t know what you are doing.
Wrapping Up – Revive Old Plugin Settings
Revive old posts is a great plugin to share your old posts as well as new & updated posts automatically to your social media accounts.
I am using it on my site and it’s working great for me.